How to make tilted layered soap bars
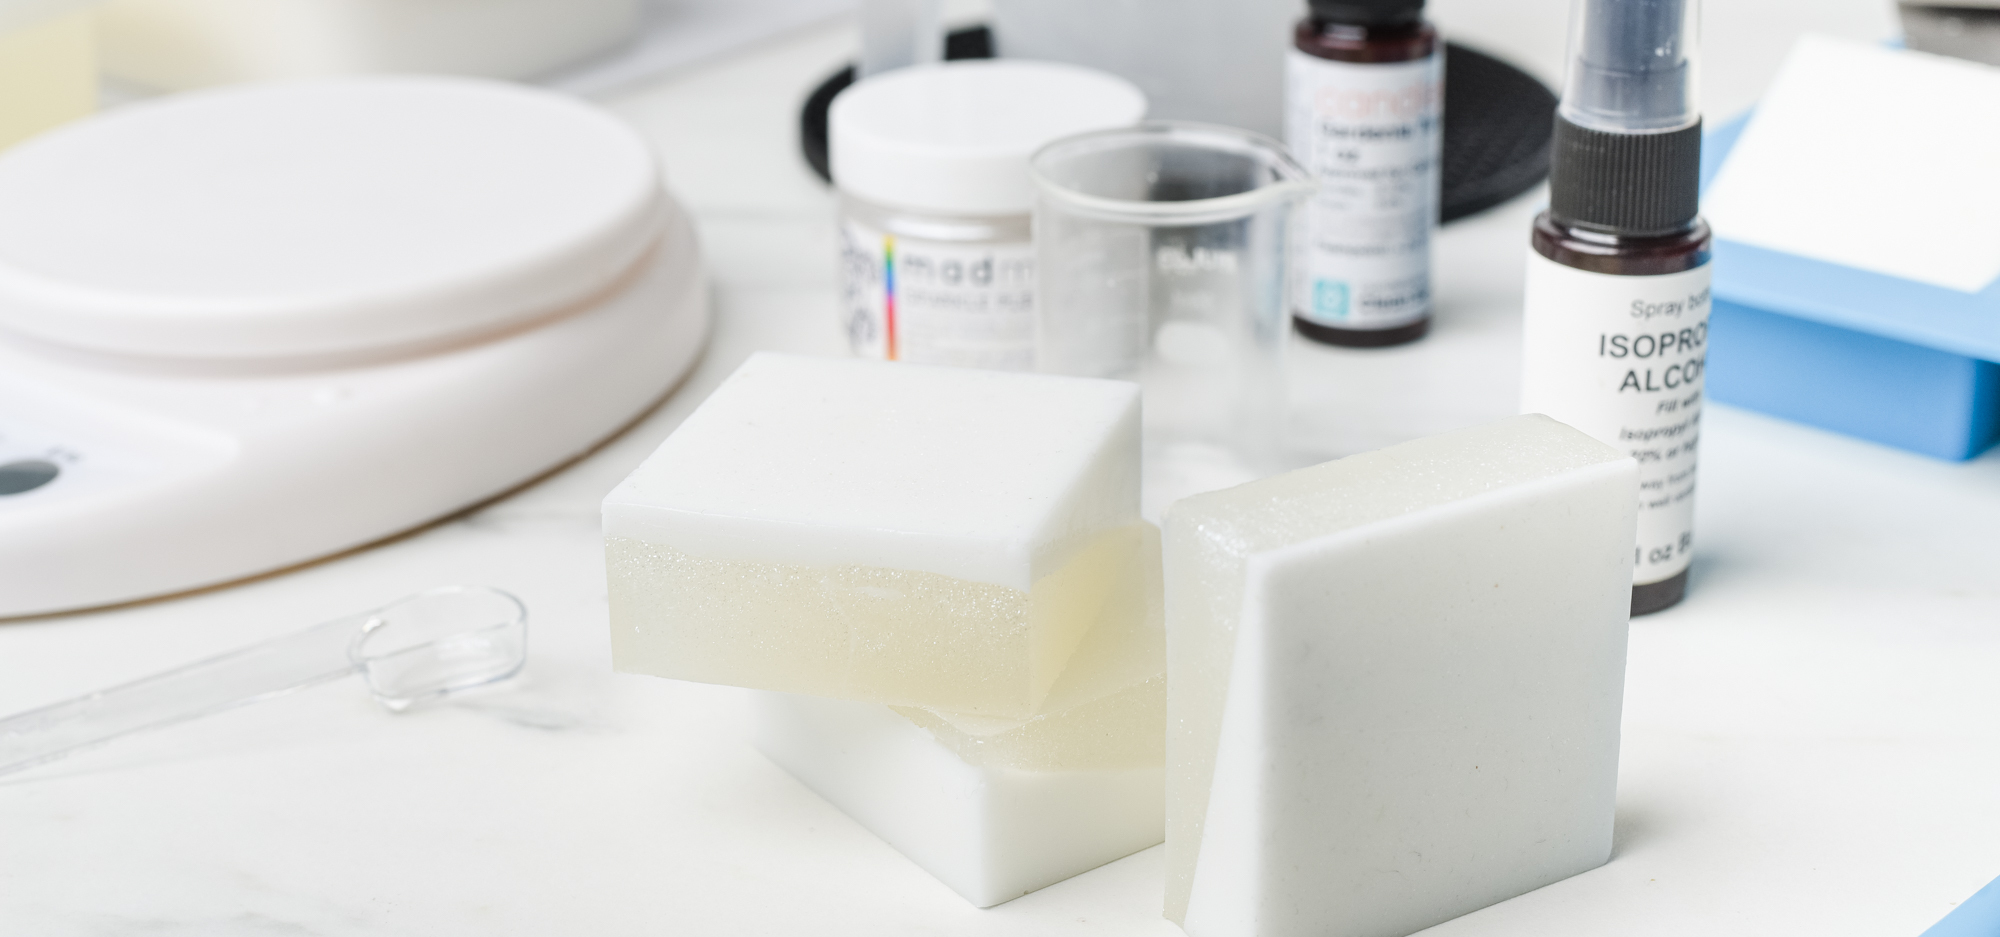
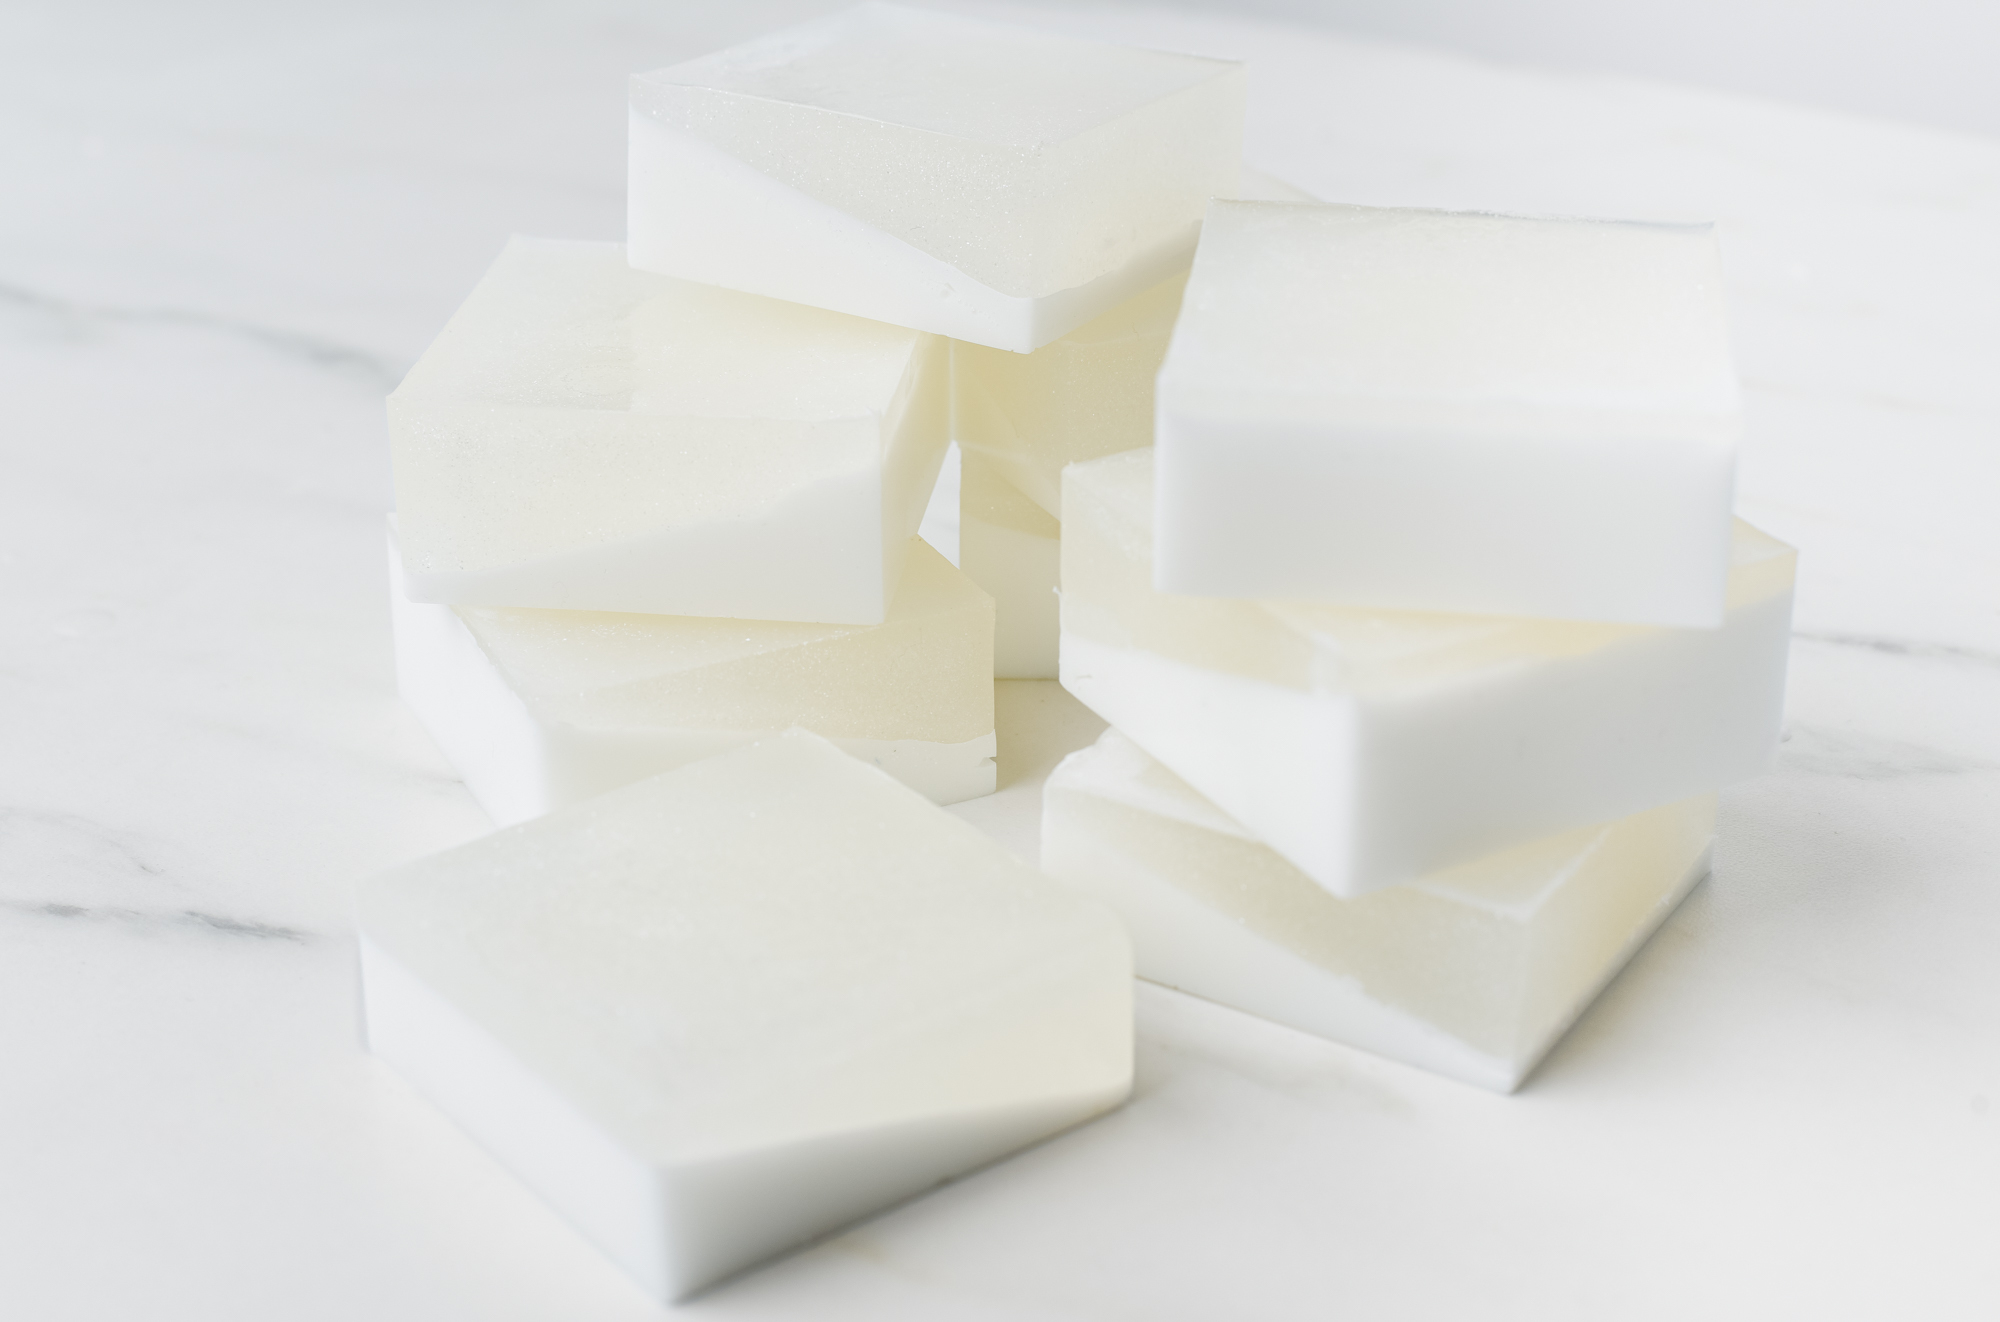
How do you create eye-catching soap without using bright colors or busy designs? By using subtle forms of contrast, you can achieve an interesting aesthetic that maintains minimalist appeal; our tilted layered soap bars show off this technique. Plus, mica powder for sheen and glitter-like dashes of sparkle!
This soap tutorial uses the same shade of mica powder in two different melt and pour soap bases, opaque and transparent. We chose mica as our colorant because we love how it looks different in various soap bases. The opaque base results in a subtle sheen on the surface, while you can see pops of sparkle throughout the transparent base. We joined the two subtly different layers on a tilt for an extra element of interest.
You can easily customize this project using a different mica powder shade. We used Sparkle Plenty mica for our version, but you can use any shade of mica to make your own tilted layered soap bars. This DIY soap project is perfect for anyone who wants to customize melt and pour soap bars using layer or angle techniques.
Discover how to make your own tilted layered soap bar below. It's so satisfying to see the visual impact of using different soap bases for the same bar of soap. In this step-by-step soap tutorial, we'll walk you through the process, techniques, and materials needed to make your own. Let's get started!
Additional items needed:
- Latex gloves
- Cutting board
- Small glass containers (for measuring oil)
- Plastic wrap
- Microwave
- Isopropyl alcohol
- Paper towel
- Angled soap mold prop
Directions:
Step 1: Prepare your supplies and work space
Wash your equipment, soap molds, and utensils in warm soapy water and dry thoroughly. Don’t forget your workspace! Avoid any cross-contamination by spraying the area with rubbing alcohol or a 5% bleach solution, then wipe dry with a clean paper towel.
Step 2: Create your mold prop
For this soap project, we did a 50/50 split. We set the mold at an angle before pouring the first layer. You can do this by using props like a book, a piece of wood, or you can create a cardboard triangle like we did in our Tea Tree and Turmeric soap project. For this project, we used a laptop stand since we could make small adjustments to achieve the 50/50 split.
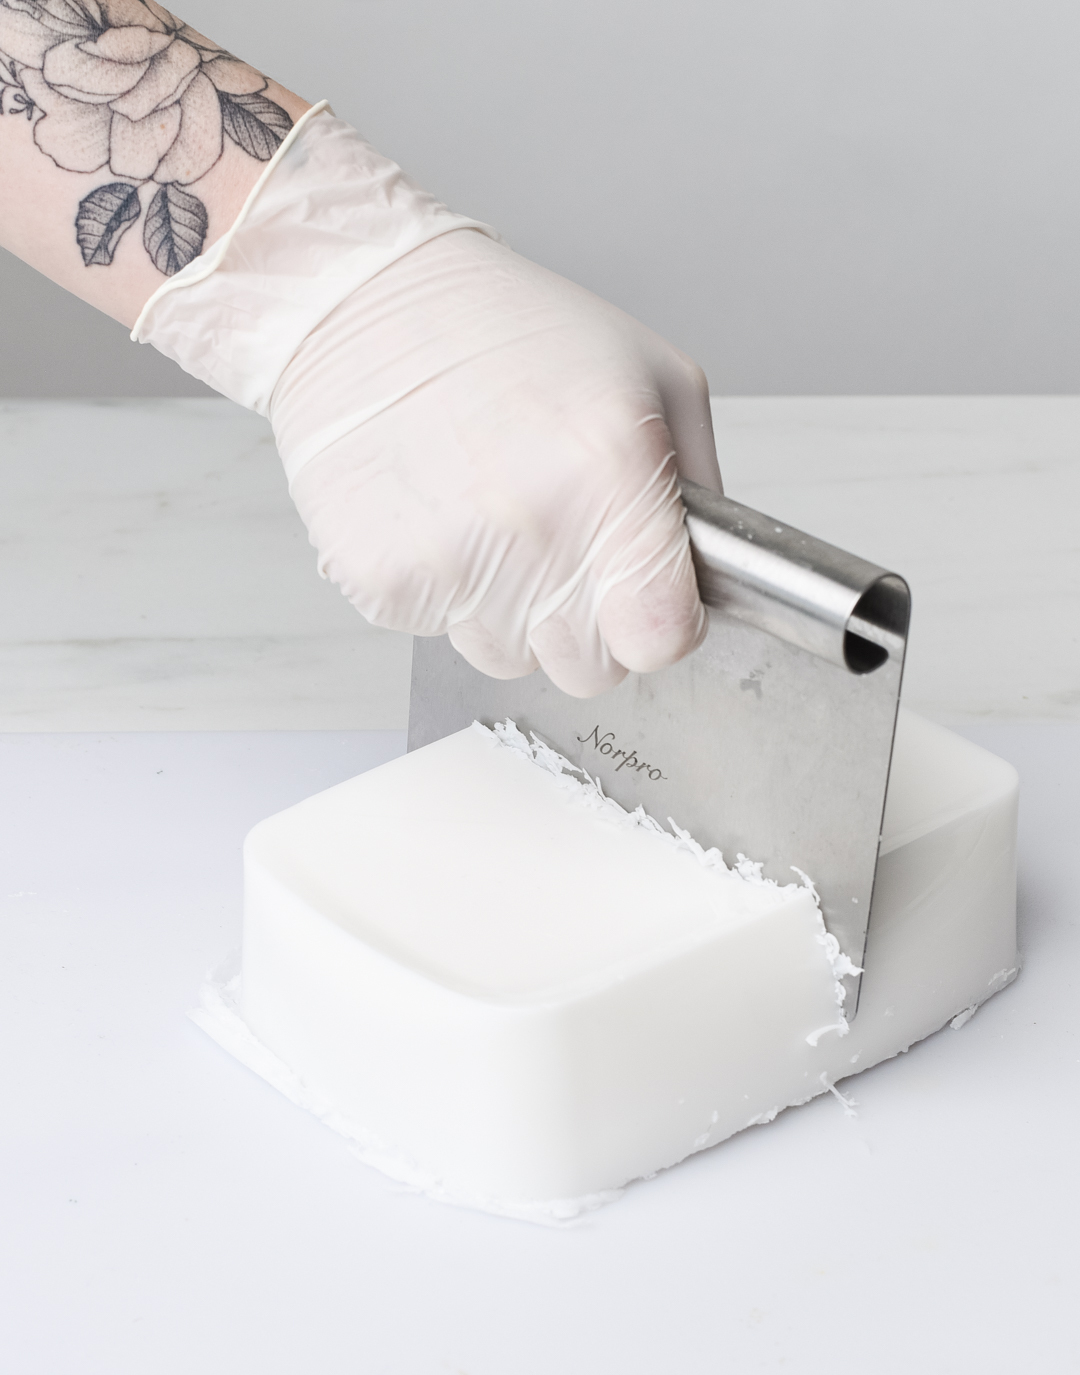
Step 3: Cut and weigh the soap base
This project will use 2 lb of soap base (1 lb of White, 1 lb of Clear).
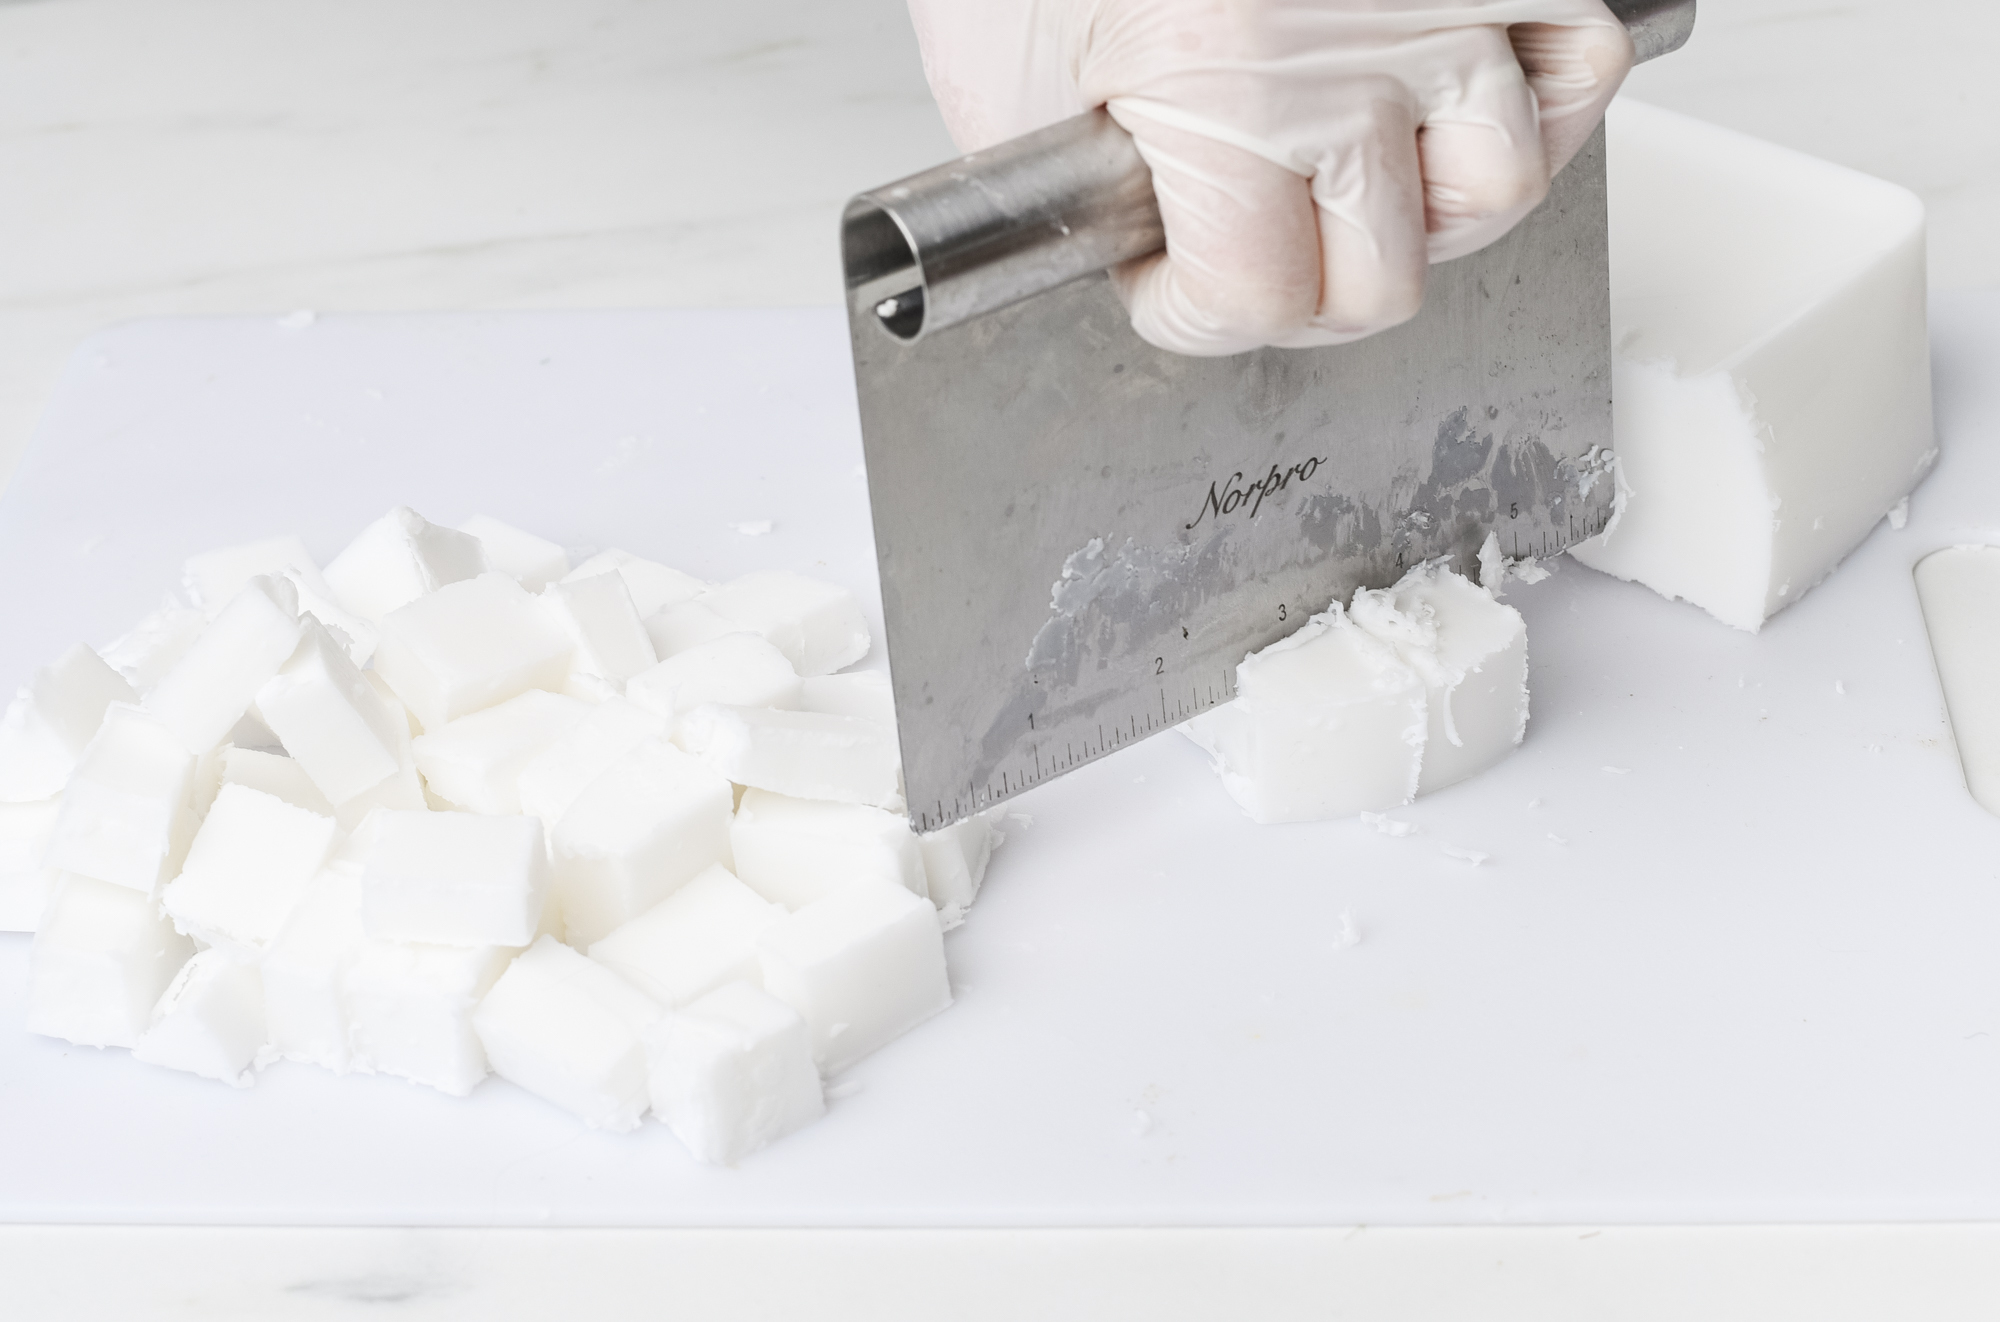
Remove the White soap base from the container and cut the soap block in half. Place half back in the container and cut the other piece into 1” (2.5 cm) cubes.
Using a soap cutter or knife, chop the soap base into 1” cubes.
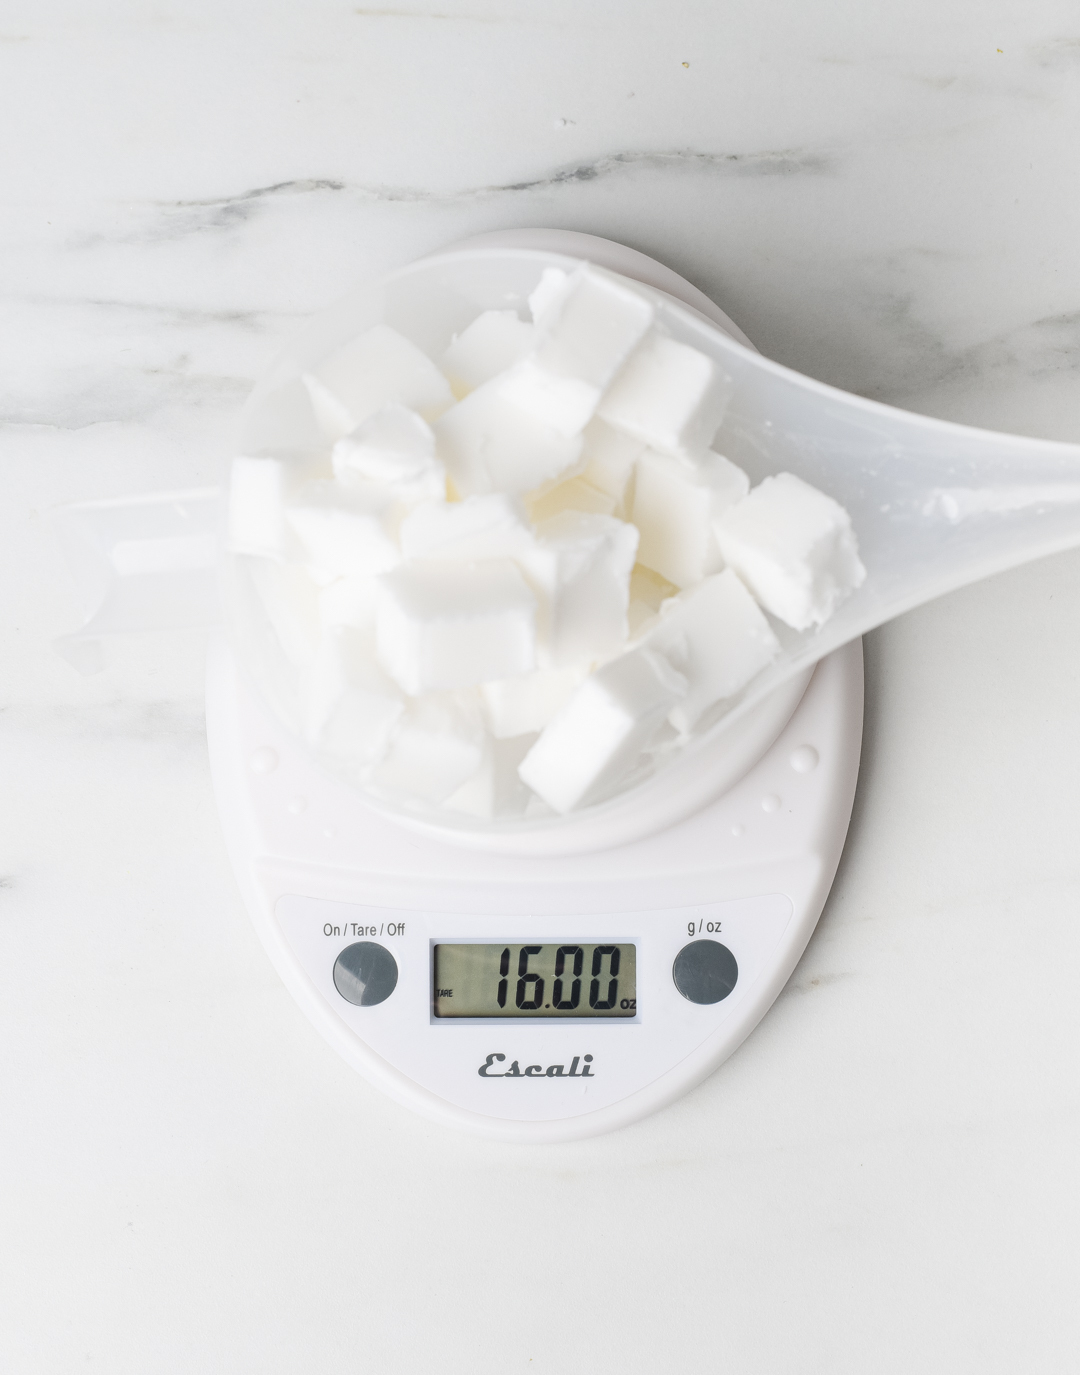
Place your funnel pouring pitcher on your scale and tare the weight. Add the soap cubes and weigh out 16 oz (453 g) for the first layer.
Place your funnel pouring pitcher on the scale and tare the weight. Add the soap cubes and weigh out 16 oz (454 g) for the first soap layer.

Step 4: Weigh fragrance oil
This project will use 2 lb of soap base (1 lb of White, 1 lb of Clear) with approximately a 2% fragrance oil load. Each layer will use the same amount of Gardenia Tuberose fragrance oil, .32 oz.
Place small glass container on scale and tare the weight. Weigh .32 oz (approximately 9 g). Set aside. You want to have your oil prepared ahead of time so the base does not start to cool and harden as you work.
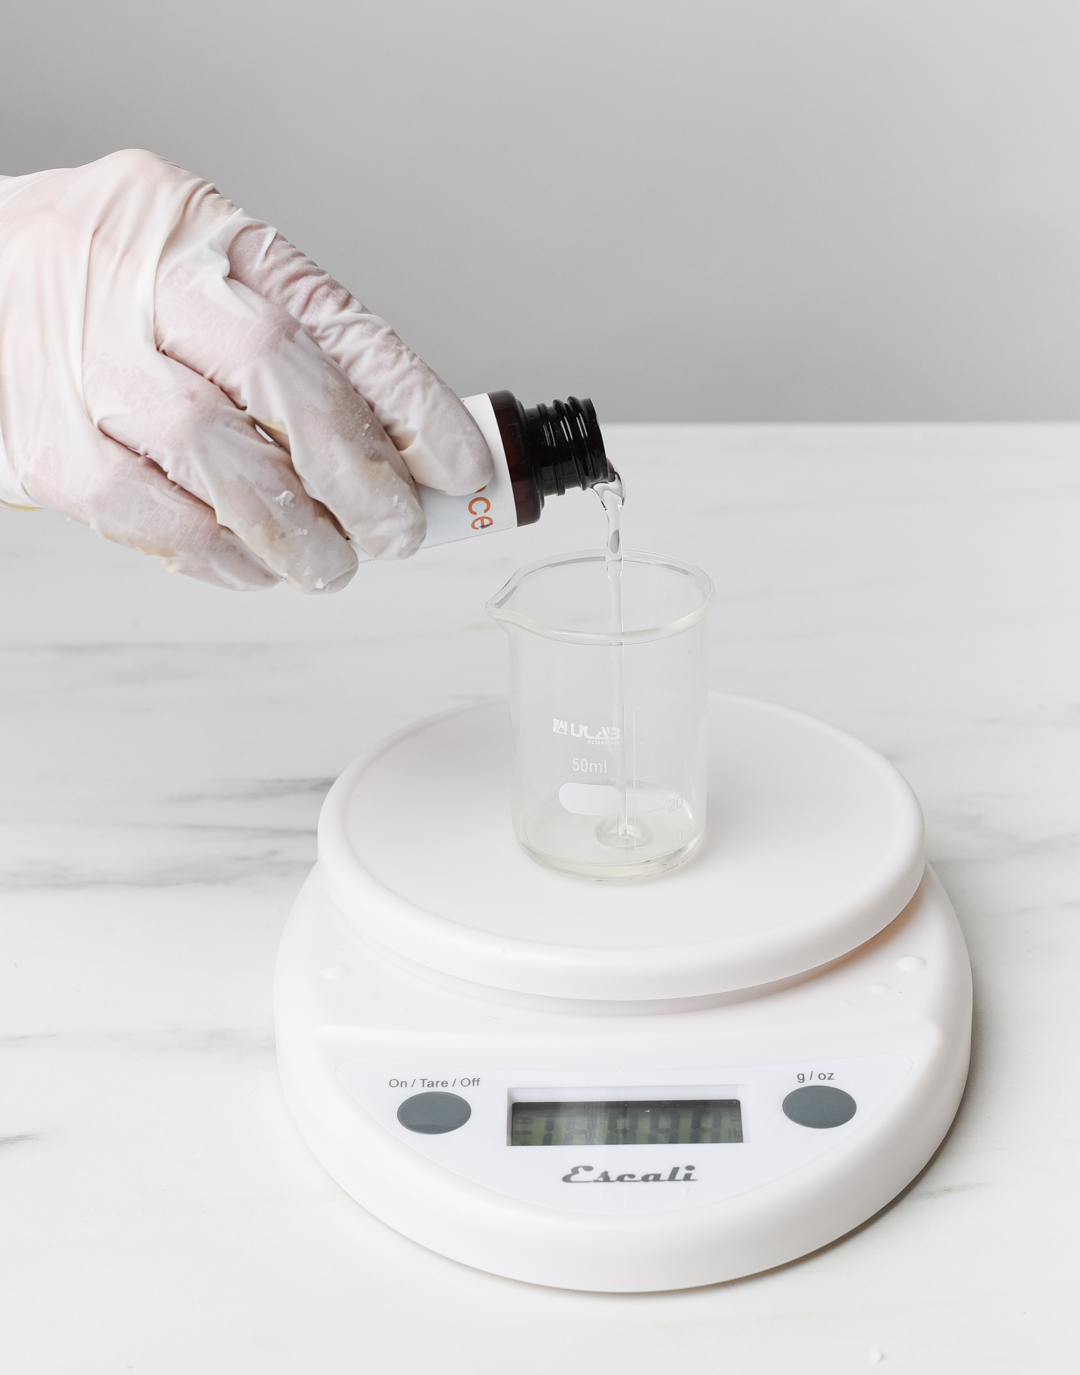
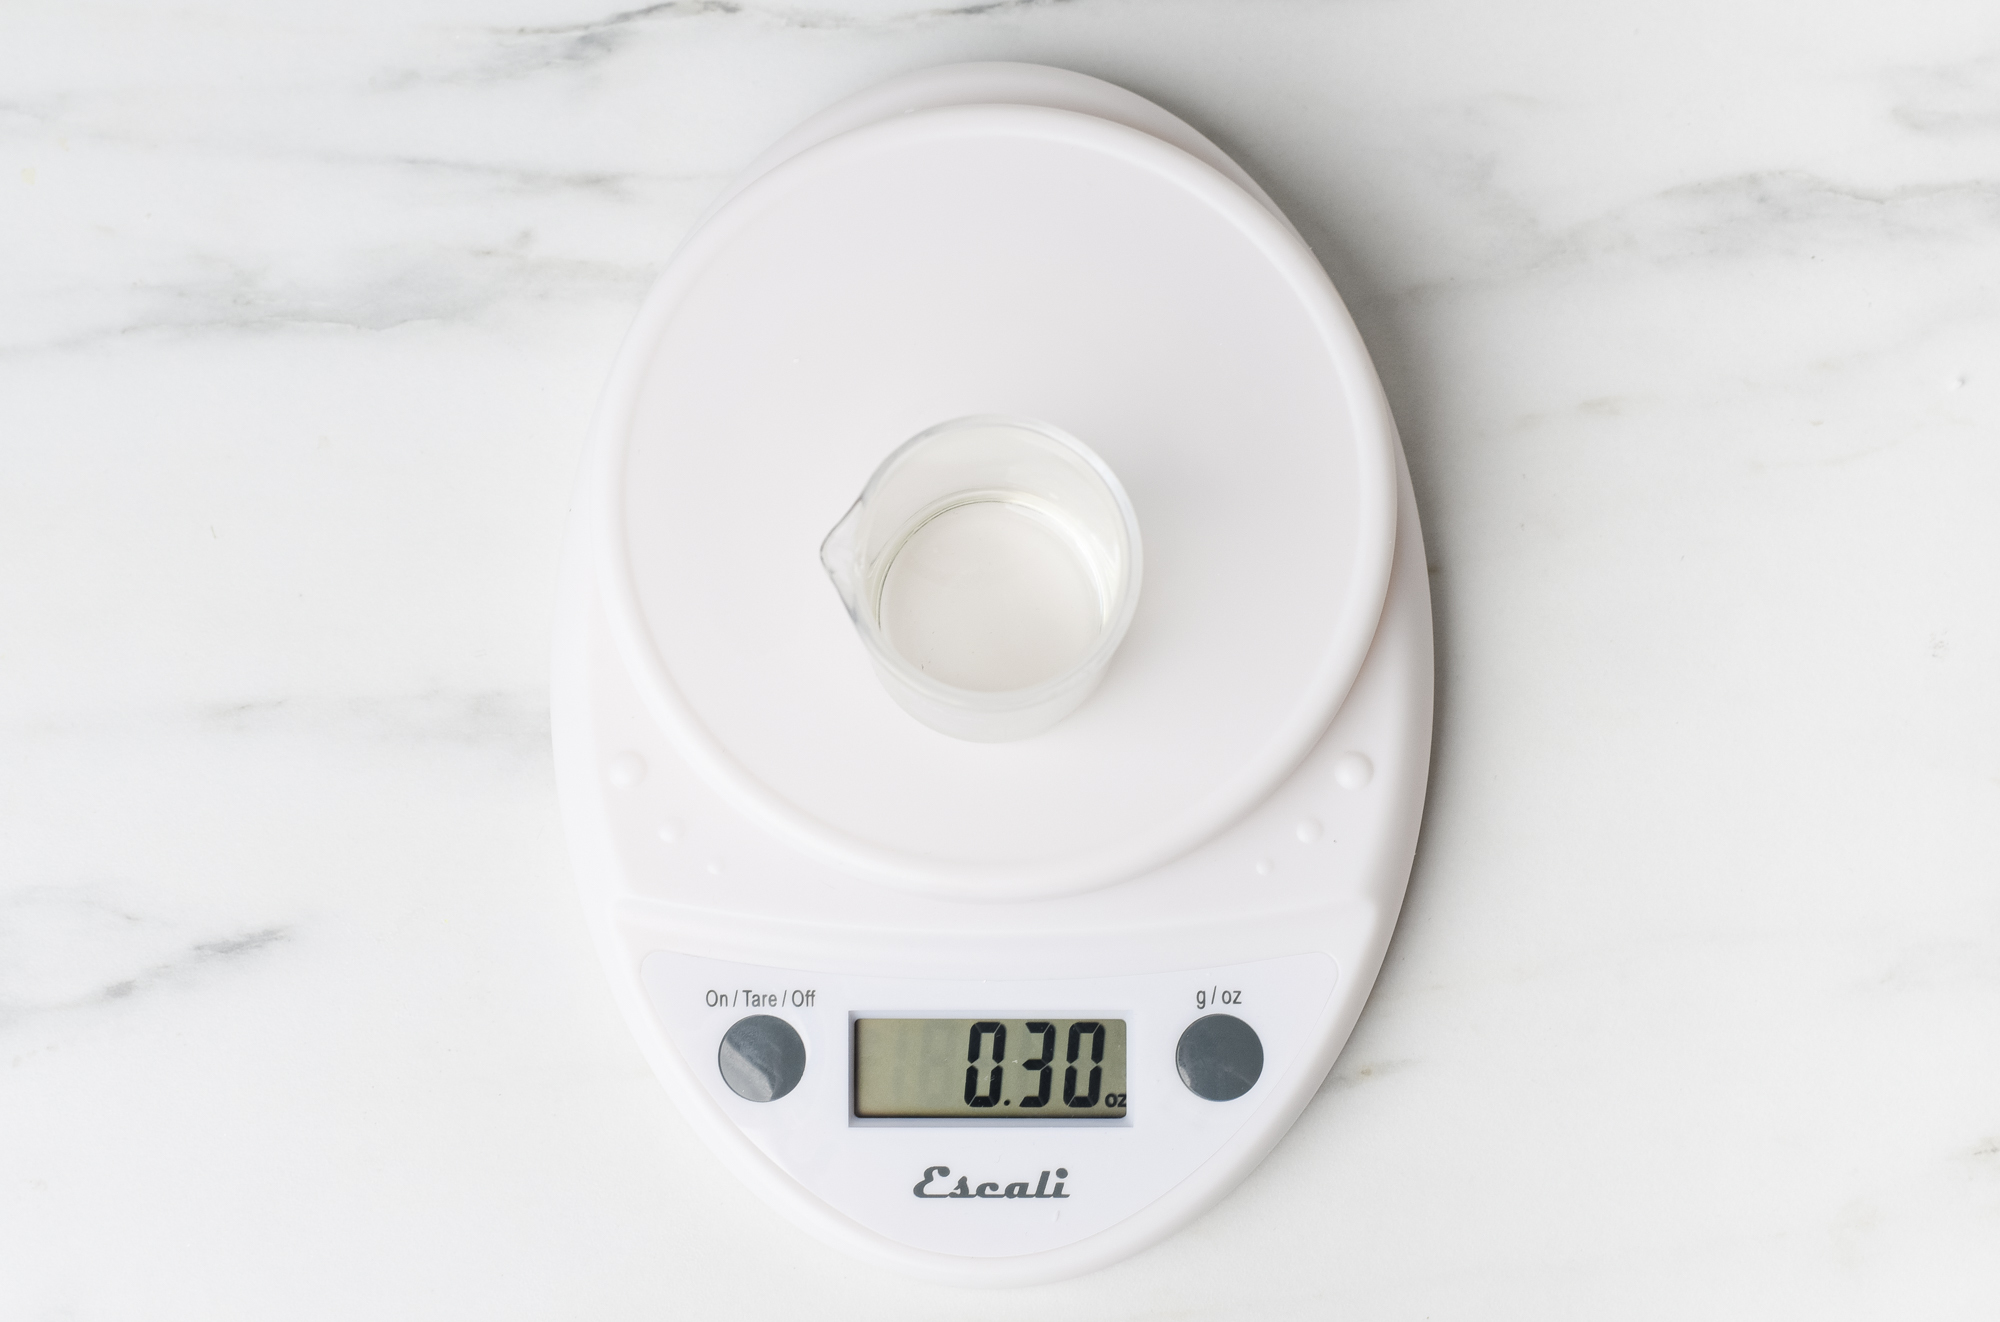
Note: It is important to only use glass for this step. The fragrance can damage certain types of plastic and paper if it sits for long periods of time.
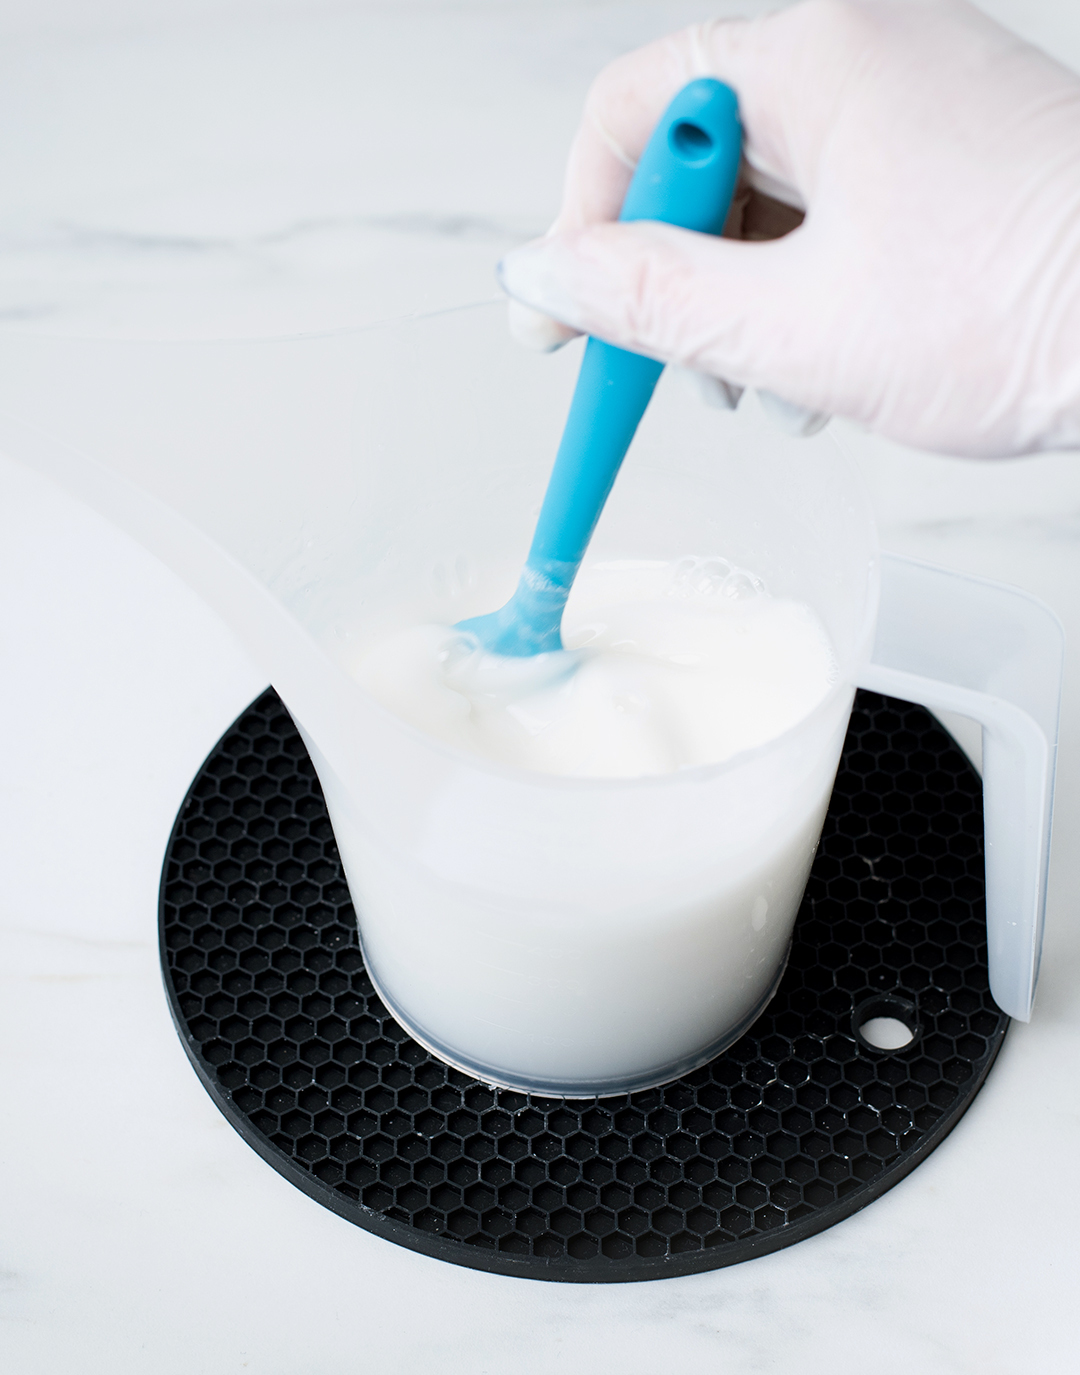
Step 5: Melt the soap base
Using the Funnel Pouring Pitcher or another microwave-safe container, melt the soap cubes in the microwave for 30 seconds intervals, stirring in between, until the soap is fully melted. Stir in between, and melt for an additional 10 seconds if necessary.
Melted soap will be extremely hot, so use caution when handling it. The soap should not exceed 160ºF (71.1°C) to avoid a rubber feel to the finished bars.
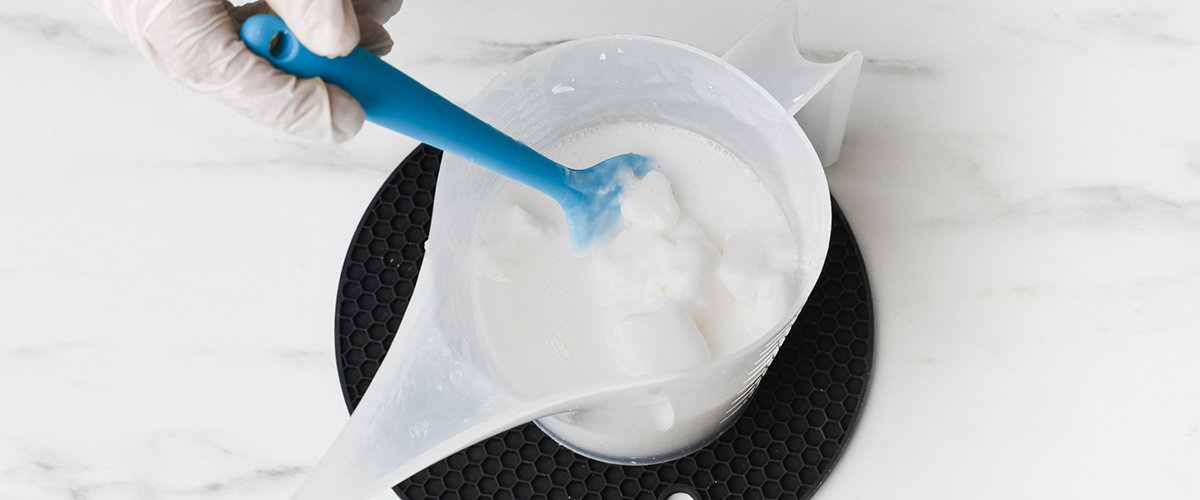
Note: If the soap base starts to foam while in the microwave, it is too hot. Stop the microwave and do not continue to heat. Stir gently to continue the melting process.
Note: A thin skin may form on the surface of the soap. Don’t worry! Simply stir it back into the melted soap. If the soap has begun to thicken at this point, microwave again in 5-10 second intervals until it has thinned out.
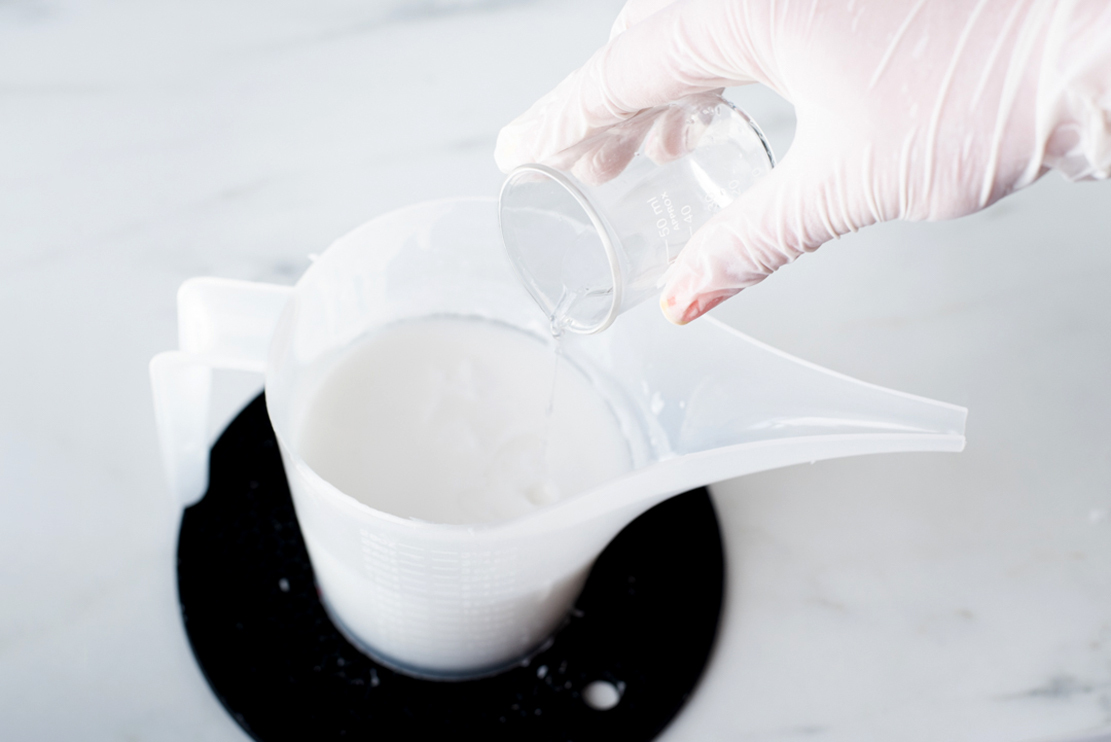
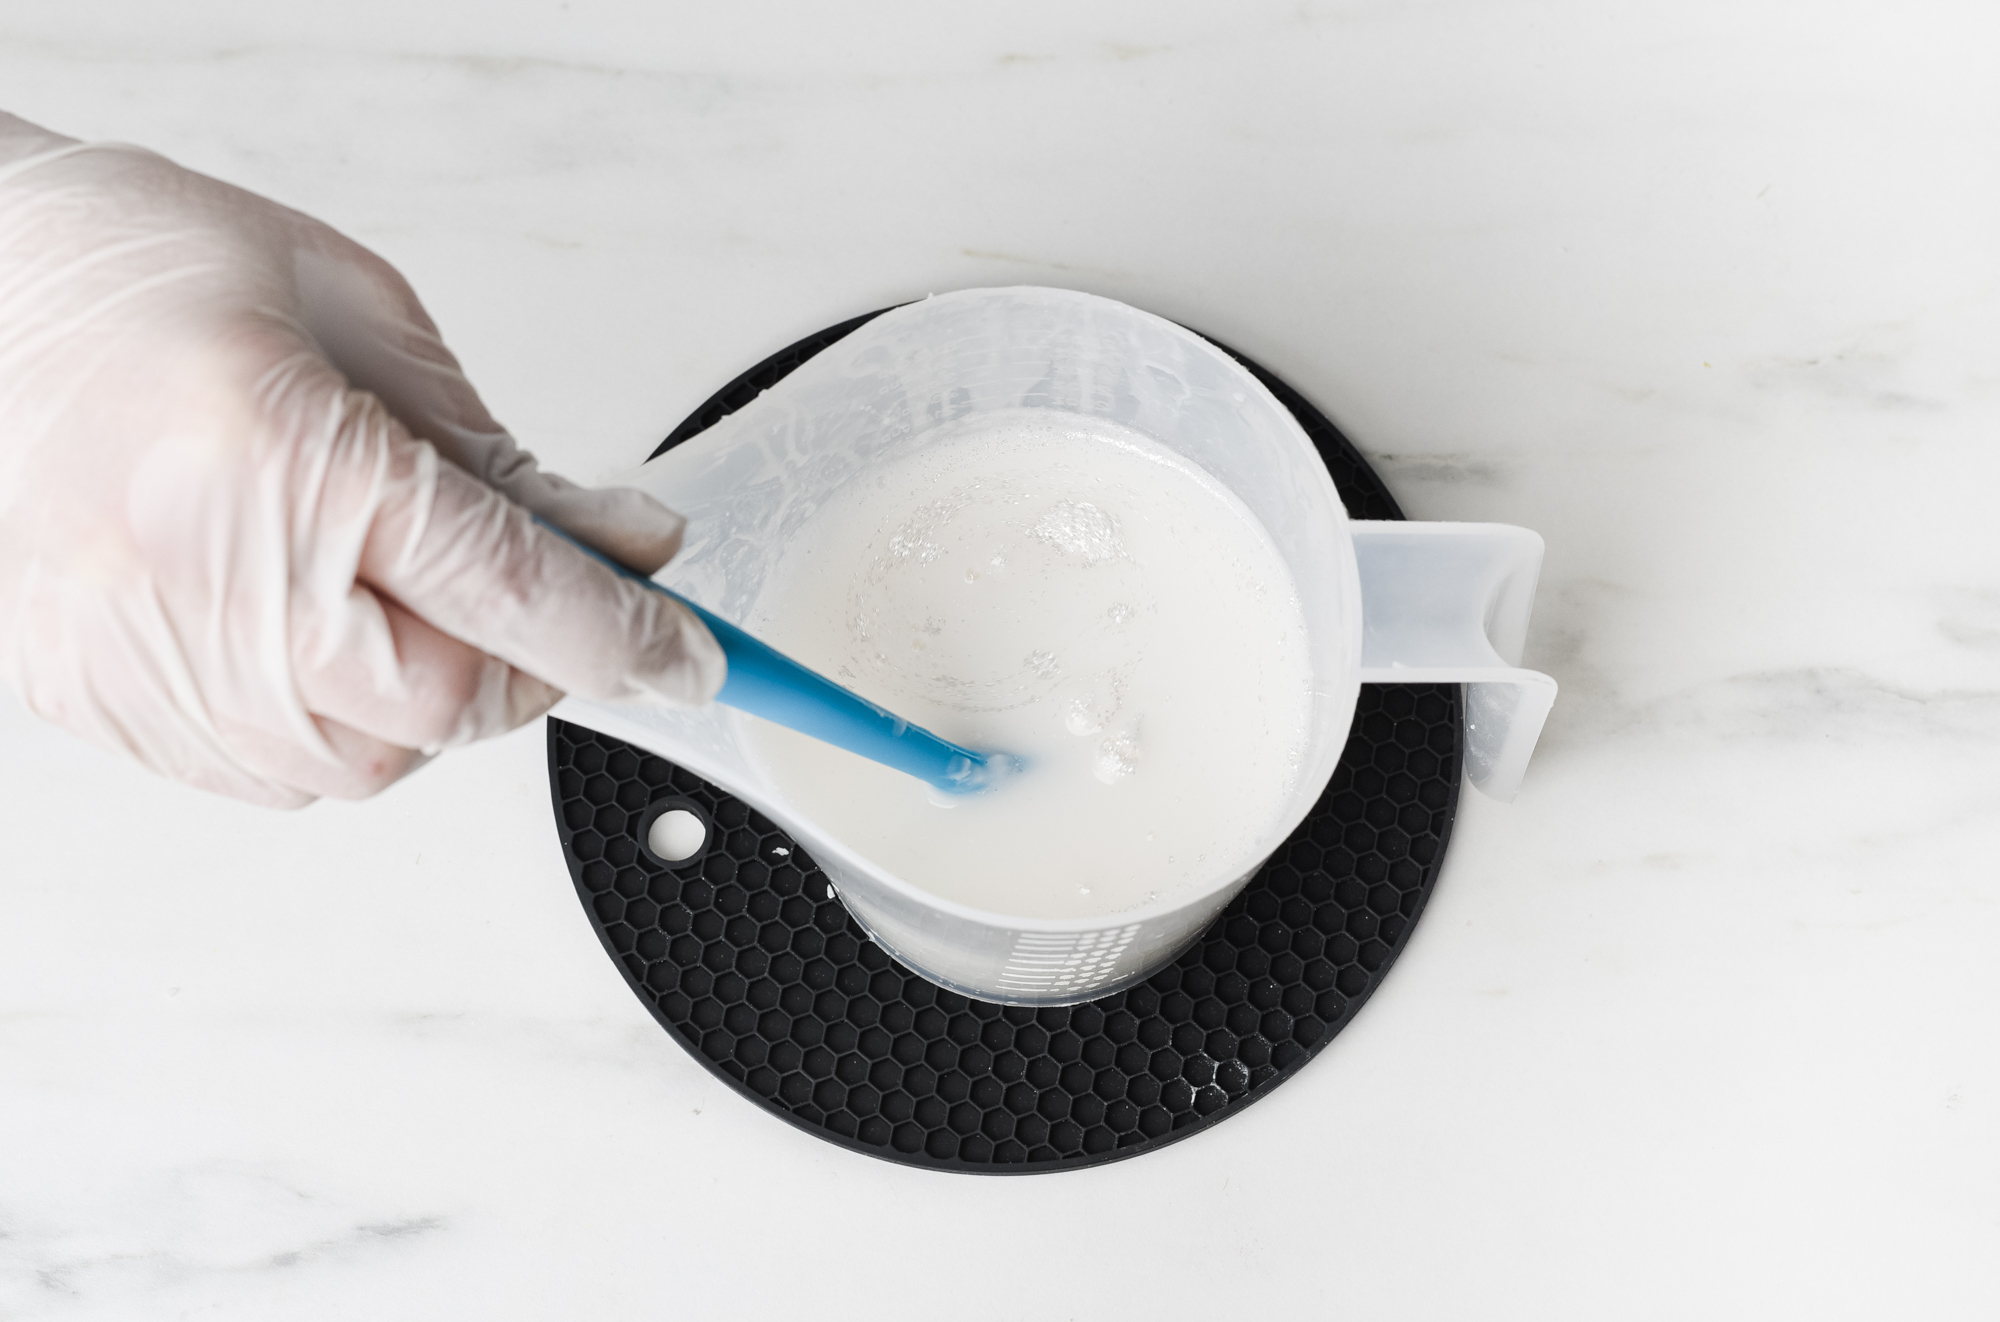
Step 6: Add fragrance oil
Once the soap base is fully melted, add your premeasured .32 fragrance oil to the soap base and stir well.
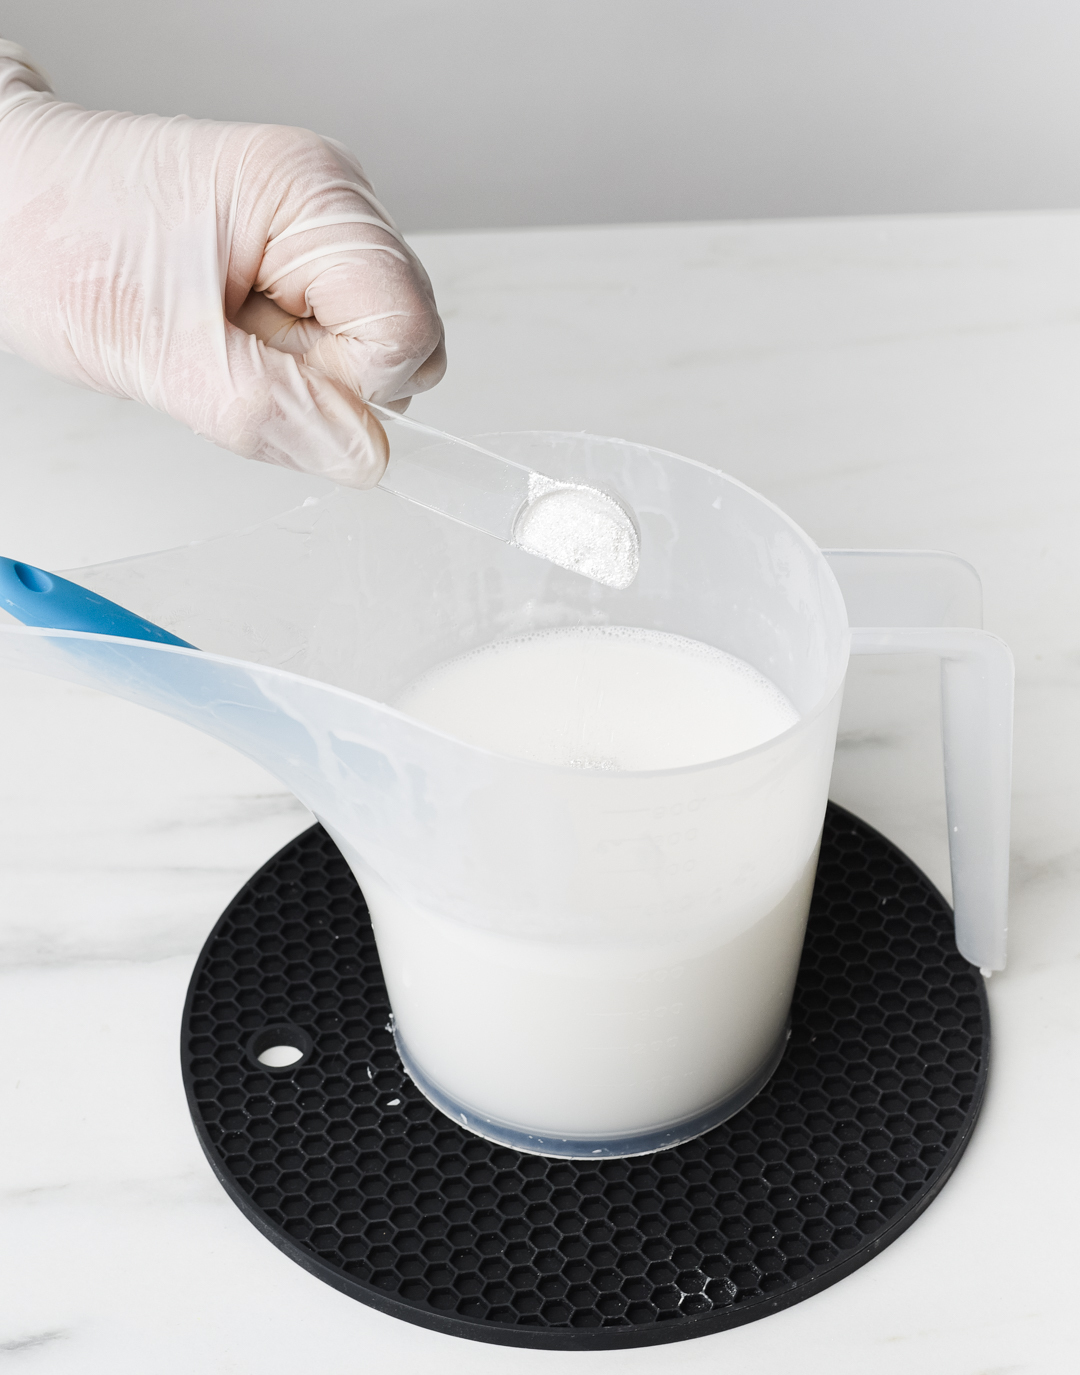
Step 7: Measure and add mica
Scoop ½ tsp of mica (we used Sparkle Plenty) and add it to the soap. Stir soap until it is fully incorporated.
Note: You can experiment using different amounts just be sure to not use more than the recommended amount of ½ tsp of mica per 1 lb of melt and pour soap base.
Step 8: Pour soap
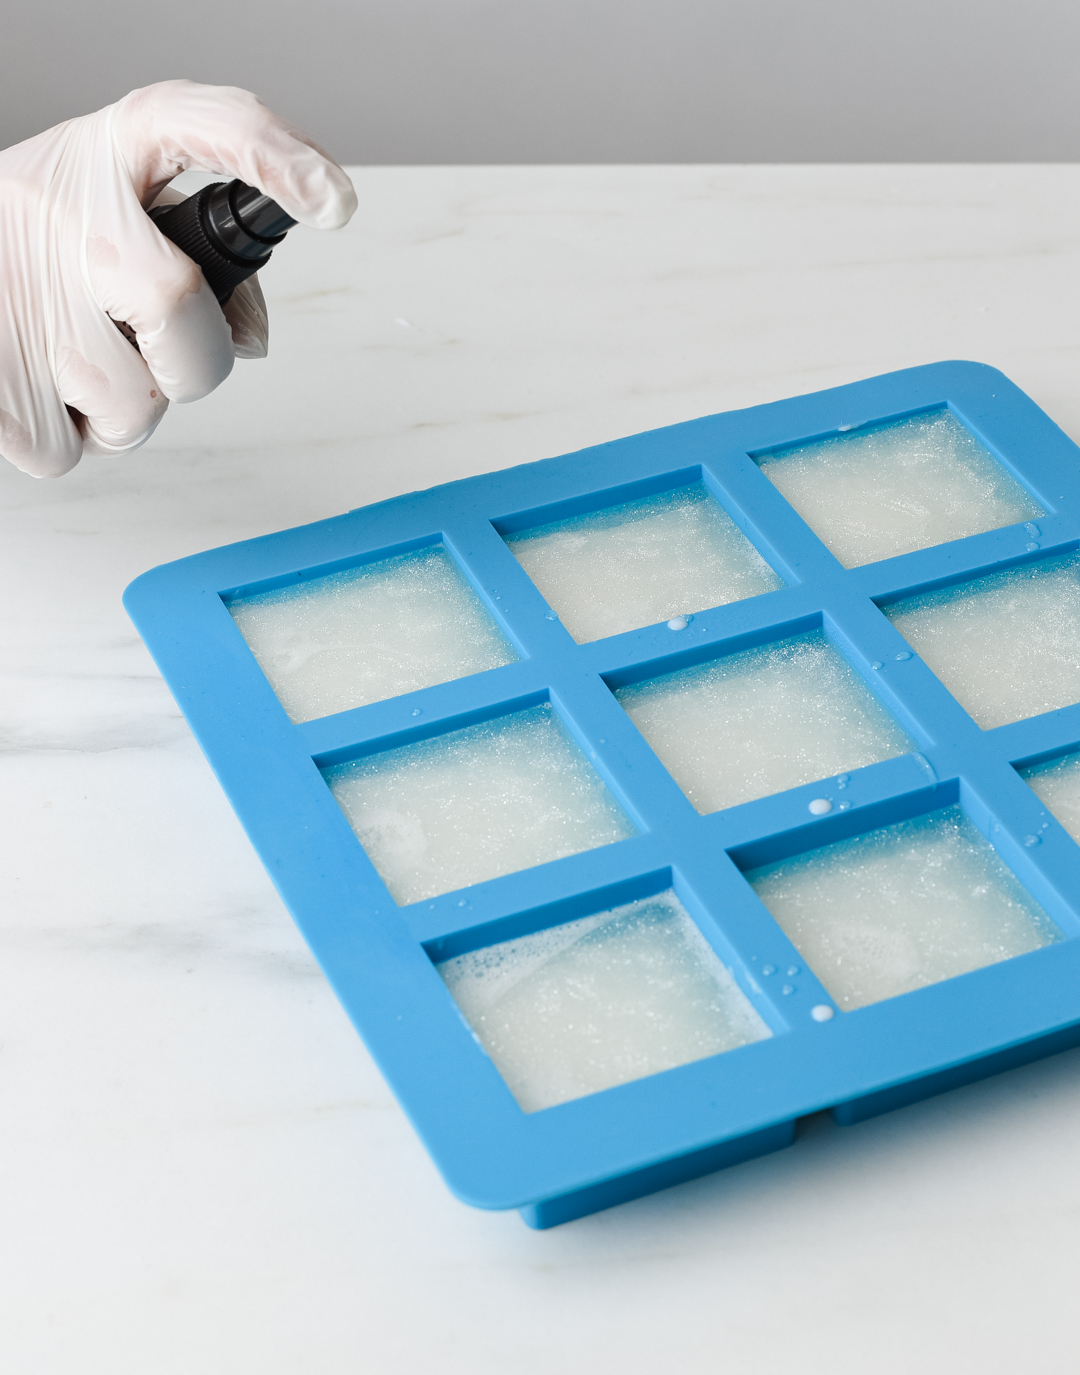
Pour soap into the square mold set at an angle. Pour slowly to reduce the amount of air bubbles. Spray the surface with alcohol to remove any bubbles.
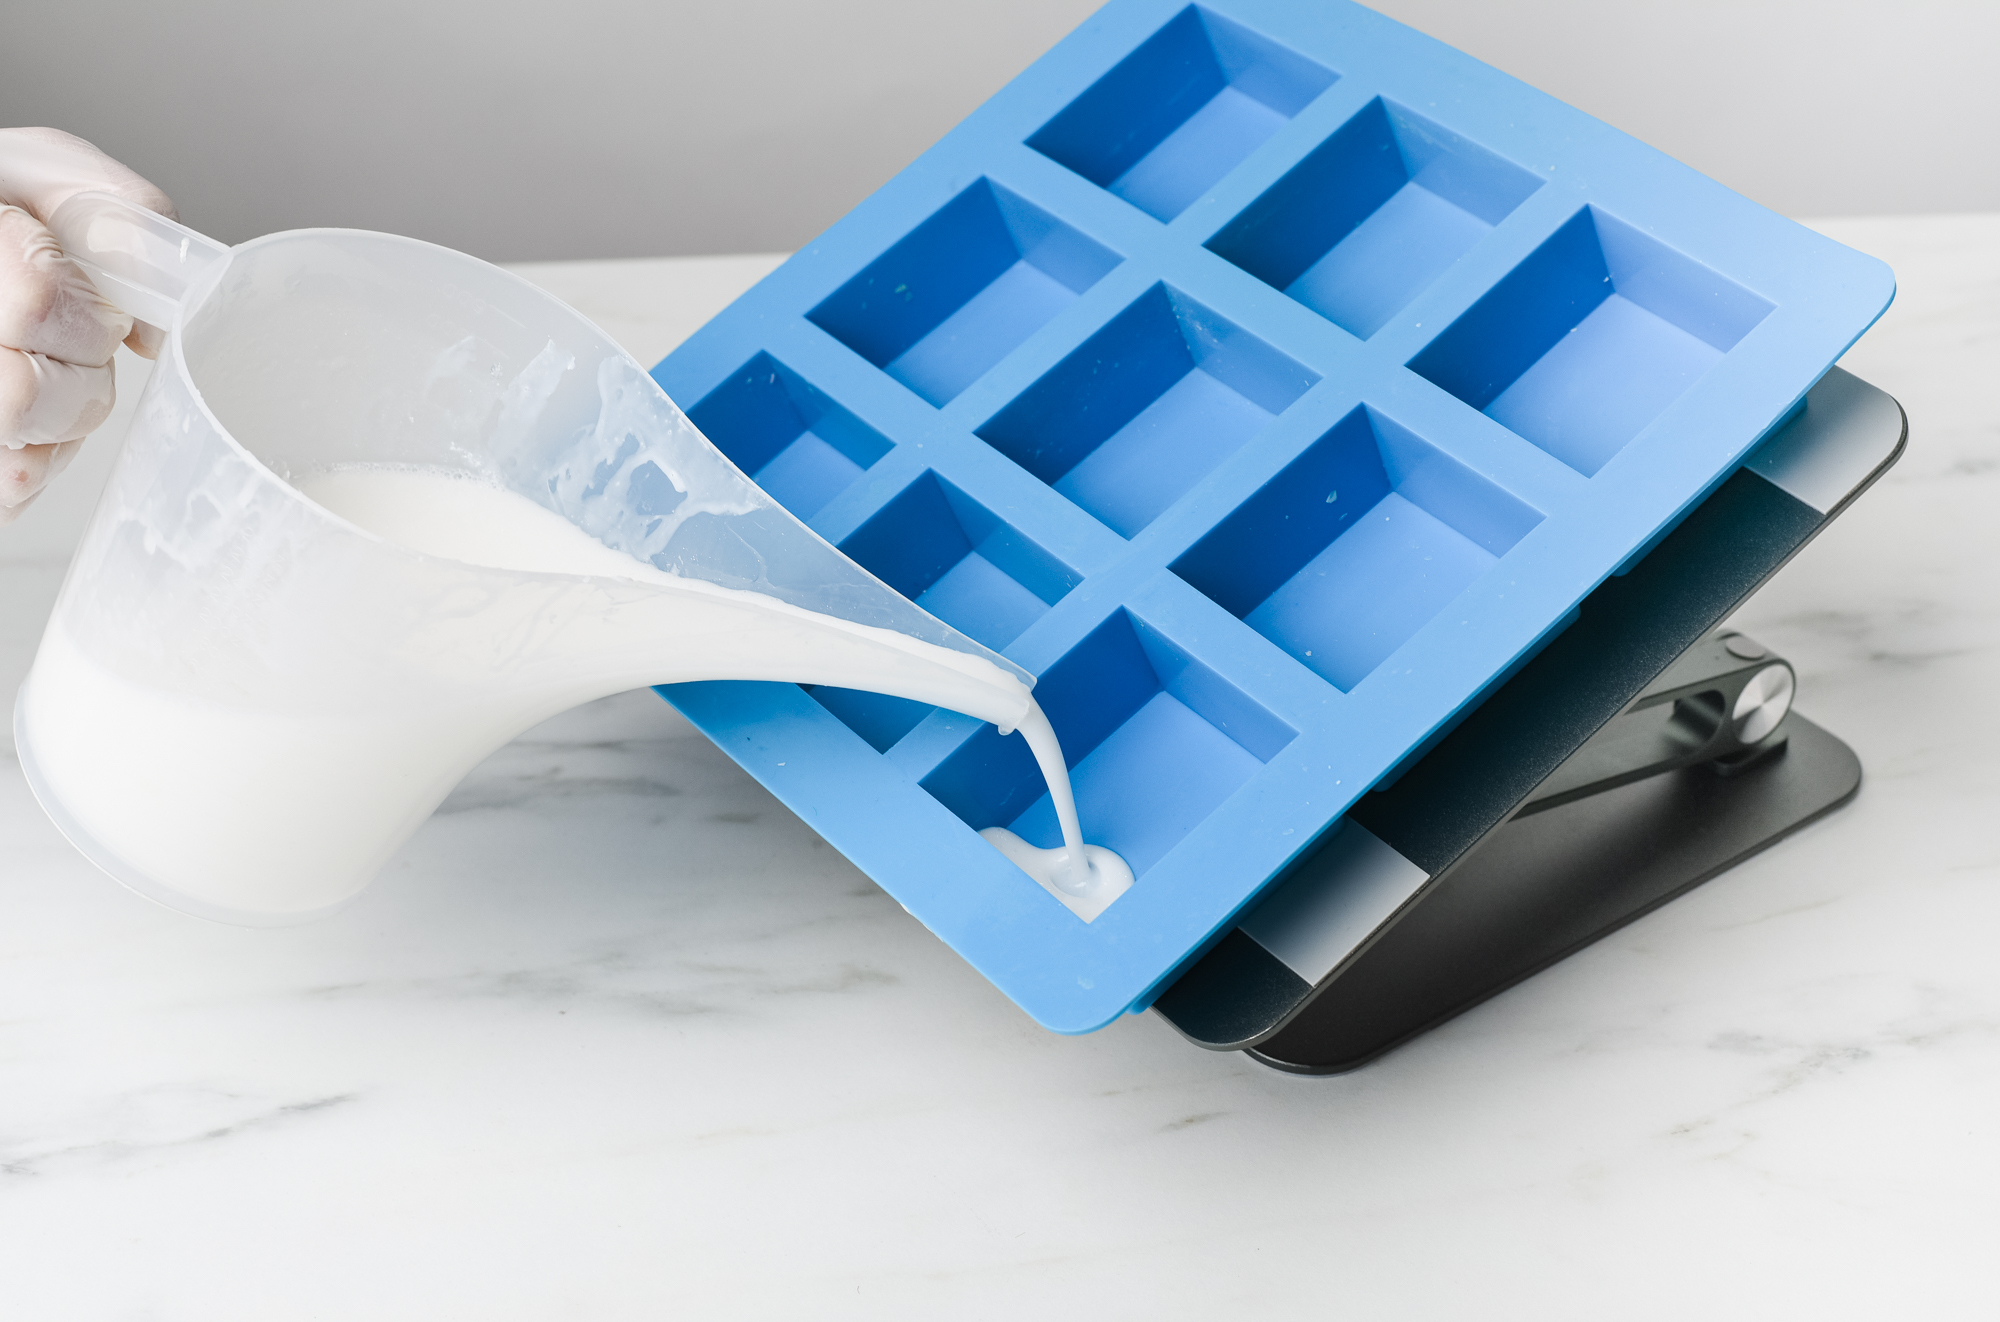
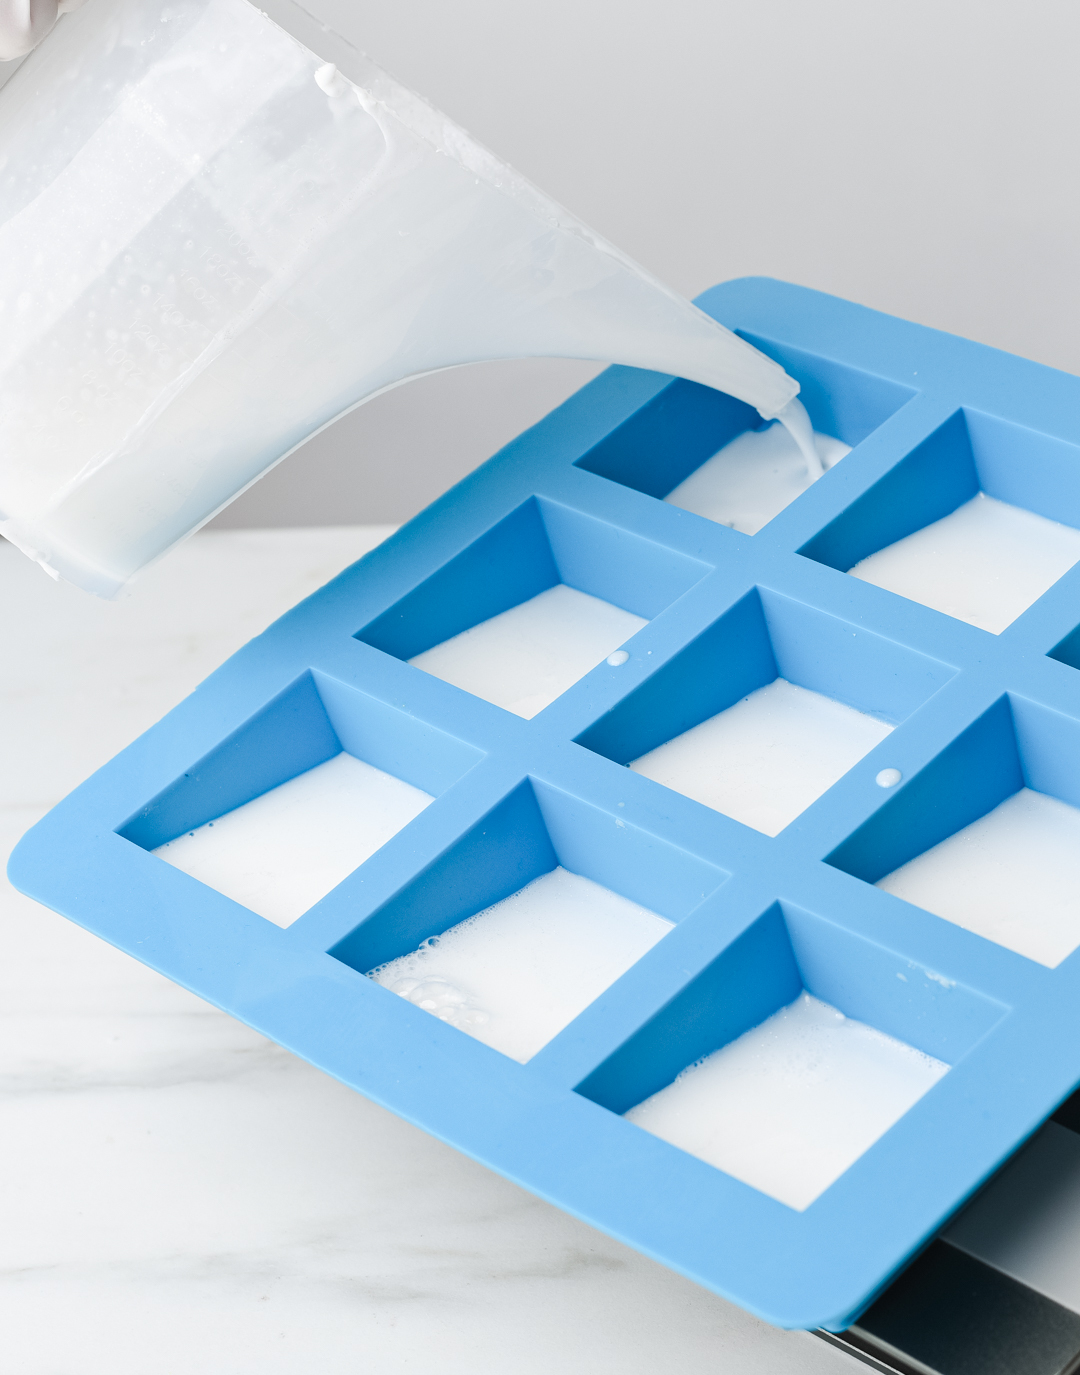
Set the soap aside and allow it to cool as you start working on the second layer.
Part 2: Create and pour second layer
Repeat Steps 3-7 using the HCVS Clear soap base.
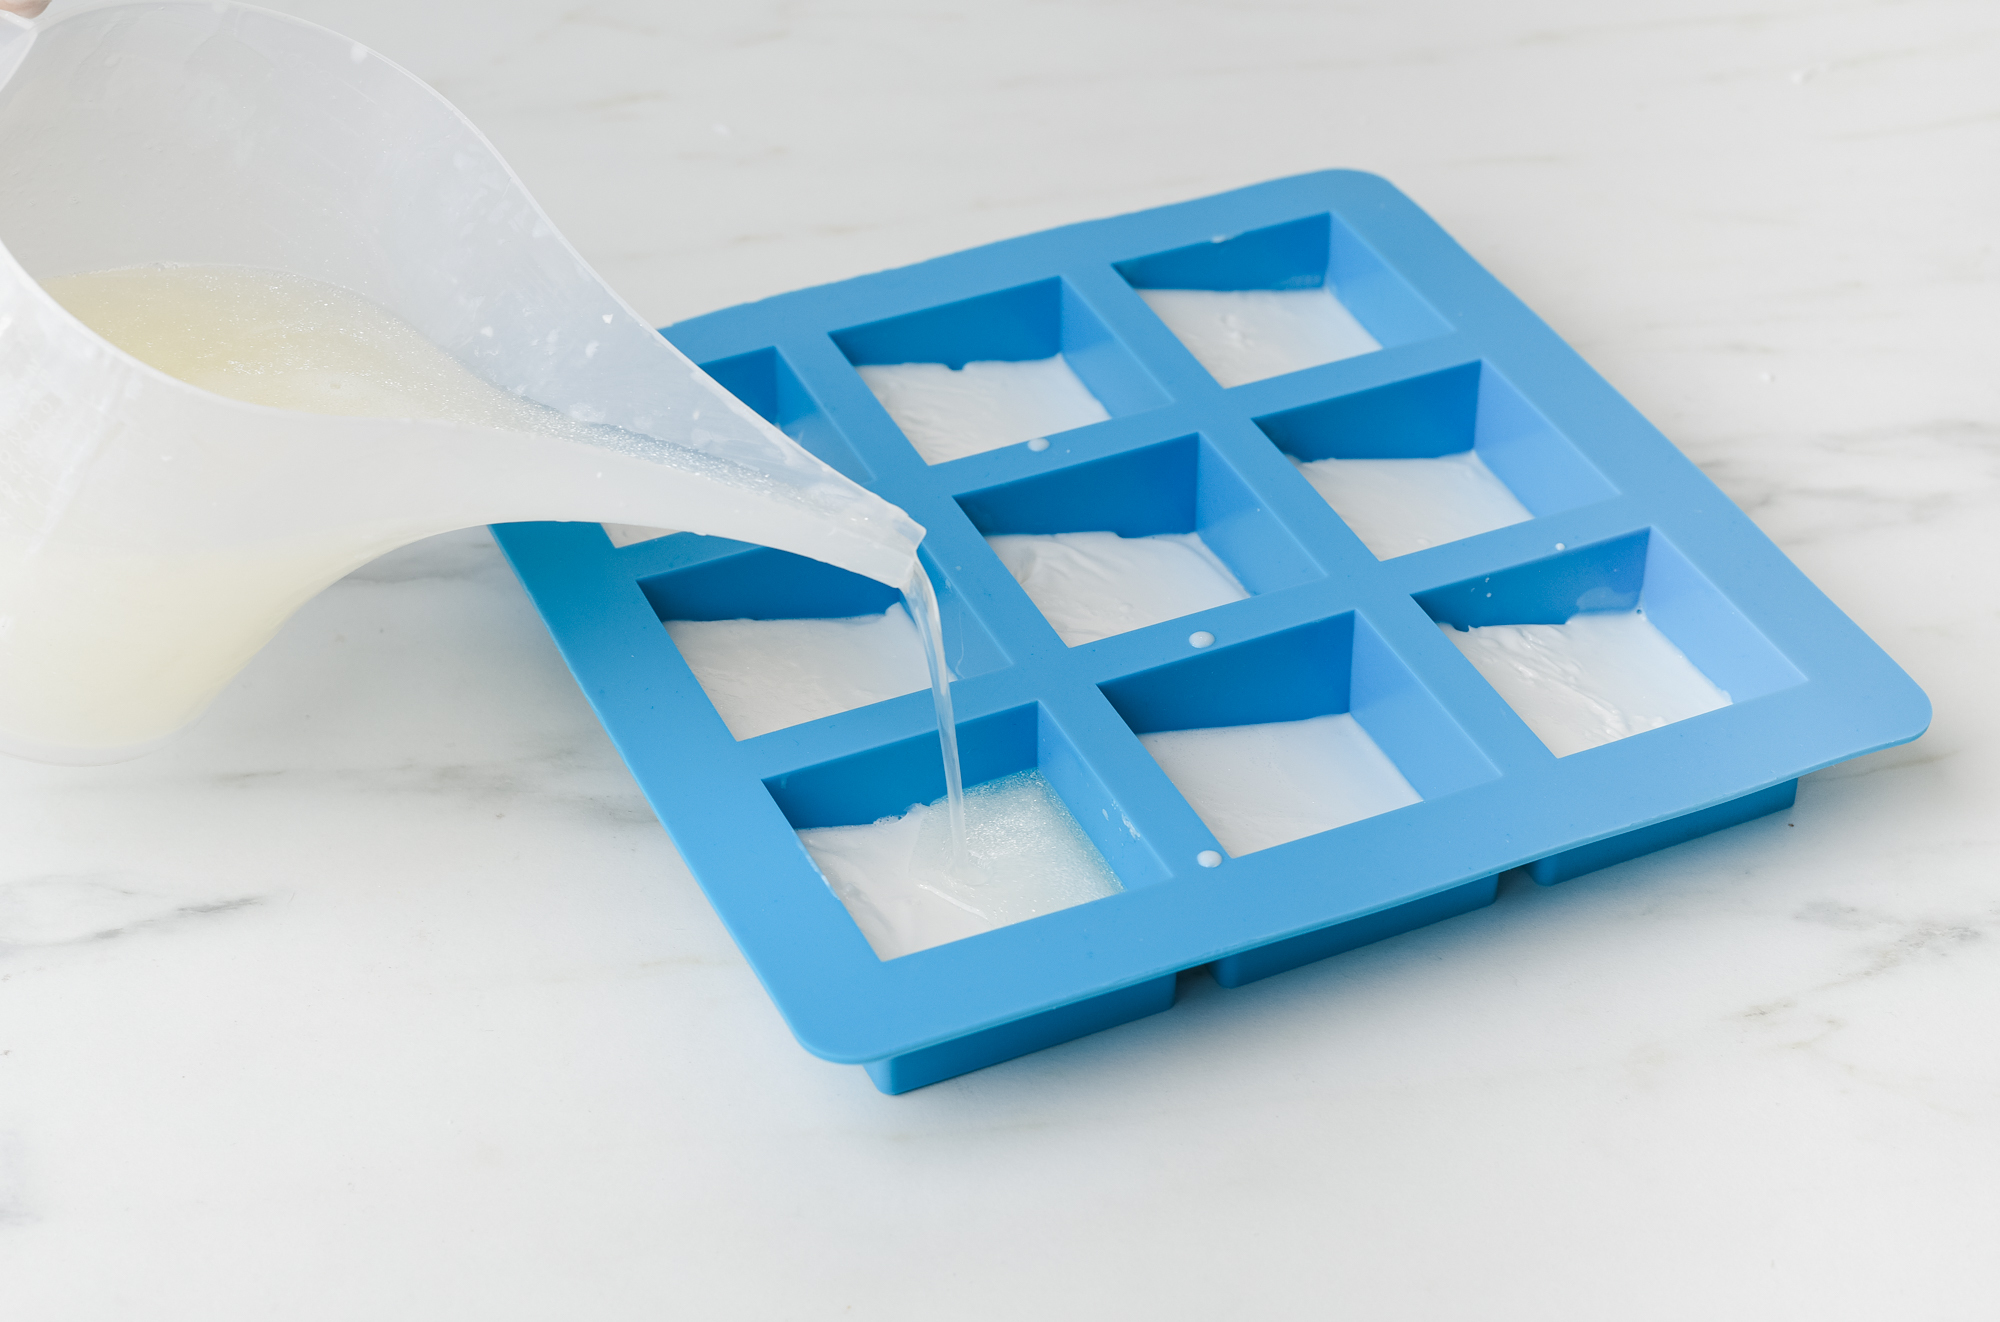
Place your soap mold on a flat, level surface.
The first layer of soap does not have to be completely solidified but once it is firm to the touch, you can pour the second layer.
Pour the Clear soap base over the first layer until it is completely covered. Spray the surface with rubbing alcohol to remove any bubbles.
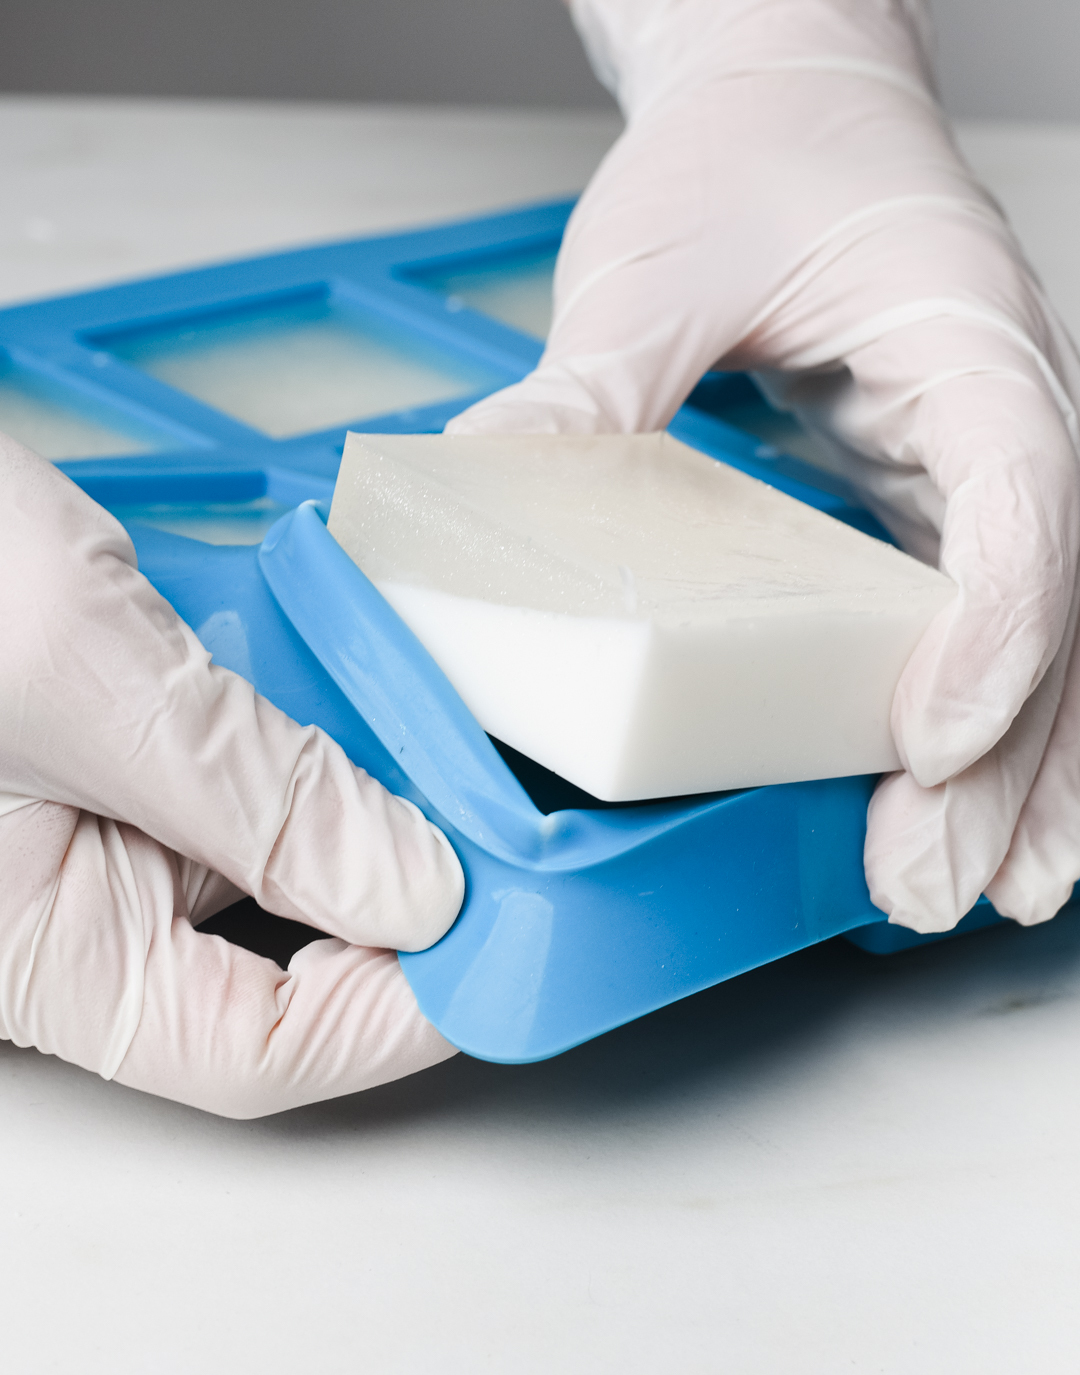
Step 8: Unmold the soap
Leave the soap to set and allow it to cool completely, usually around 3 hours before unmolding. Pull the sides of the mold gently to help release the bars and apply light pressure to the center of the cavity to pop out the soap. If the bars do not come out easily, allow it to cool a bit longer, or stick the mold in the refrigerator for up to 30 minutes and try again.
Store your soap bars in an airtight container or in plastic wrap to reduce sweating.
Show off your take on the tilted layered soap bars and all your handmade creations, with the CandleScience community by tagging us @CandleScience and using the #CandleScientist hashtag on Facebook, Twitter, and Instagram. We may feature you in our Stories or on our website!