How to make holiday soy candle tins
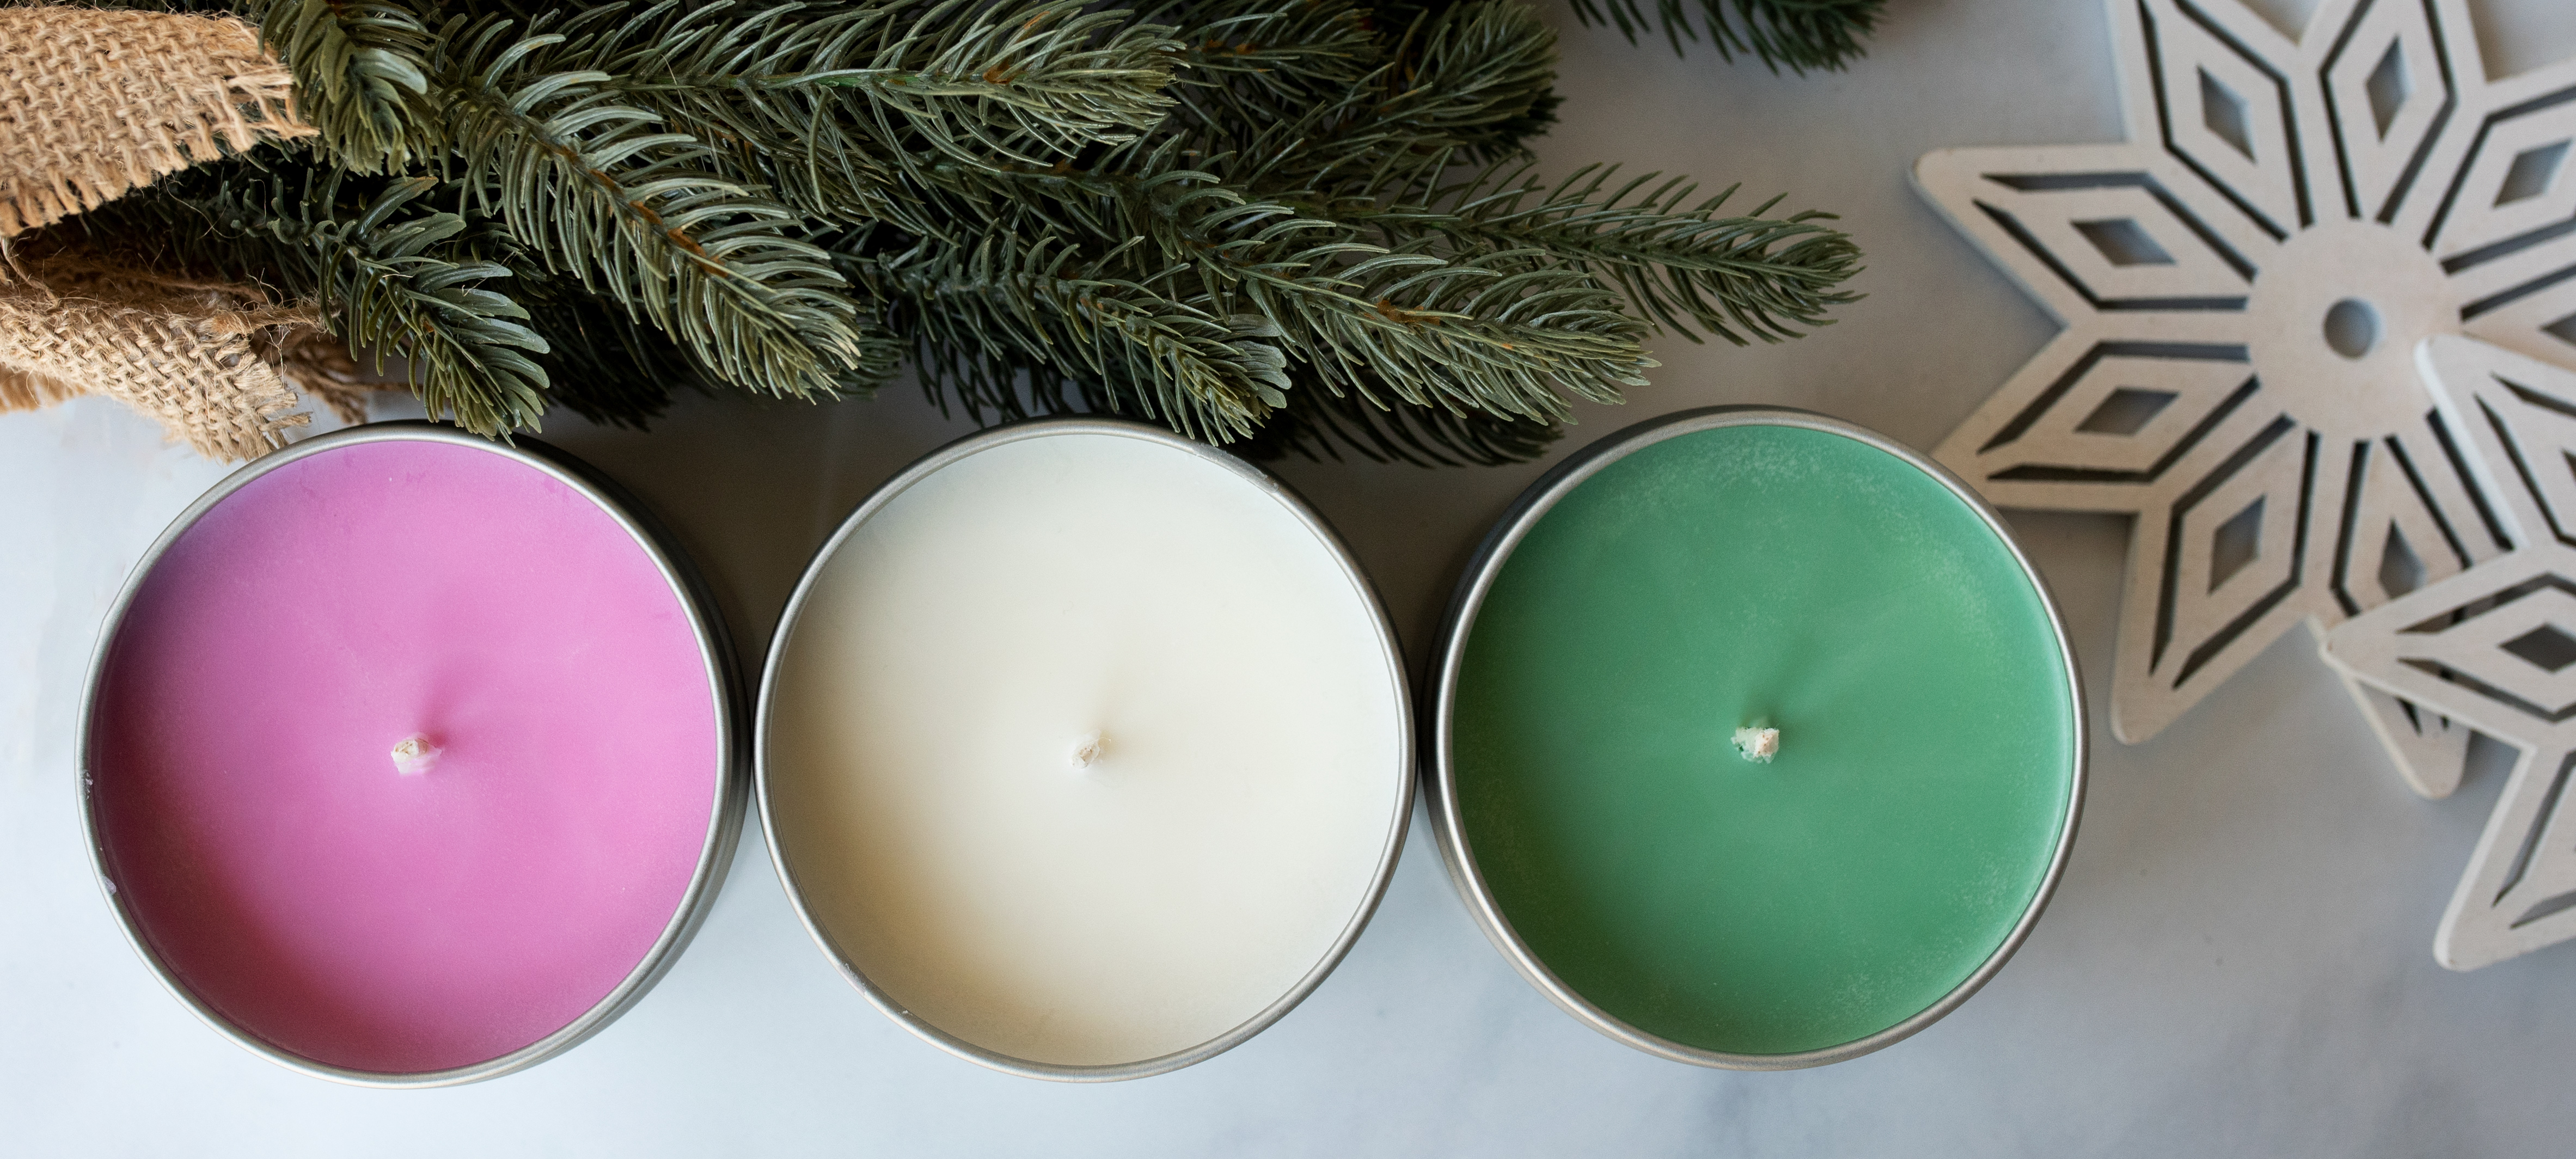
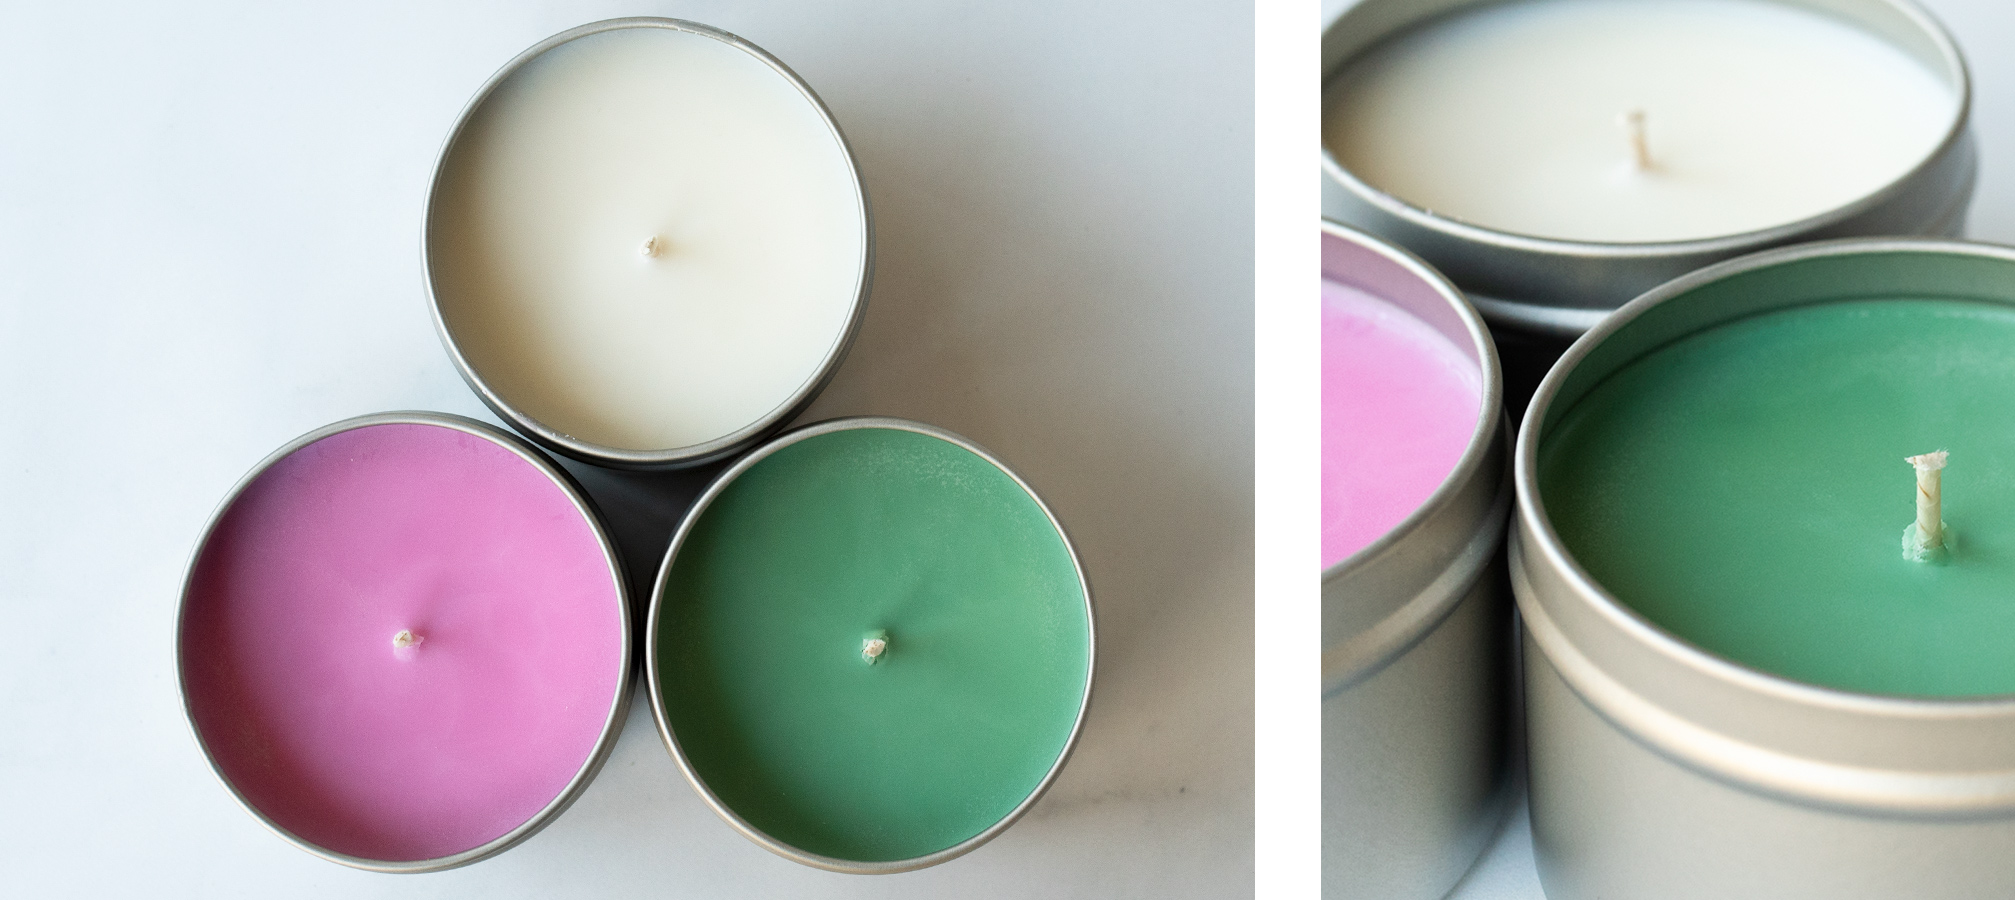
Add a little holiday cheer to the basic candle tin in this gift-worthy candle tutorial. Learn how to make a festive candle trio featuring holiday inspired scents and colors. Candle tins are the perfect beginner candle making project and you can customize scents and colors for any occasion!
EO Notes: You can also use candle-approved essential oils for this project. Check the recommended usage percentage on the essential oil product page and start with low percentages. How to Make Soy Candles with Essential Oils
Additional Items Needed:
Note: Equipment should not be re-used for food prep.
- Isopropyl alcohol
- Paper towels
- Paper Cups or Small Glass Beaker
- Microwave
- Metal Stirring Spatula
- Cutting Board
- Knife
Directions:
Note: This tutorial makes 3 different candles.
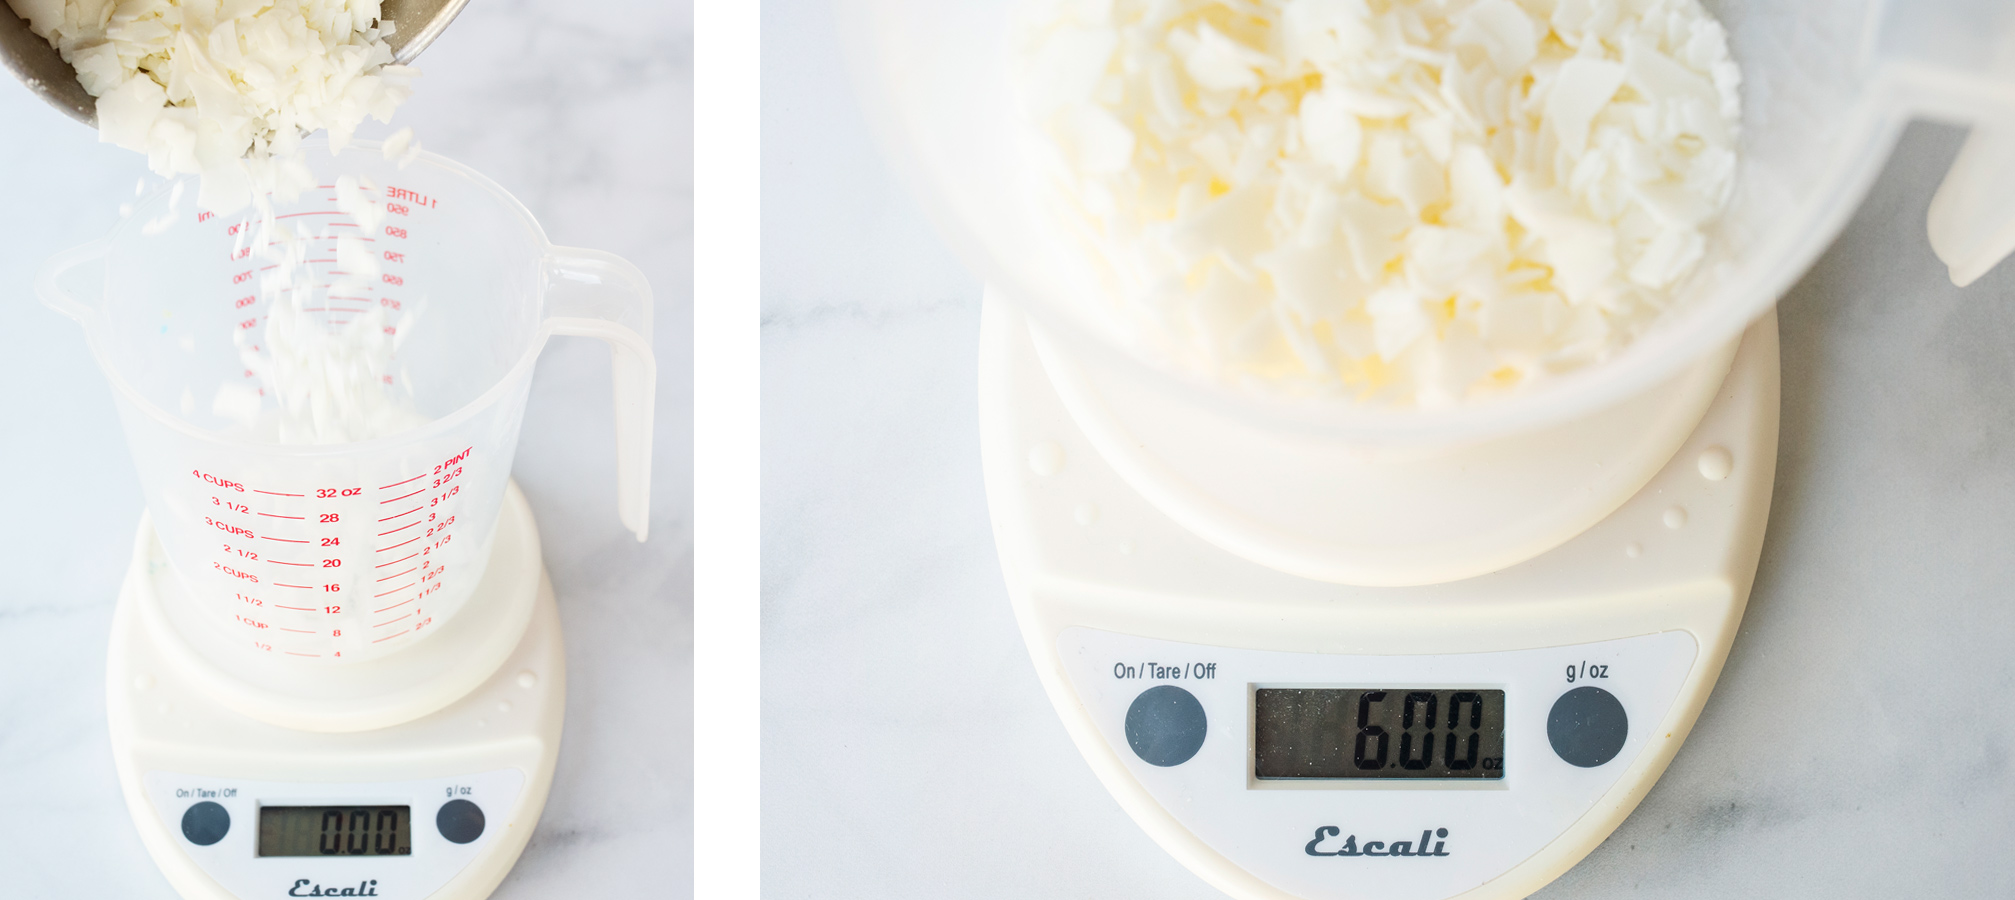
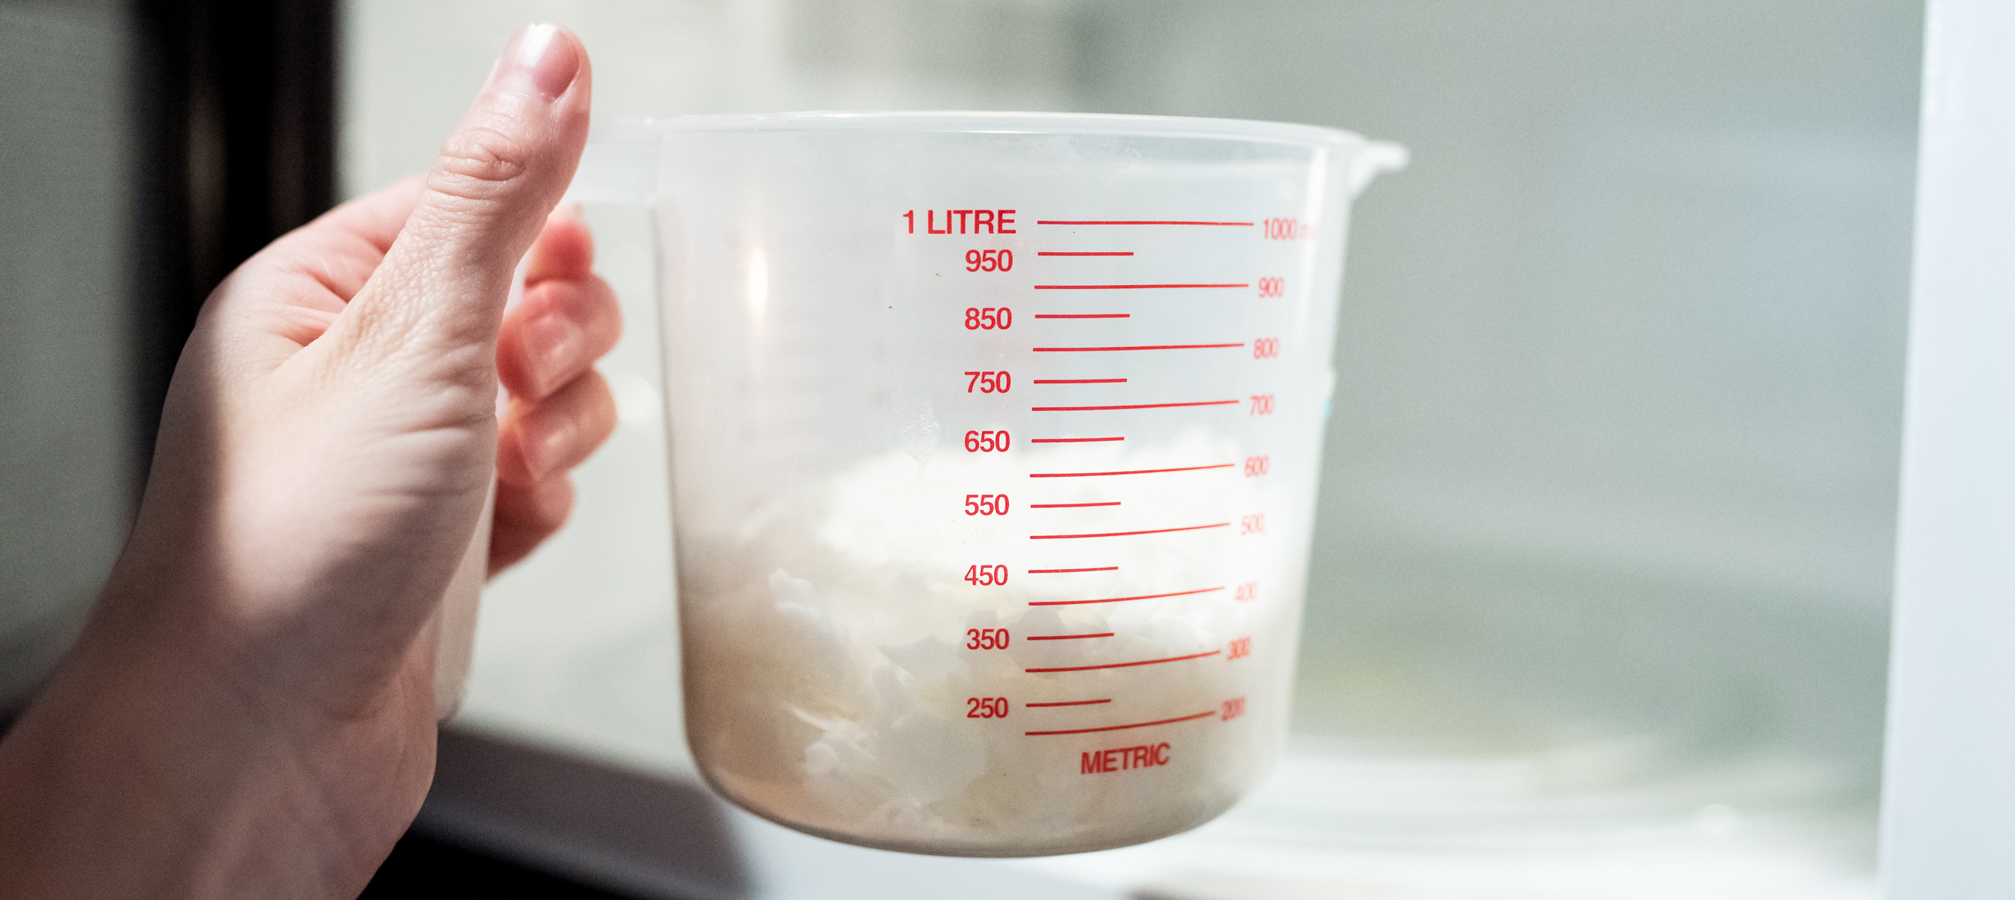
STEP 1: Weigh out soy wax
Place the microwave-safe pouring pitcher on your Candle and Soap Scale and tare the weight. Weigh 6 oz. (170 g) of 464 soy wax flakes and set aside.
Note: We will use this container for each candle, cleaning in between each candle.
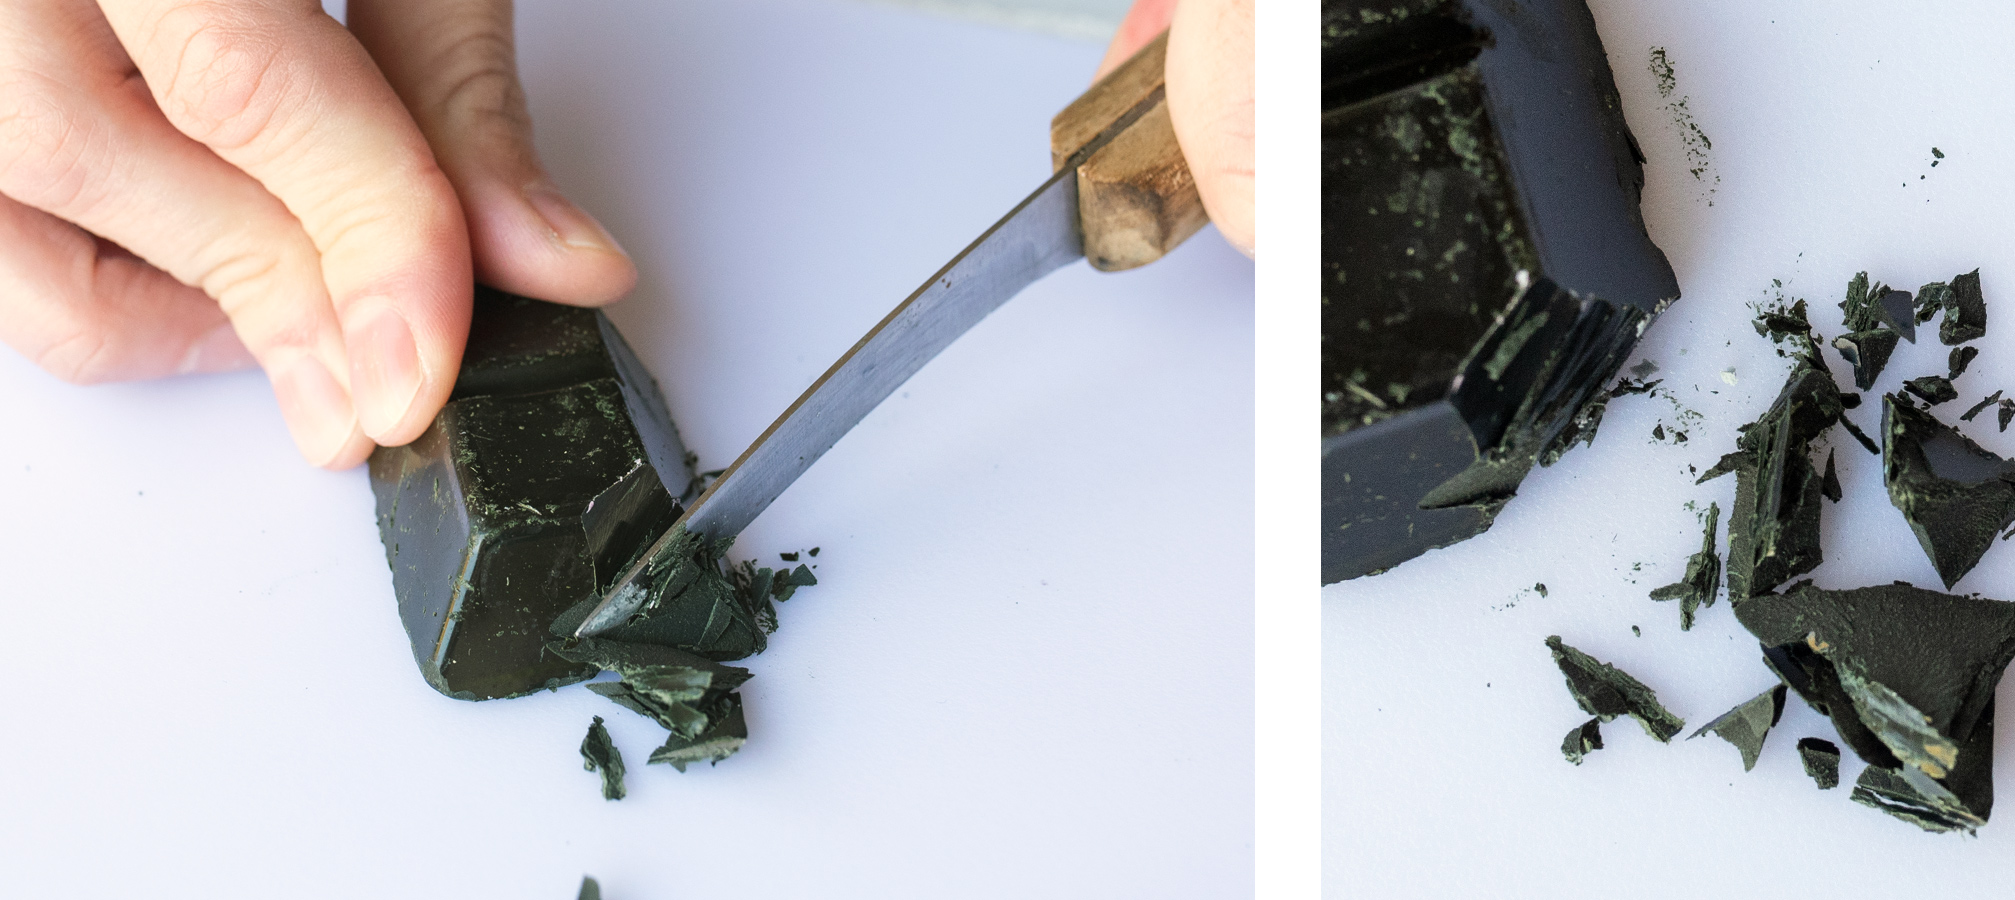
Step 2: Prepare the dye blocks
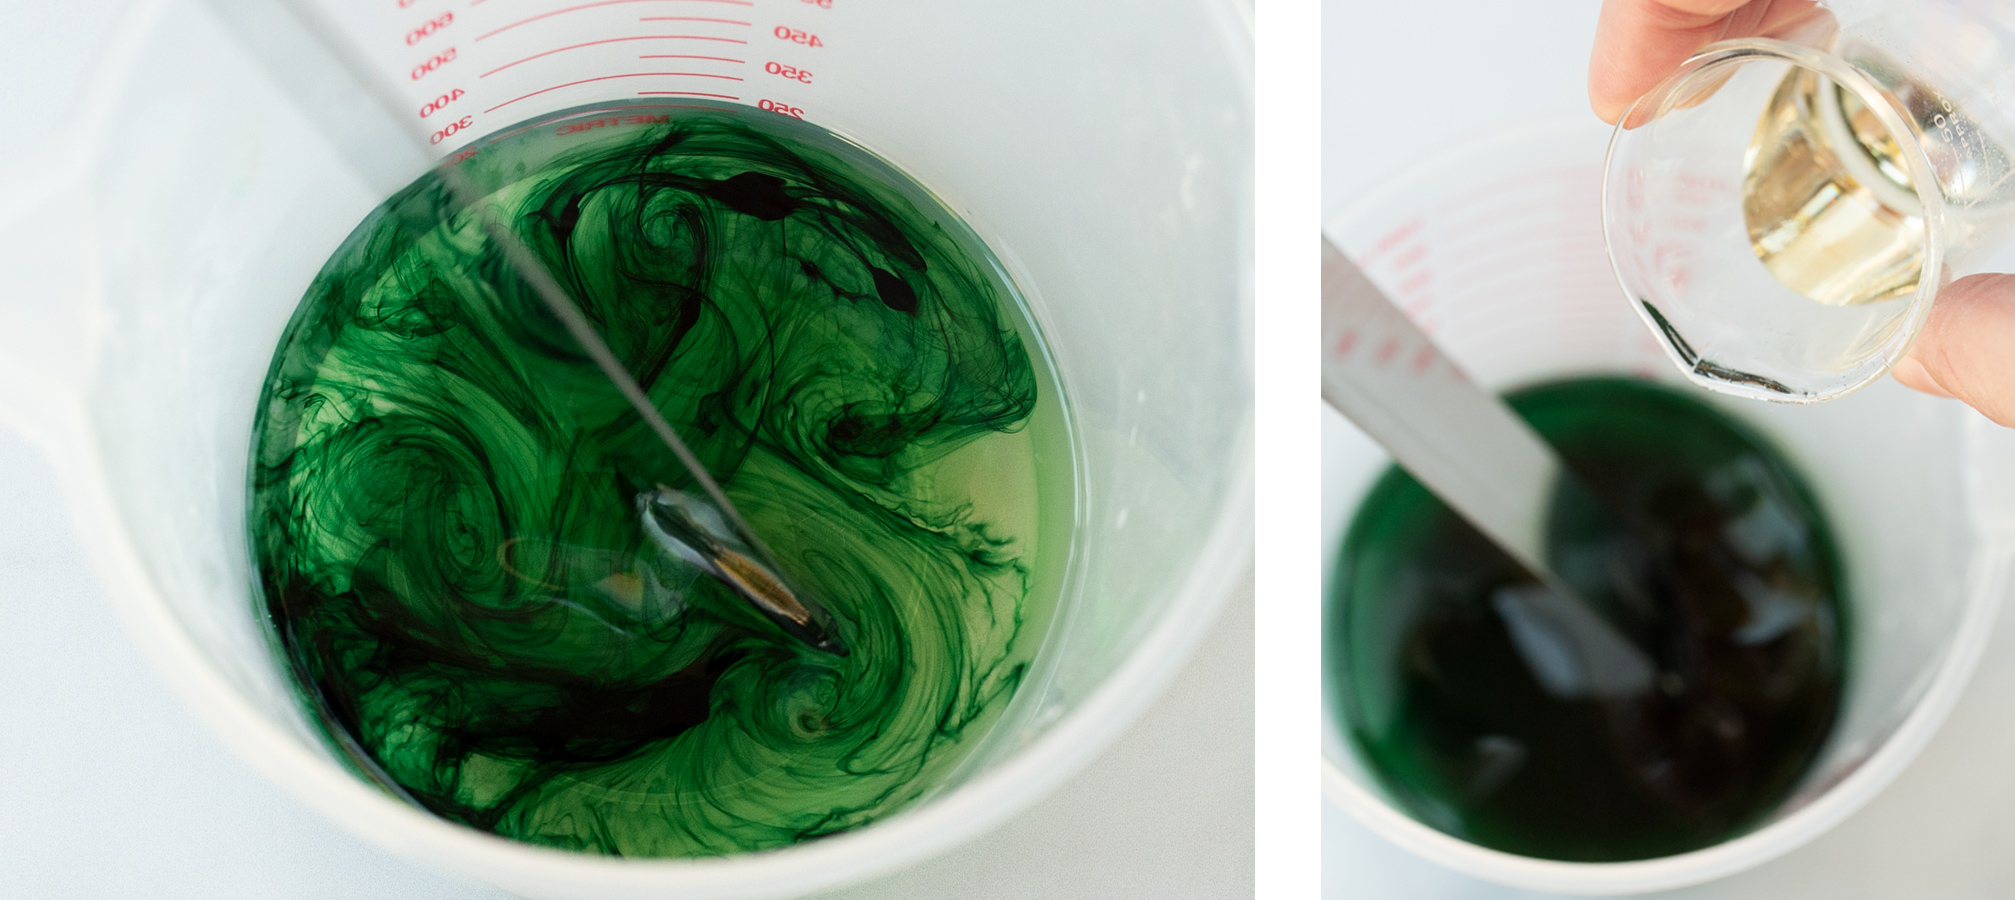
Cut a small chip off of the Forest Green Dye Block. Because we’re only making one candle per color, we’re just estimating the amount of block we need. We used a little less than .05 oz (1.4 g). Add more or less depending on the shade of green you'd like. Set aside.
Note: To stay consistent with your color for larger batches, weigh your dye block.
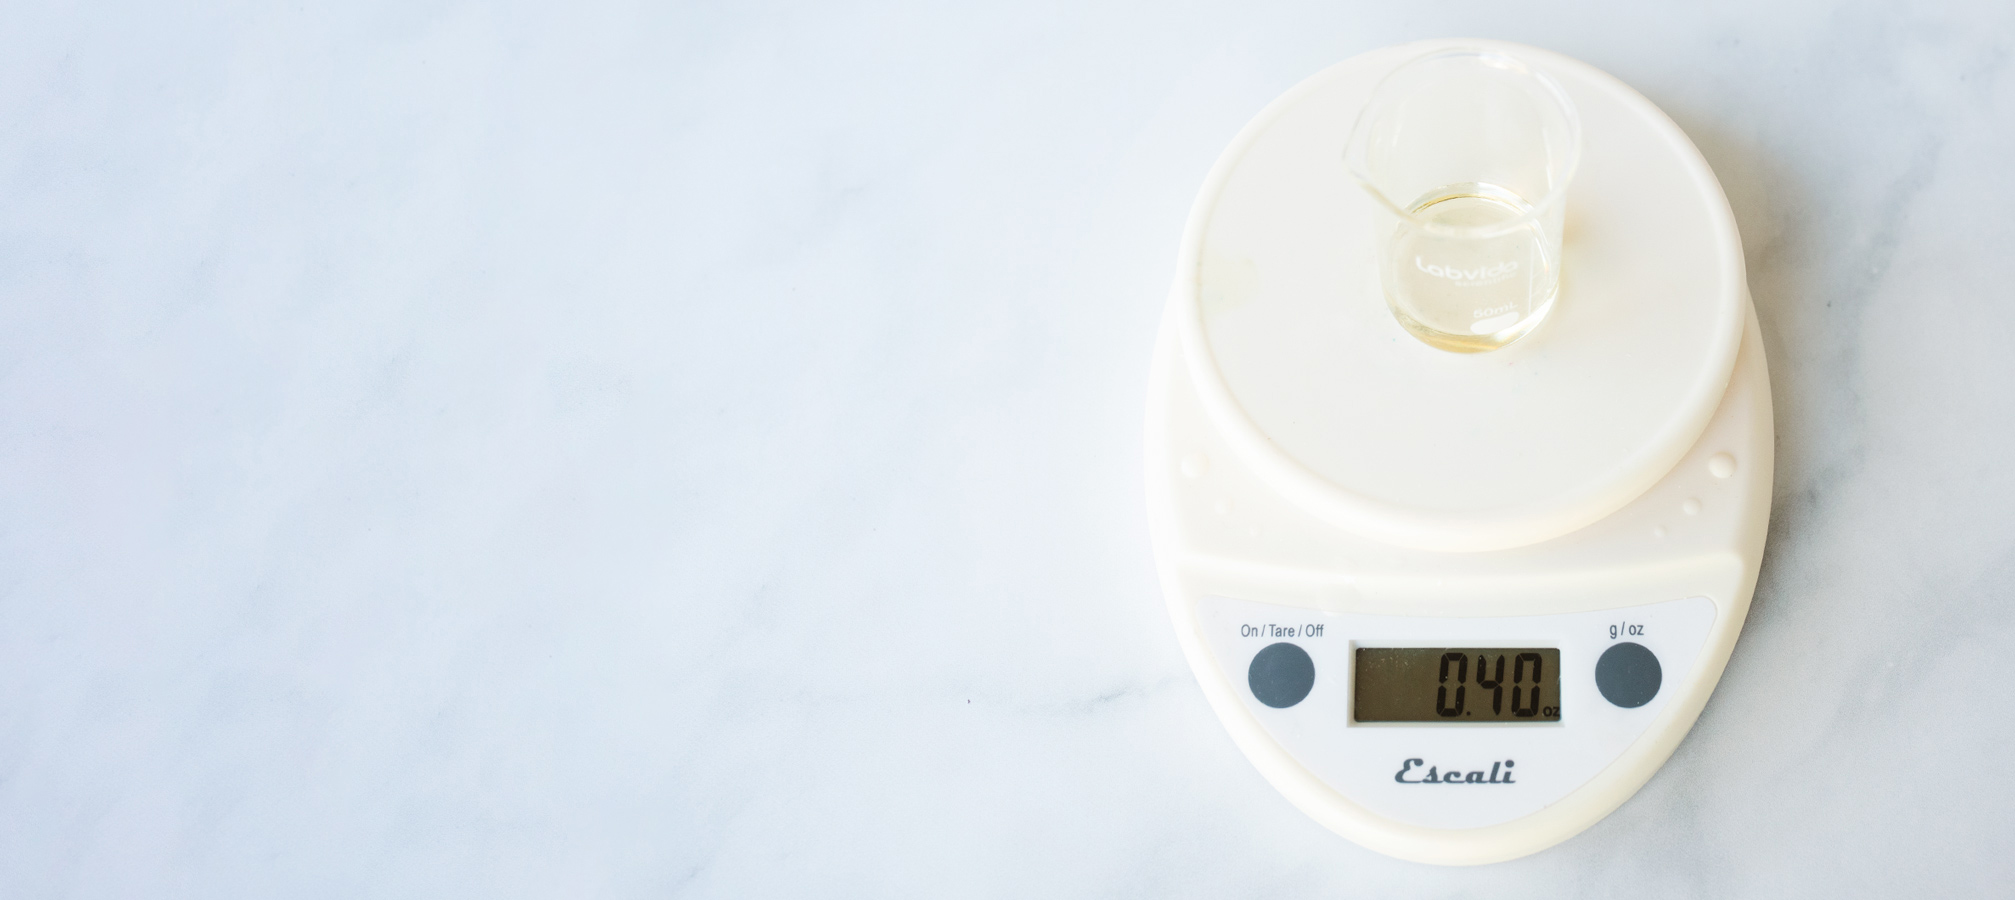
STEP 3: Weigh your fragrance oil
In a paper cup, or glass beaker, weigh 0.4 oz (11 g) of the Fraser Fir Fragrance Oil, which is about a 7% fragrance load. You can adjust up or down to your preference.
Step 4: Melt the soy wax
Place your microwave-safe Plastic Pouring Pitcher into the microwave and microwave for 3 minutes. Stir the wax. If it is not fully melted, return to the microwave and melt for 30-second intervals until it is fully melted.
Note: The wax will be hot! Use caution when you pull your wax out of the microwave.
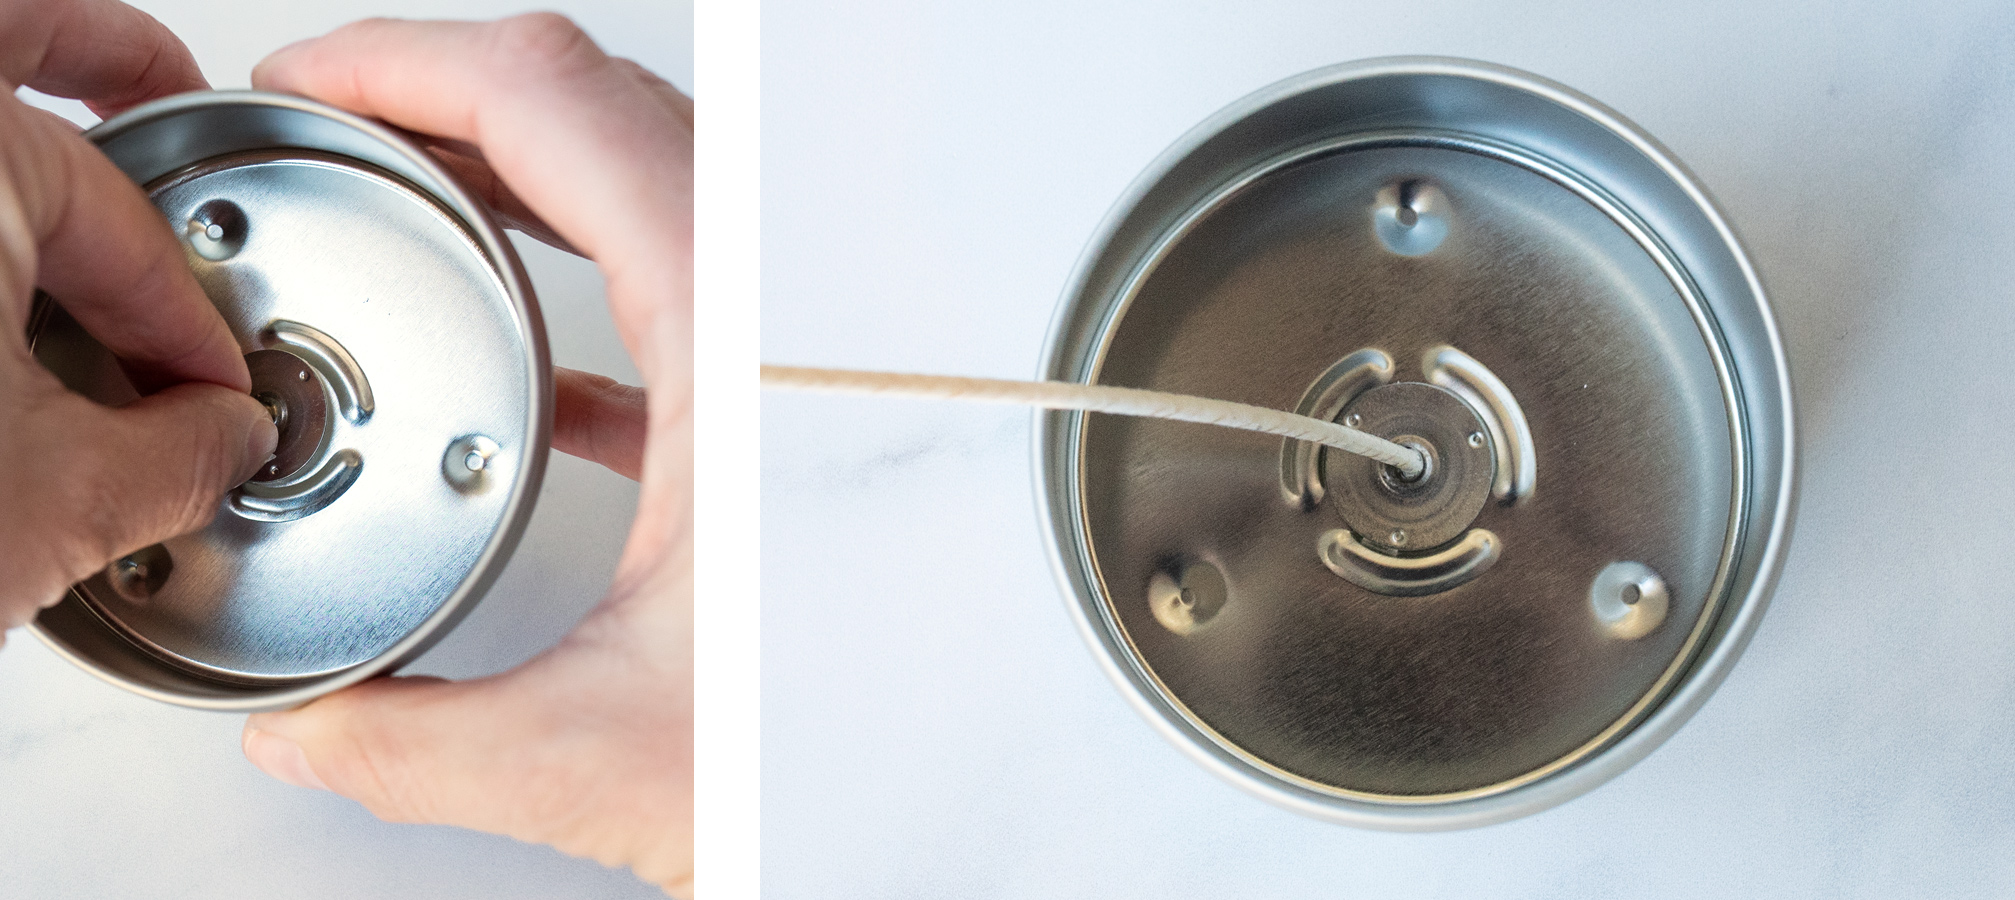
While the wax melts, prepare your candle tin. Wipe the tin out with a little isopropyl alcohol and a clean paper towel. Using a Wick Sticker Pro, center one CD 18 6" Pretabbed Wick in the bottom of the tin.
Step 5: Add the dye block and fragrance oil
Add the Forest Green Dye Block and Fraser Fir Fragrance Oil. Stir gently for two minutes.
Note: The microwave process should get your wax temperature to around 185°F (85°C), the recommended temperature for adding fragrance oil. Thoroughly stirring for the full 2 minutes will ensure that the fragrance oil will fully bind with the wax for optimal fragrance throw. If you are concerned that your wax is not reaching the correct temperature, use a thermometer to double check.
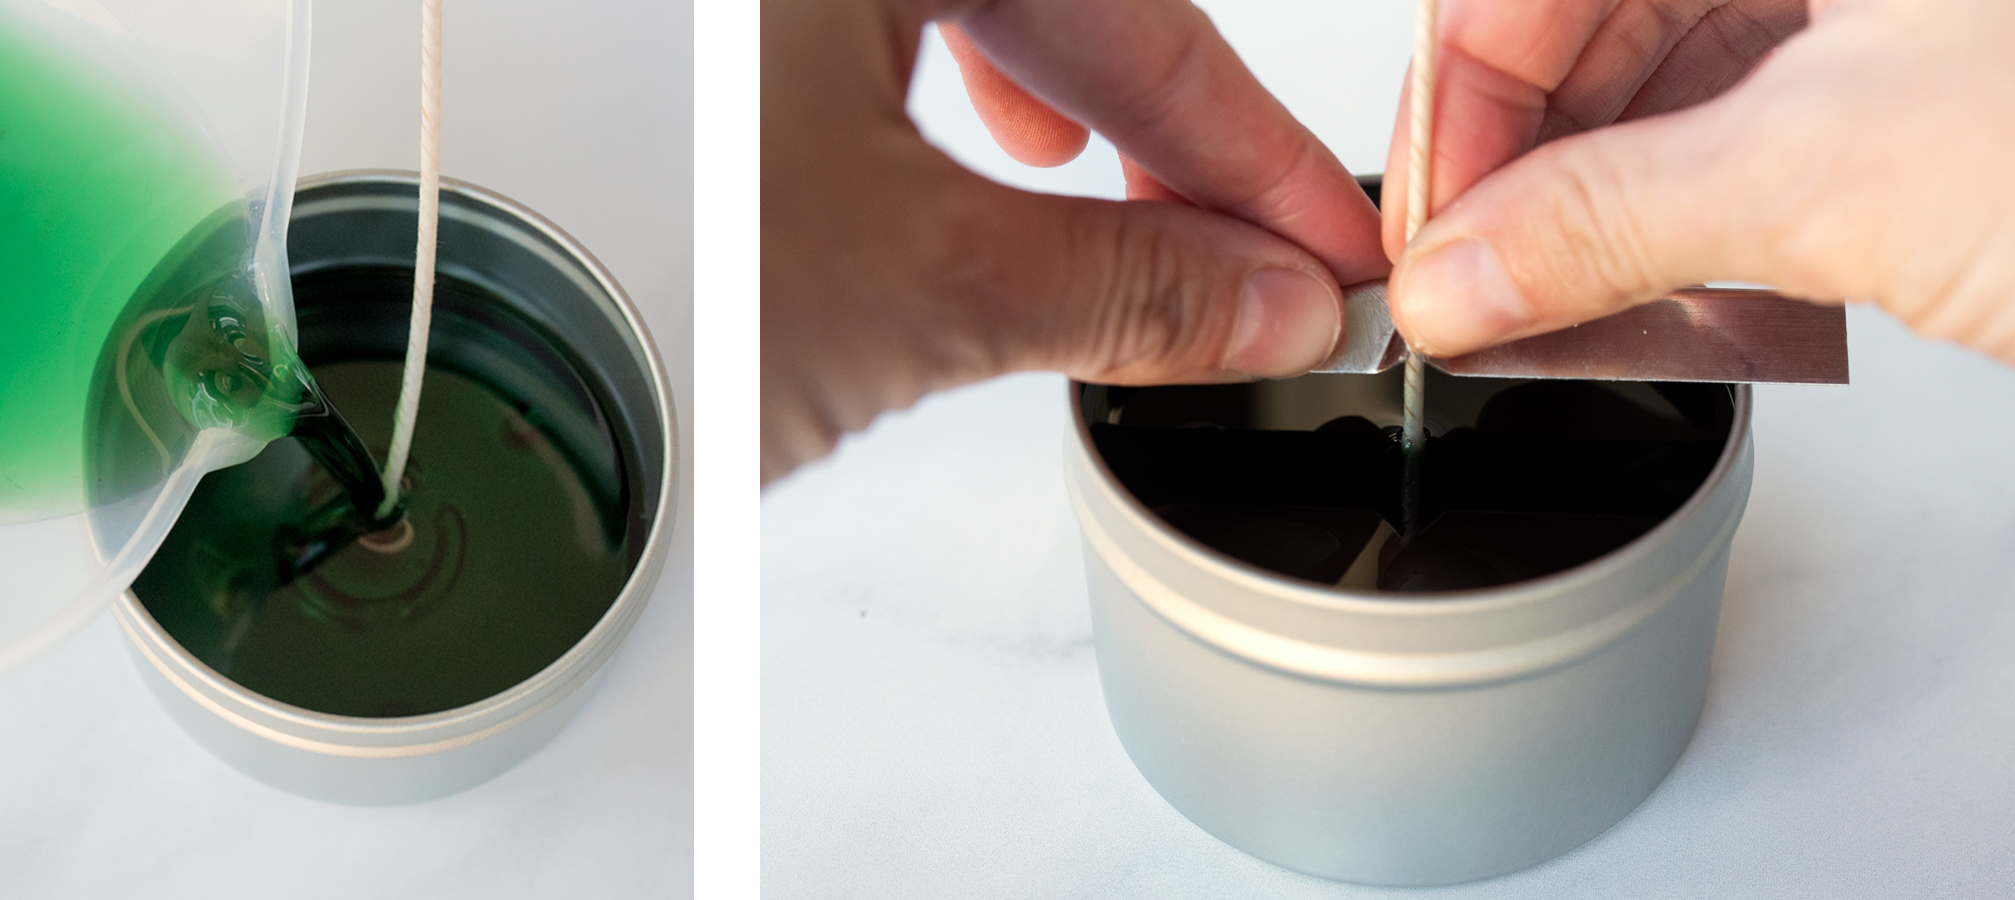
Carefully pour the melted wax into the prepared candle tin. Set the wick with the wick bar and allow to cool completely.
Repeat Steps 1-5 to make the other two candles. Use the Pale Pink dye block with the Cashmere Plum fragrance oil and the undyed candle with Apples and Maple Bourbon.
For optimal fragrance throw, allow the candles to cure with lids on for 1-2 weeks before burning.
STEP 6: Add the finishing touches
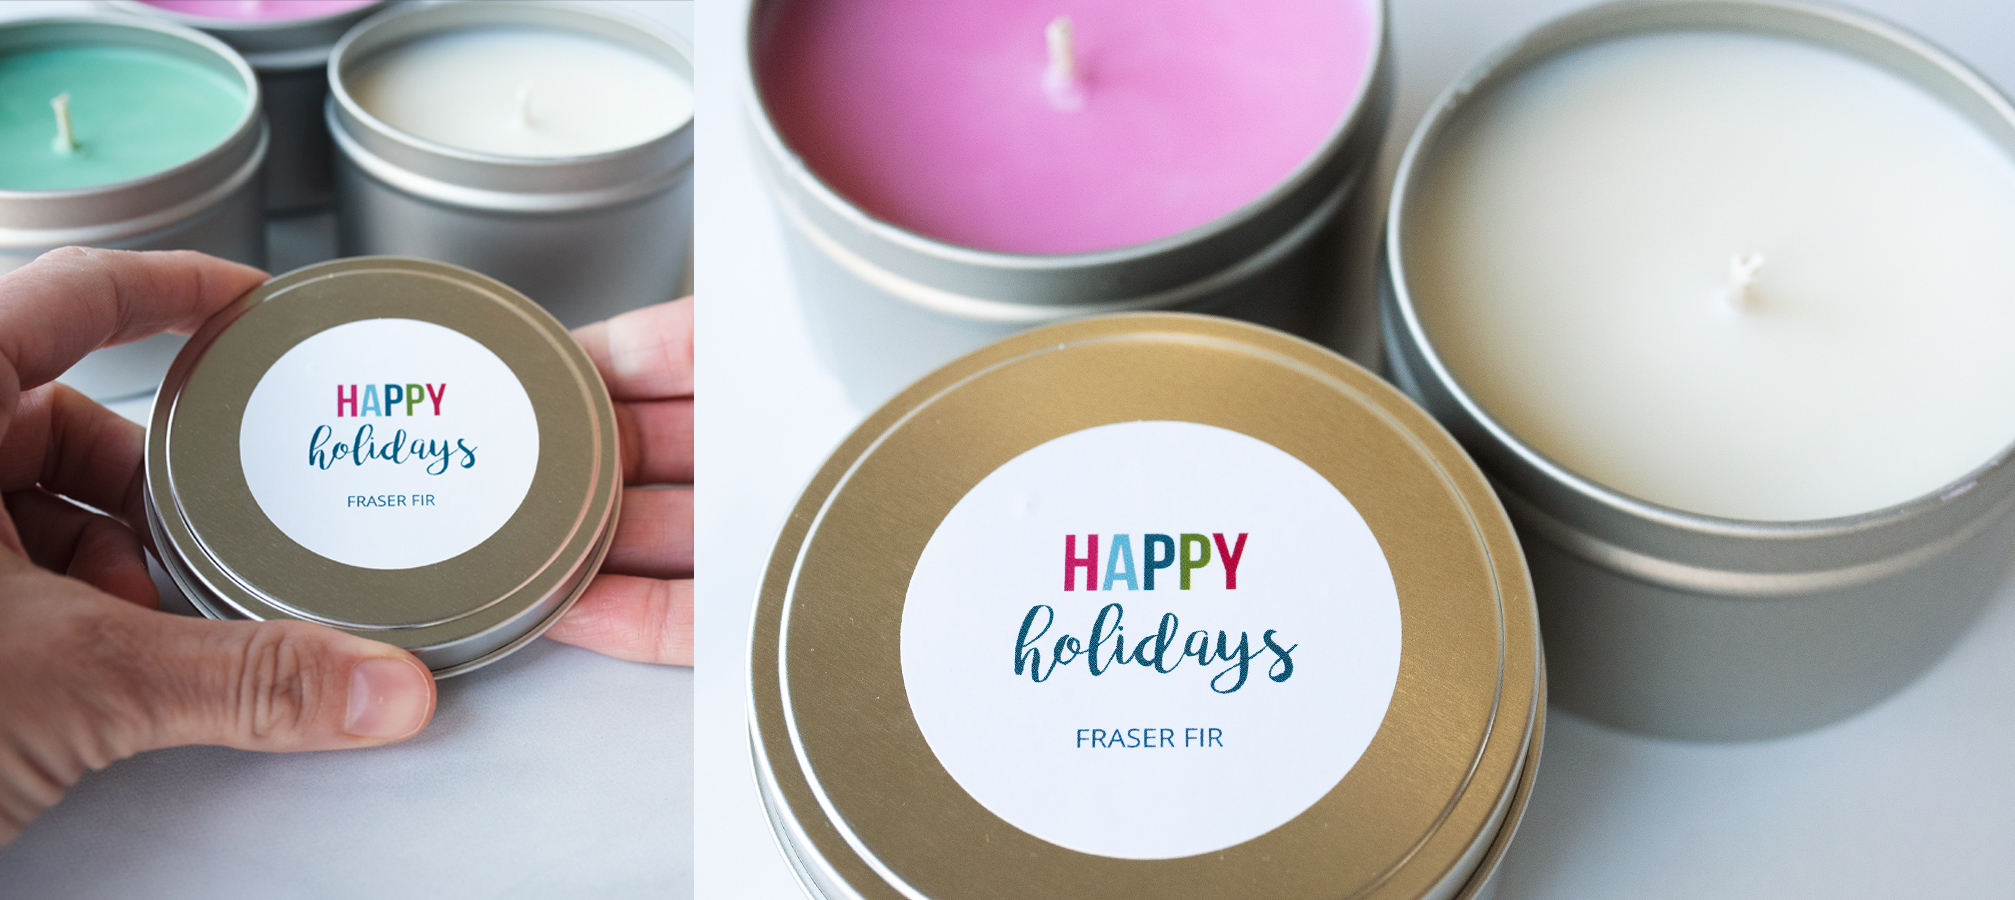
When your candle tins have cooled completely, trim the wick to ¼” (6 mm) and add a warning label to the bottom.
We added a 2" (5 cm) holiday label from Avery WePrint to complete the look. Head over to avery.com/candlescience to get started designing your own and take 10% off your label order!
Did you make it? Show off your holiday candle tins, and all your handmade creations, with the CandleScience community by tagging us @CandleScience and using the #CandleScientist hashtag on Facebook, Twitter, and Instagram. We may feature you in our Stories or on our website!