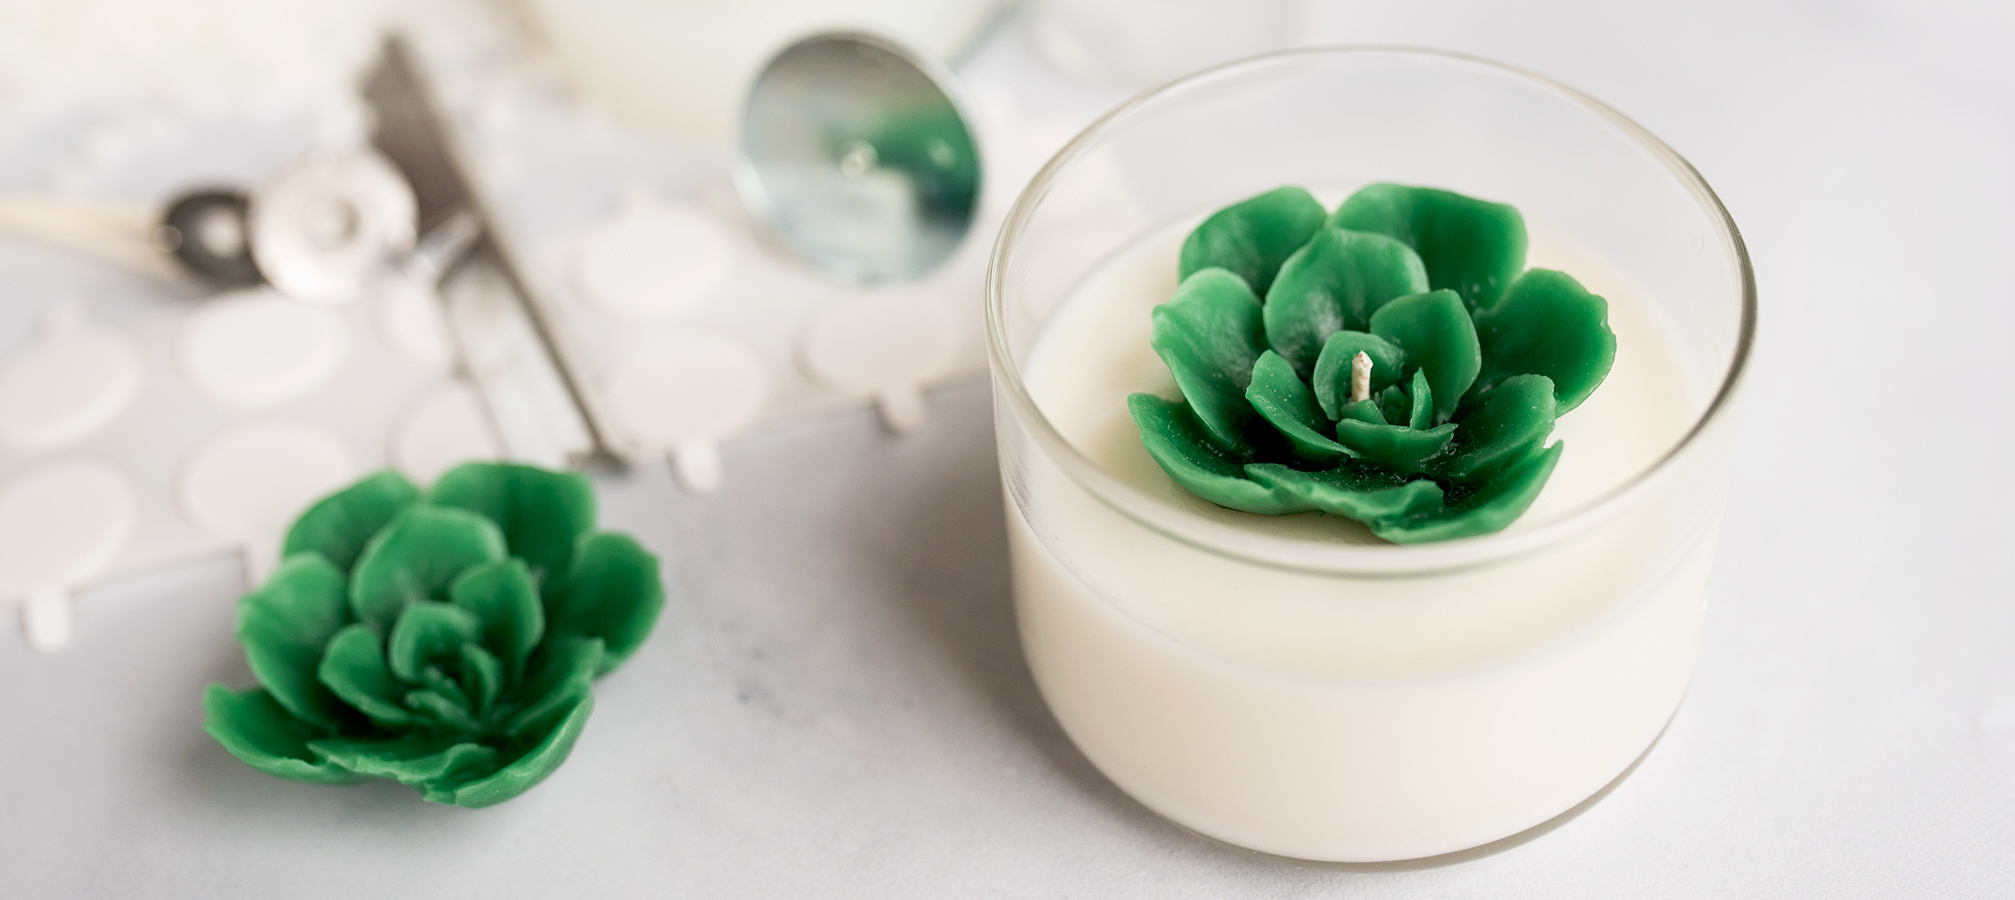
How to make succulent candles
Channel the warmer days of spring with these simple, adorable succulent candles. Add as a special spring offering to your candle line, gift one to brighten someone's day, or add to your personal home decor; however you imagine using them, this is a fun project you don't want to skip.
In this tutorial, you'll learn the basic skills for making beeswax embeds and applying them to a candle top. Once you've mastered these skills, the possibilities are endless. Create your own desert oasis or experiment with other shapes and themes.
EO Notes: You can also use candle-approved essential oils for this project. Check the recommended usage percentage on the essential oil product page and start with low percentages. How to Make Soy Candles with Essential Oils
Additional items needed:
- Succulent molds
- Metal stirring spatula
- 9 fl oz. paper cups
- Paper towels
- Votive wick pin or bamboo skewer
- Wax or parchment paper
- Paring knife or cheese grater
- Heat gun or hair dryer
Succulent candle directions:
Notes: We tested multiple natural waxes for the embeds and found that beeswax was the best option for the detailed 3-D silicone molds. If you're looking for a paraffin option, we'd suggest a wax-like IGI 4625. The embeds tested with a soy and paraffin blend didn't turn out very well.
PART 1: Make the succulent
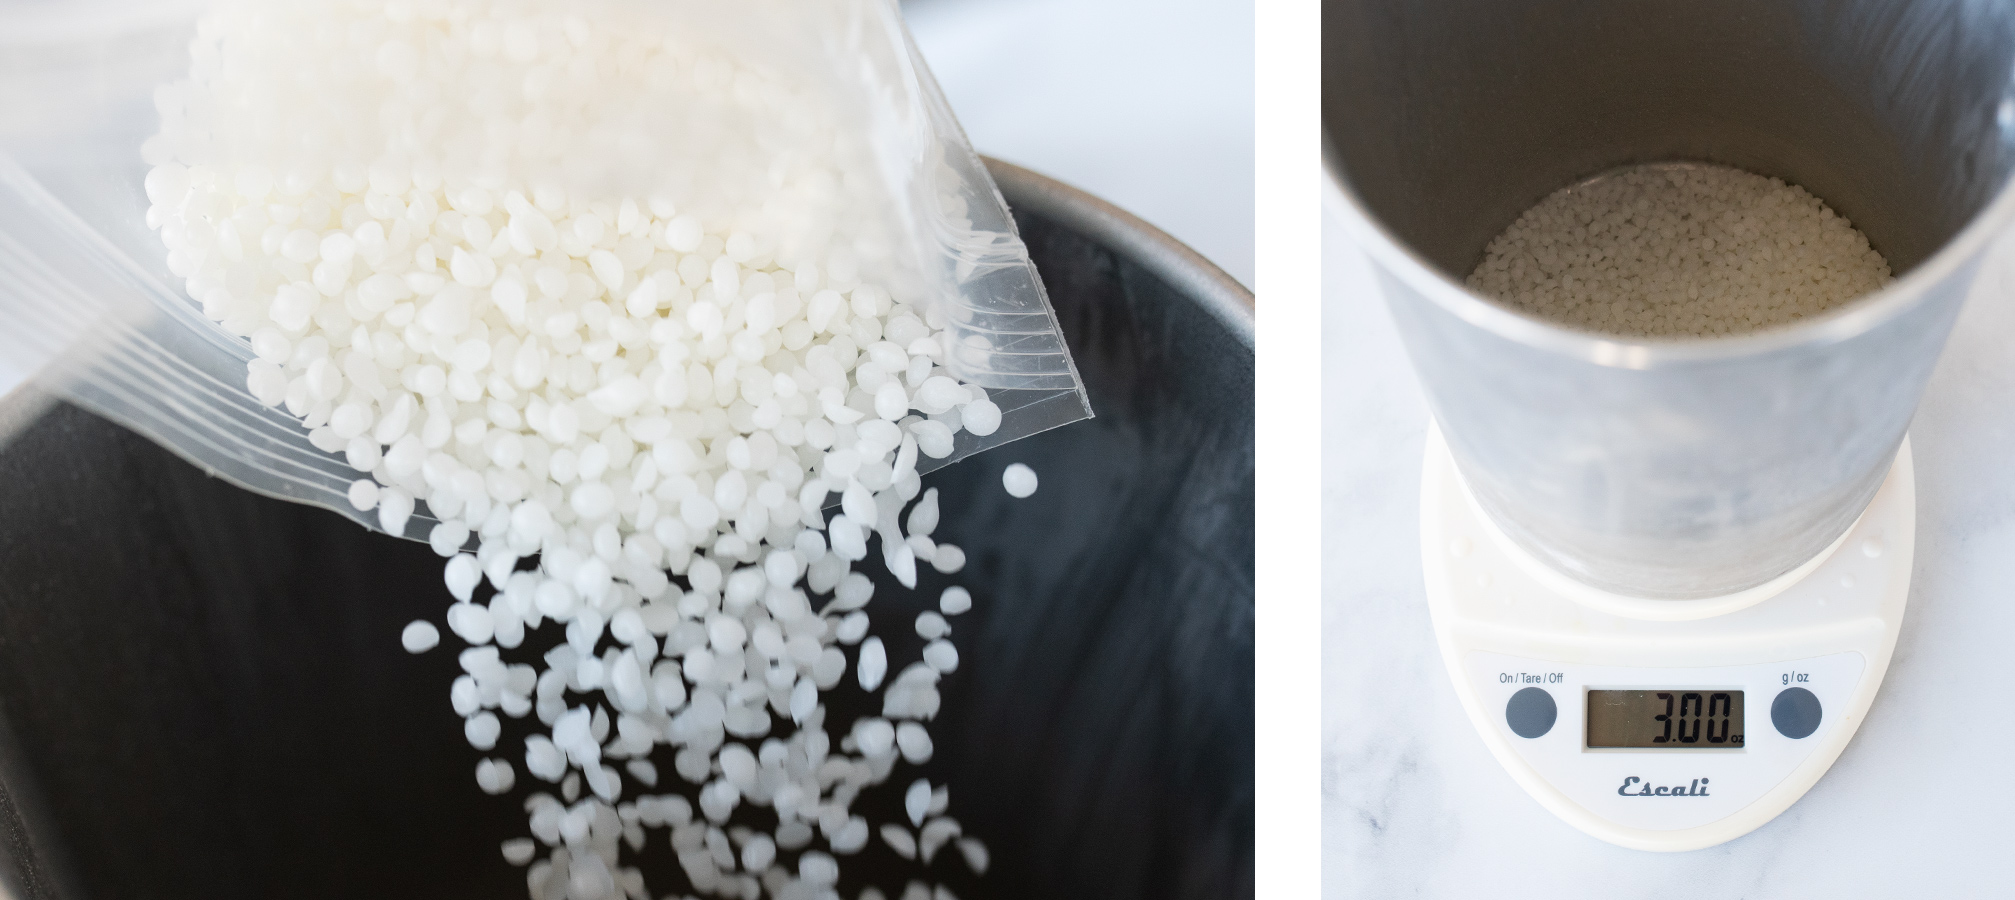
Step 1: Weigh and melt beeswax
Place the pouring pitcher on your digital scale and tare the weight. Weigh 3 oz. (85 g) of the White Beeswax pellets in the pouring pitcher. Begin to melt the wax with a double boiler or on a hot plate.
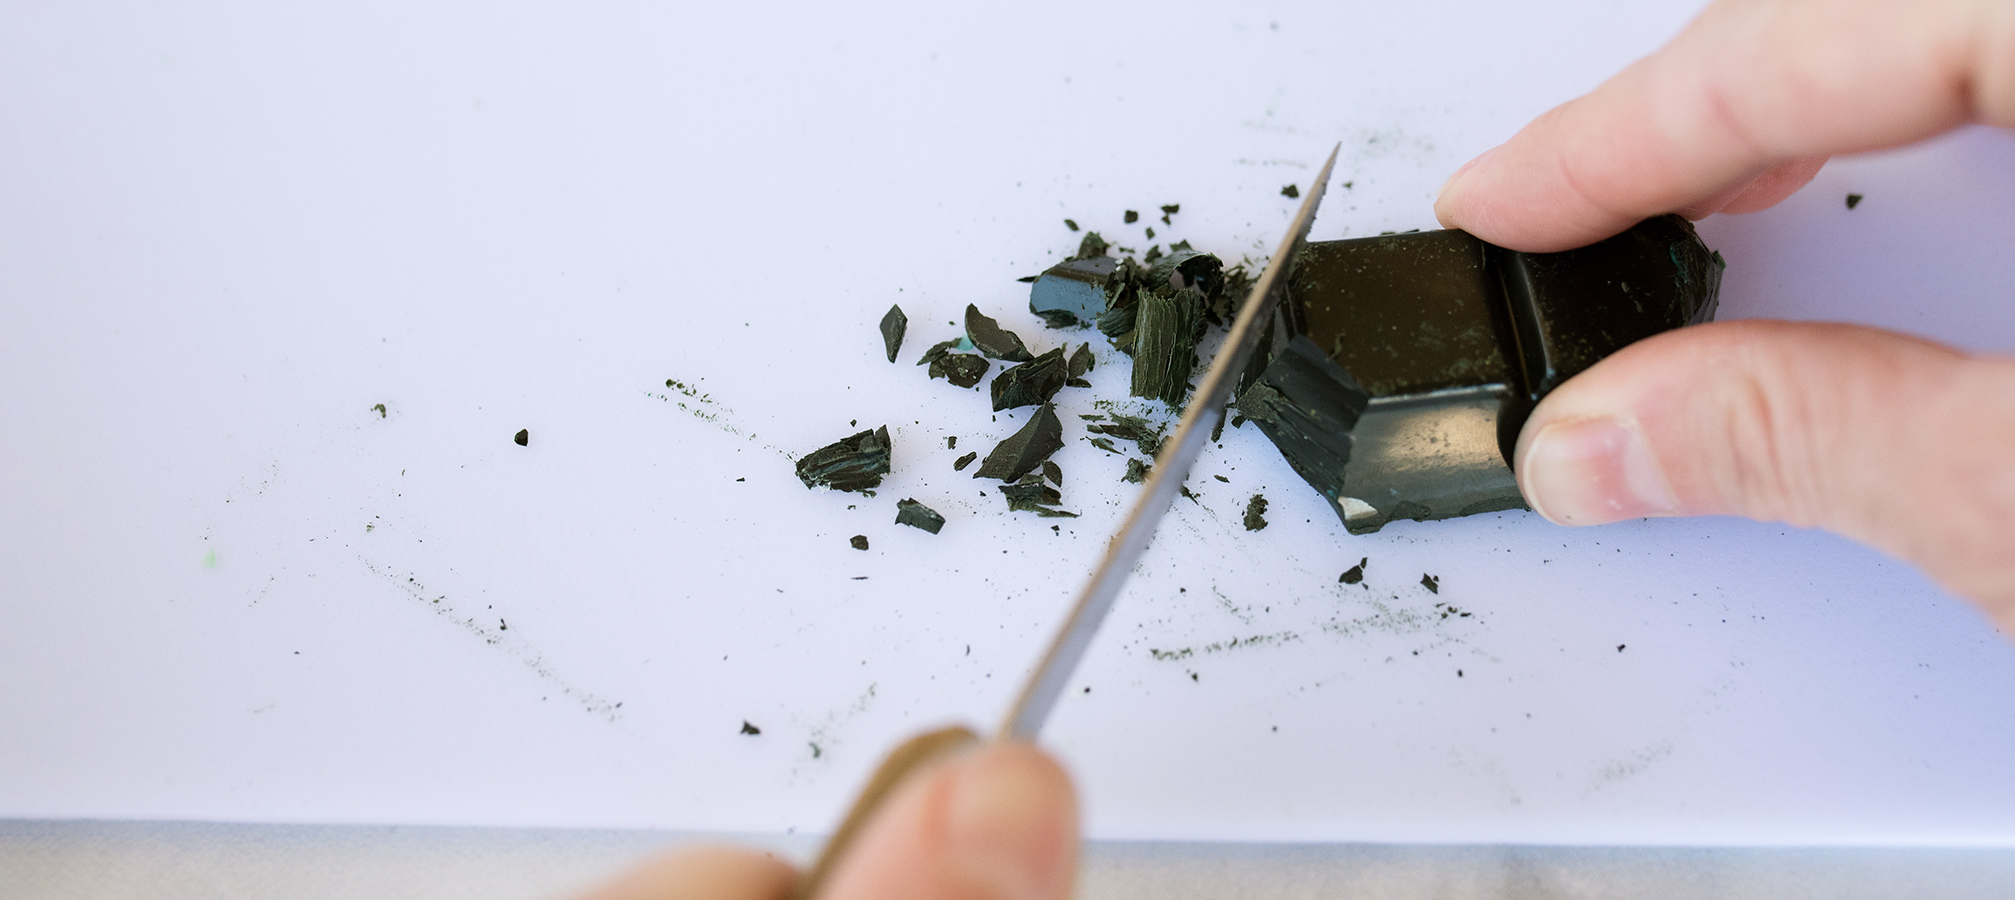
Step 2: Prepare green candle dye block
While the wax pellets are melting, prepare your Forest Green dye block. The small amount of wax we're using doesn't need much to achieve a bold green color. Use a paring knife or a cheese grater to scrape off some of the color from the dye block. You will only need a small, flat pile of dye block shavings that is about the size of a dime.
Note: Dye blocks can stain your work surface so be sure to protect it with wax paper, use an old cutting board, or work your shavings directly into a bowl.
We chose to not fragrance our embeds since the wax will remain heated for an extended period of time.
If you notice the embeds smelling too strongly of dye or natural beeswax, you can add 0.2 oz (6 g) of fragrance oil when the wax has reached 185°F (85°C). This will prevent the embed smell from overpowering the candle base.
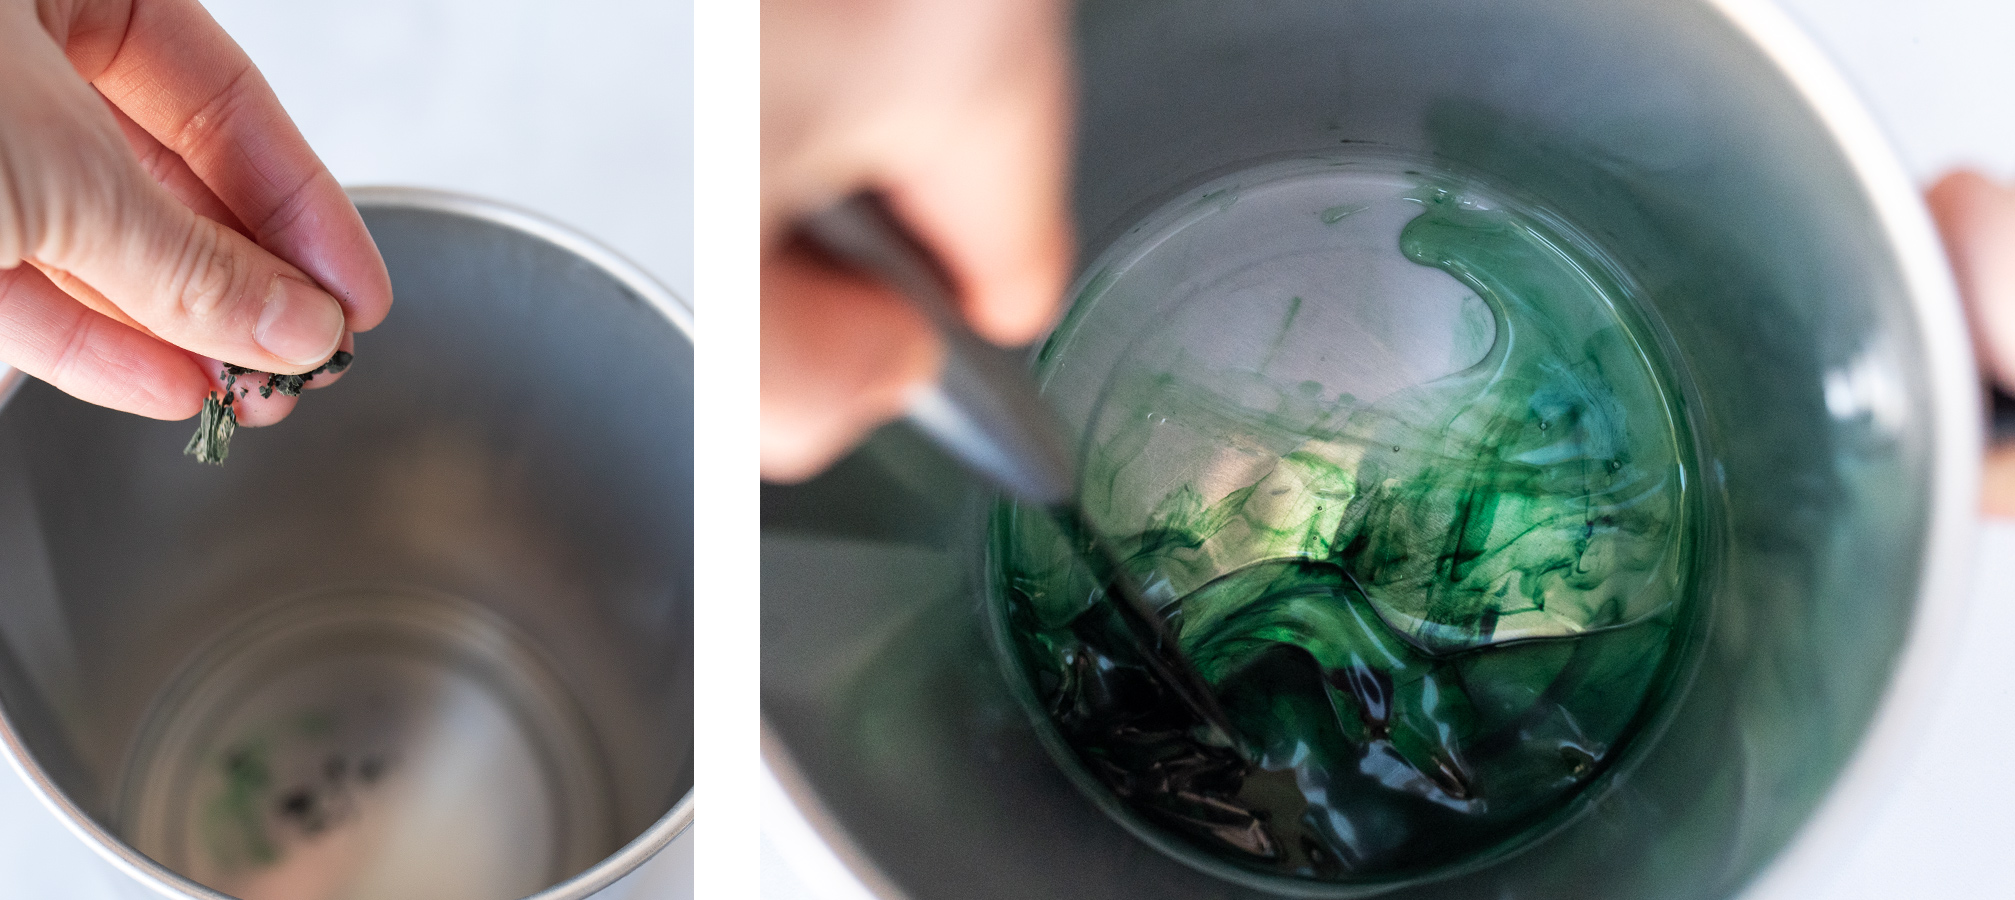
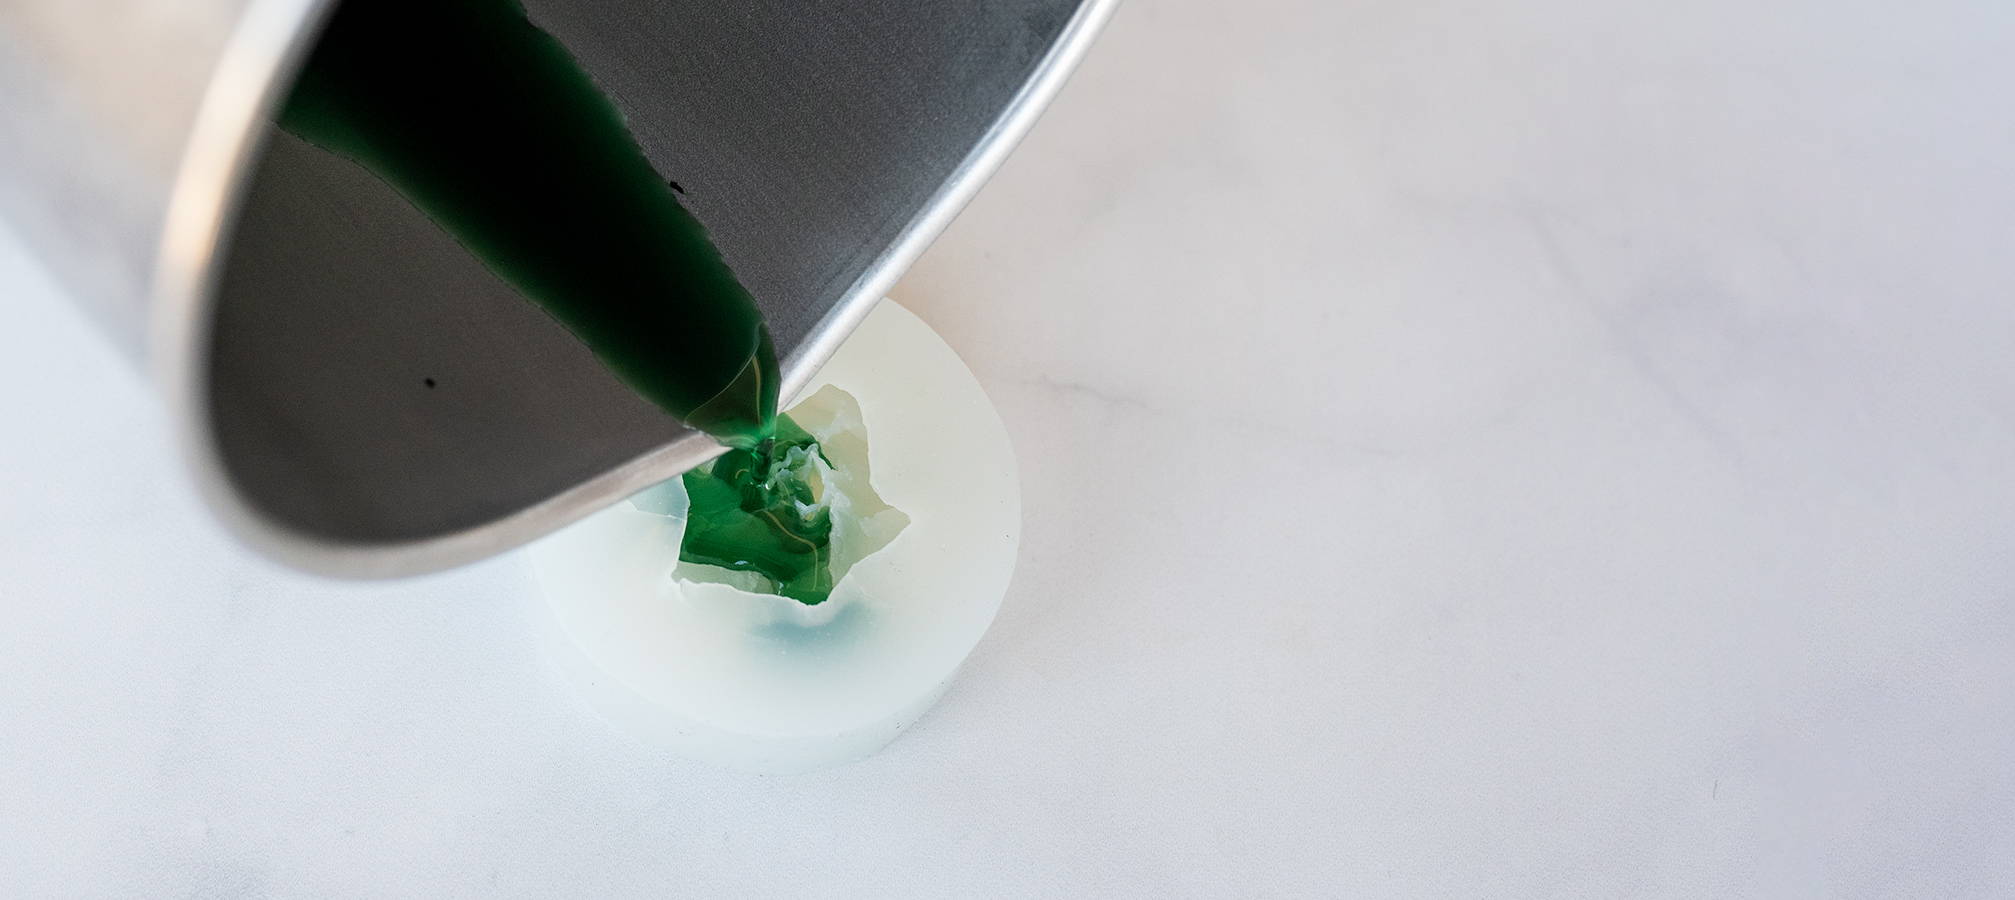
Step 3: Add dye block to melted beeswax and pour into succulent mold
When the wax is thoroughly melted, add your dye shavings to the wax and stir well.
Carefully pour the wax into your silicone molds. Fill each cavity to the top of each mold without going over.
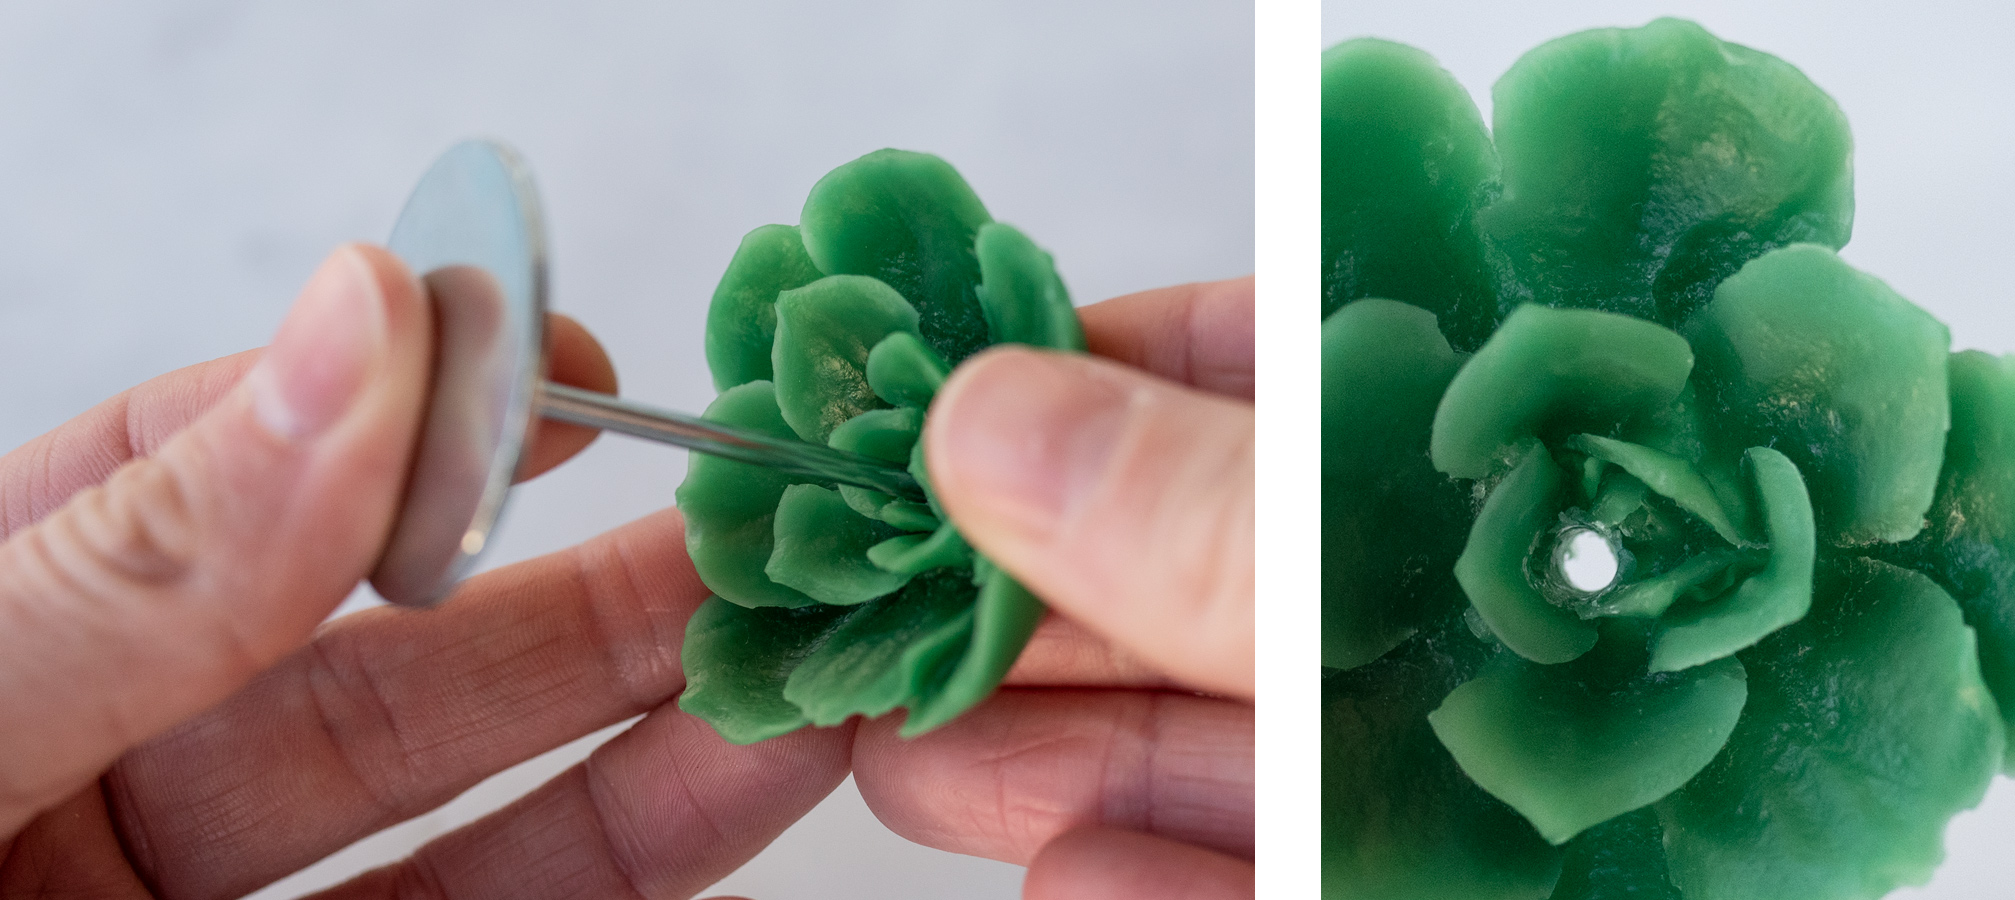
Step 4: Unmold the embed from the mold
Allow the wax to cool for 20-30 minutes. The embed will unmold the easiest if the wax is slightly warm to the touch, but not hot. Carefully remove the embed from the mold paying close attention to all of the thin petals.
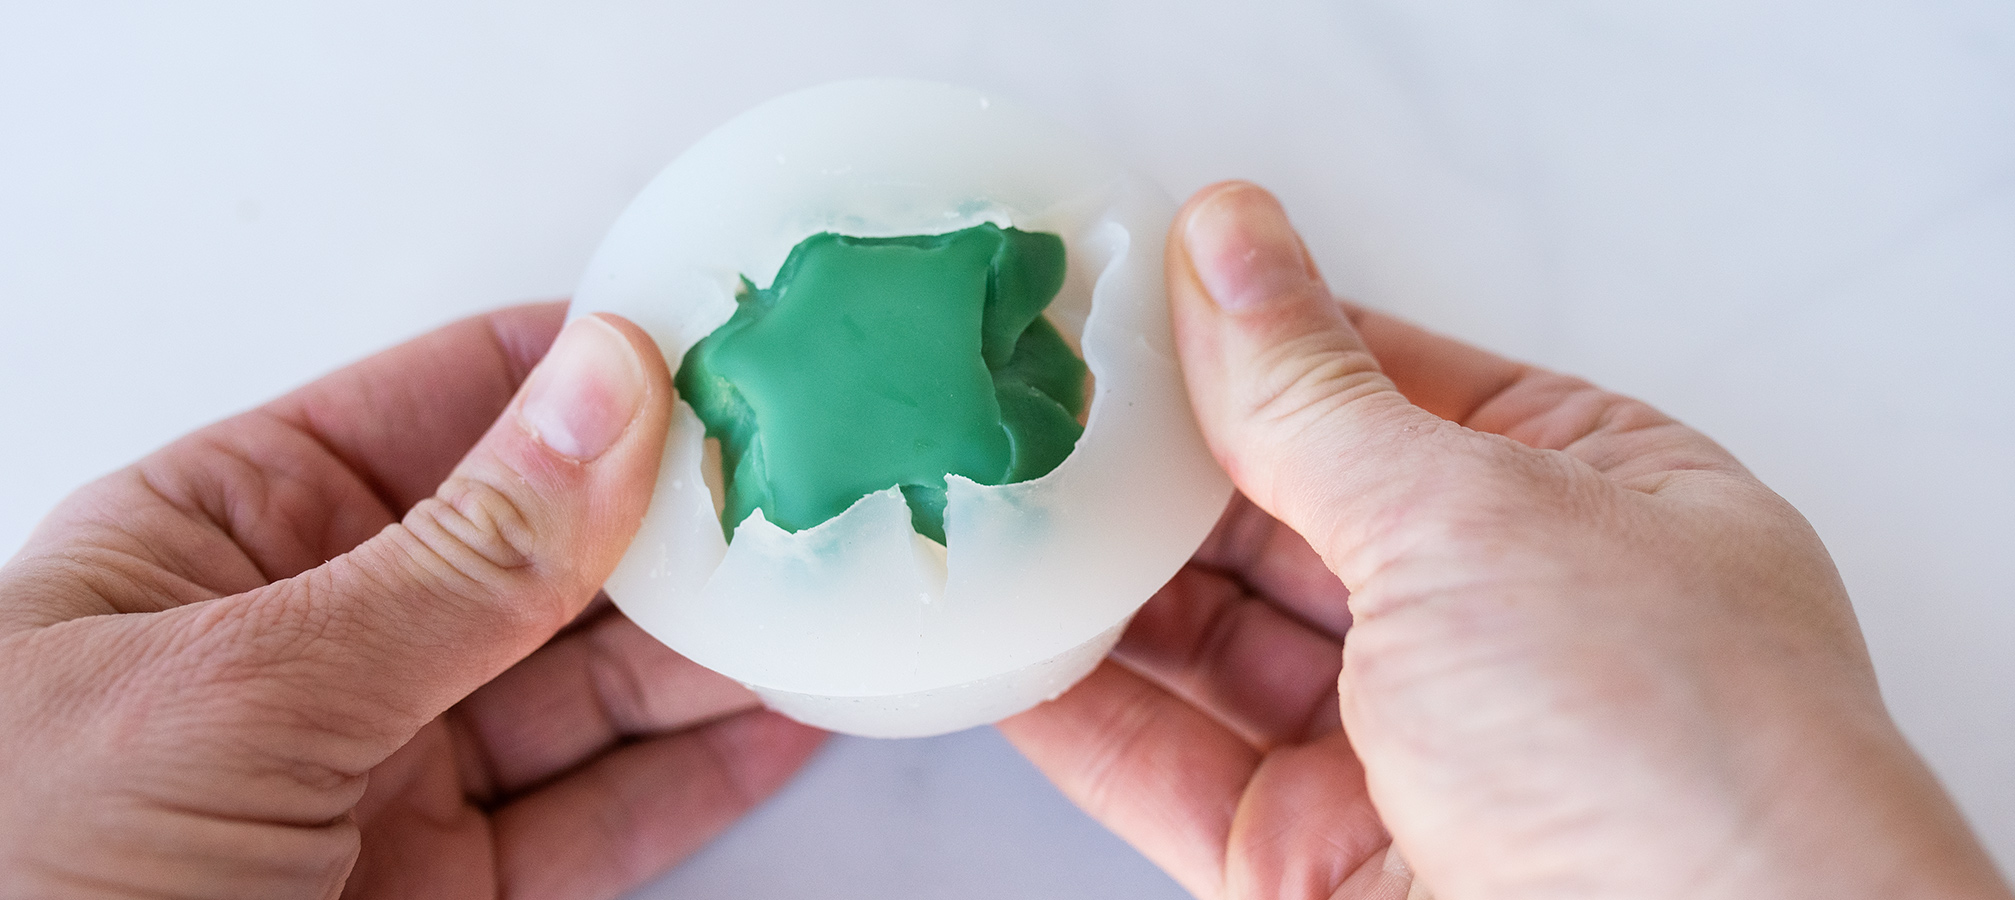
Before the embed is completely cooled, gently poke a hole in the center for the wick using a wick pin or bamboo skewer.
Set aside to cool completely.
PART 2: Make the base of the candle
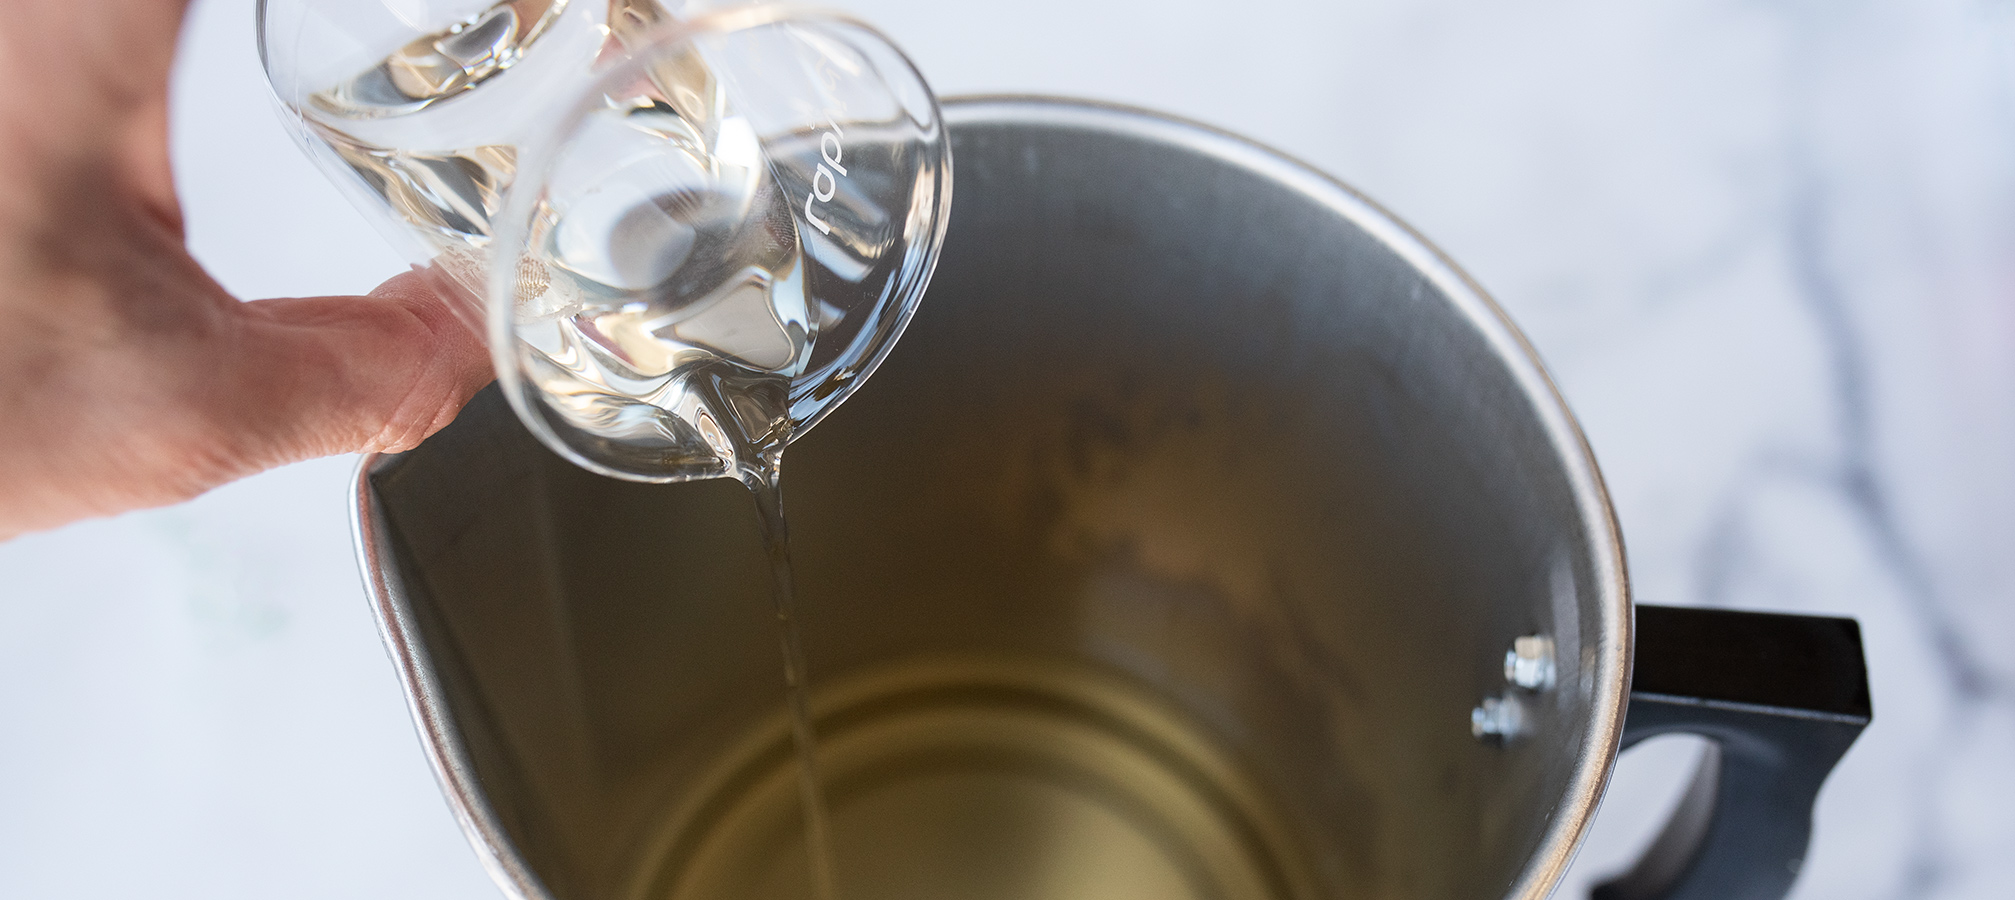
Step 1: Weigh and melt soy wax
Place the pouring pitcher on your digital scale and tare the weight. Weigh 13 oz. (369 g) of the AAK 464 soy wax flakes in the pouring pitcher. Begin to melt the wax with a double boiler or on a hot plate.
Note: The amount of wax can vary depending on how high you want your succulent to sit and the silicone mold you use. We used about 3.25 oz. (92 g) for each mini tumbler.

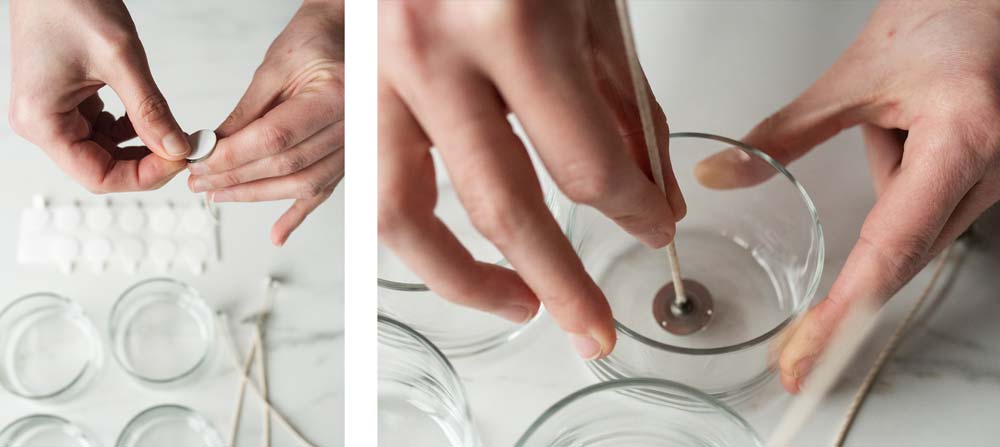
Step 2: Prepare the candle jars
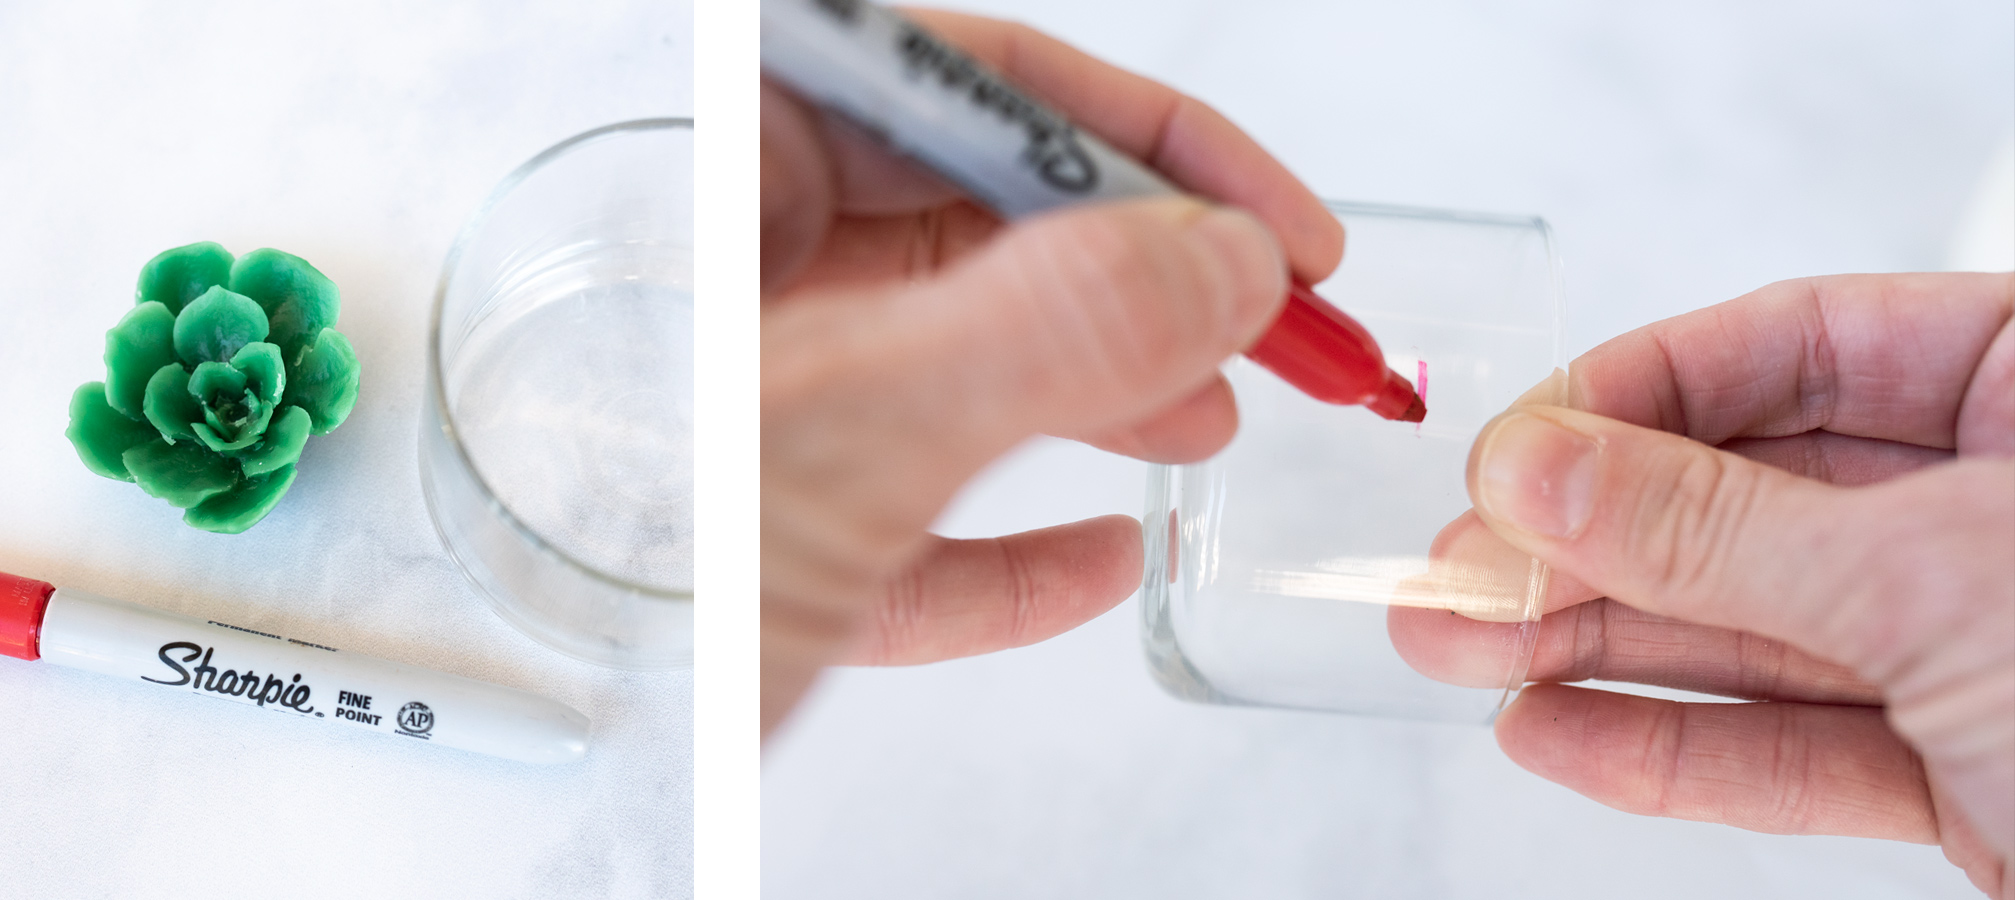
While you're waiting for the soy wax to melt, you can begin to prep your Mini Tumbler candle jars.
To determine the wax fill line, you need to decide how tall you want your embed to sit in the jar. Hold the embed up to the jar at the preferred height and mark where the base of the embed sits.
Note: If you plan to use a lid for your chosen container, be sure to position your embed so that it can safely fit under the lid.
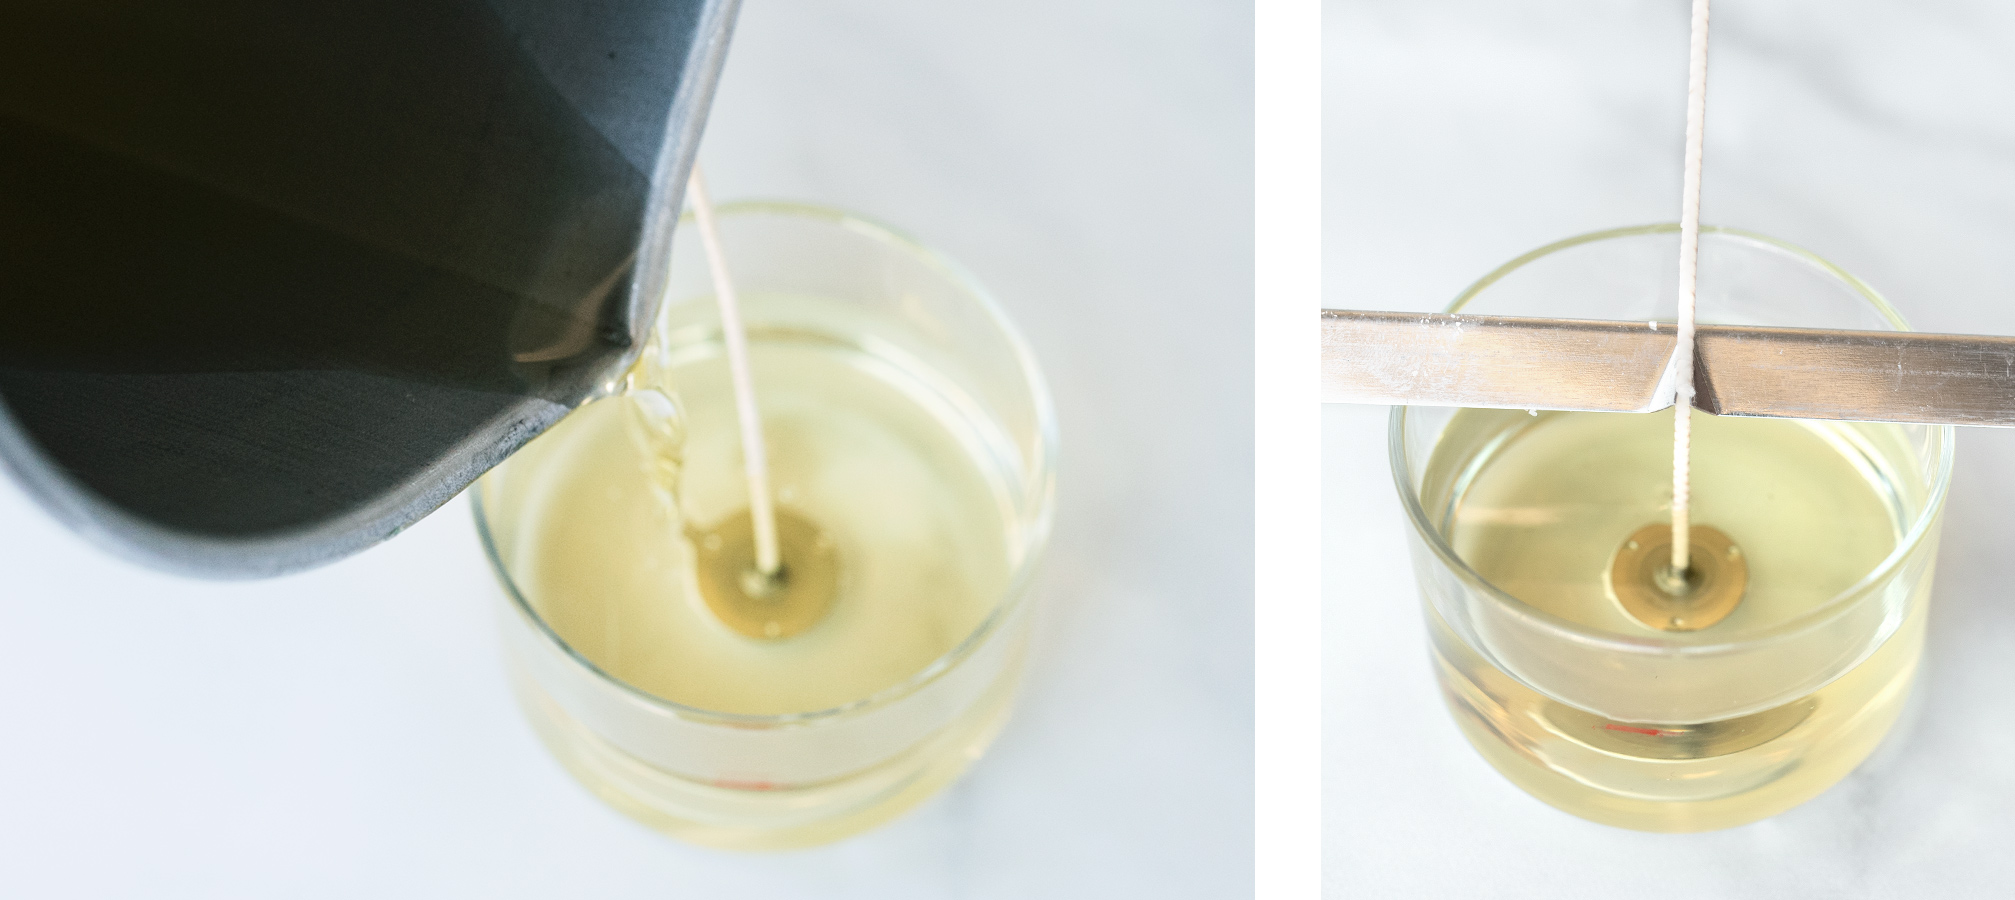
Wipe out each jar with a small amount of isopropyl alcohol and a clean paper towel. Using a wick sticker, center one Eco 10 wick in each jar.
Step 3: Weigh and add the fragrance oil
In a paper cup or glass beaker, weigh 0.9 oz. (26 g) of the Cactus Flower and Jade Fragrance Oil, which is about a 7% fragrance load. You can adjust up or down to your preference.
Once your wax has reached 185°F (85°C), add the fragrance oil. Stir gently for 2 minutes to ensure that the oil is fully incorporated with the wax.
Pour the wax into the Mini Tumblers when the wax cools to 150°F (65.6°C). Fill each tumbler to the fill line you indentified in Step 2. Secure wick with a wick bar and allow your candles to start cooling.
PART 3: Assemble the candle
Note: This part will require a little bit of candle babysitting to ensure the candle doesn't cool too much.
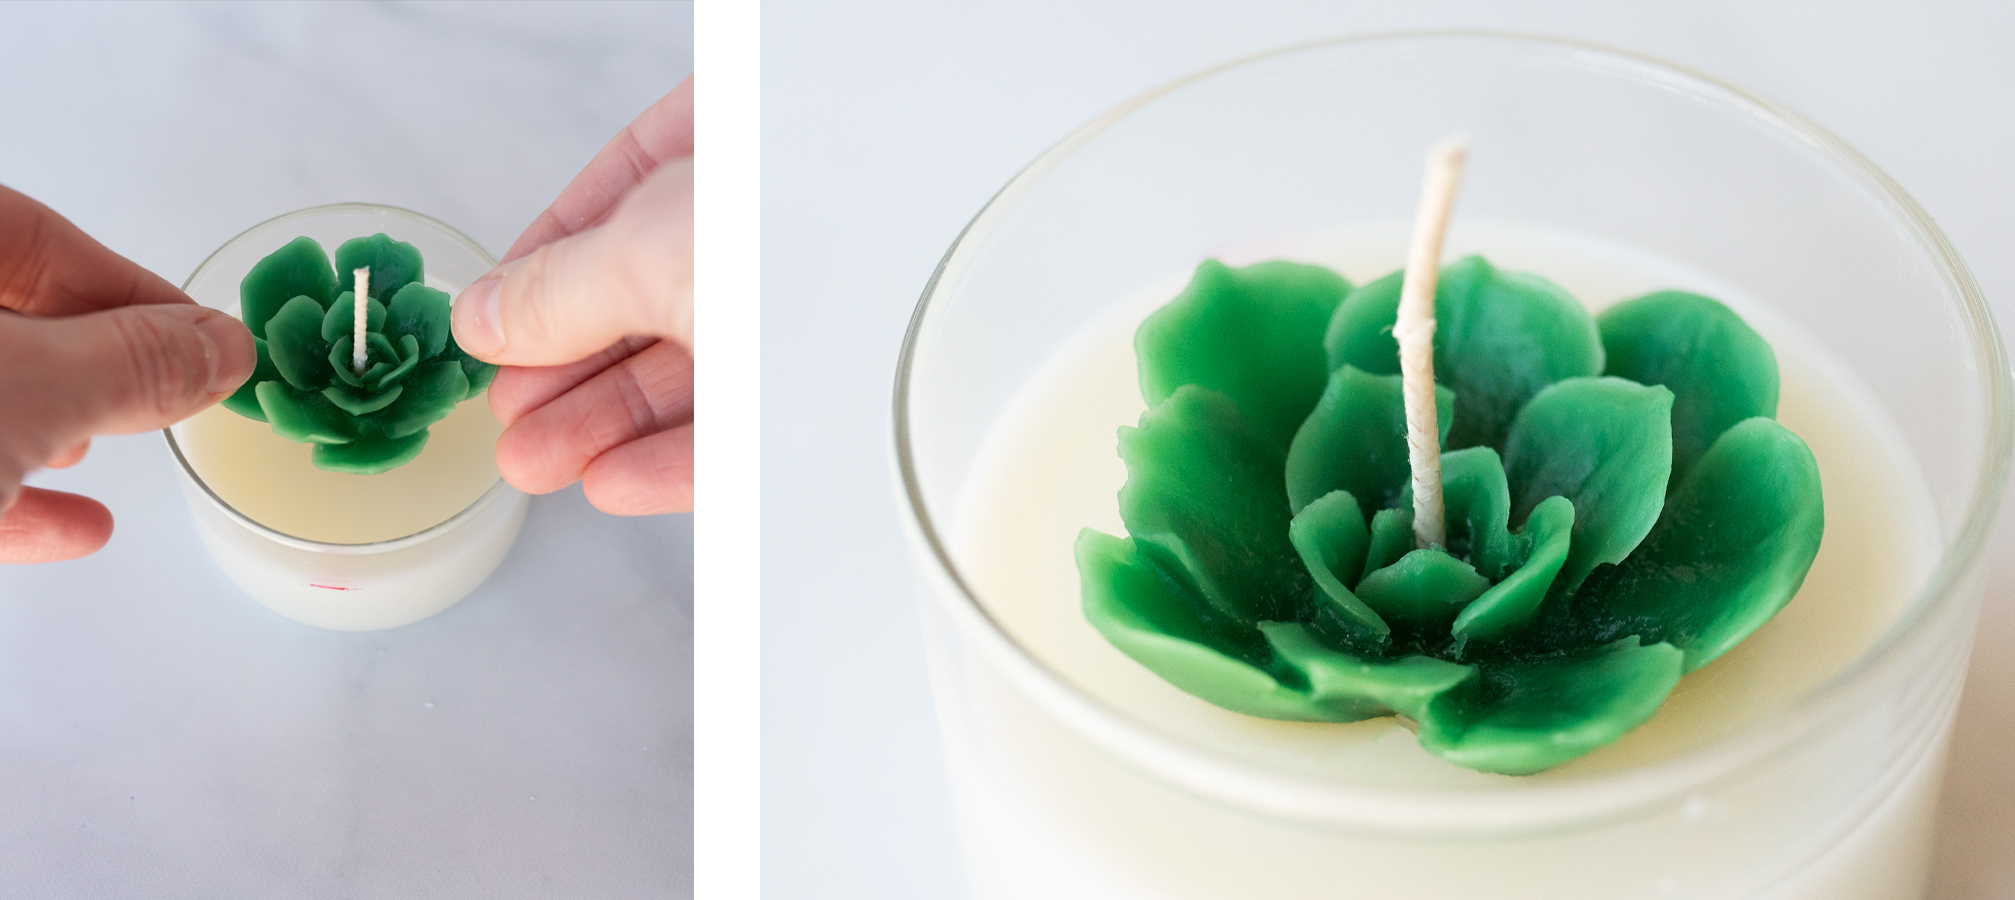
Step 1: Place the succulent embed
After you pour your candle bases, let the candle begin to cool naturally, but not fully. Be sure to keep an eye on your candle so it doesn't cool too much. The very top layer of the wax should still be liquid while the cooled wax below is able to support the weight of the embed. If the wax has started to form a skin, use the heat gun to quickly liquefy the wax.
Thread the wick through the embed and gently press the embed into place, allowing it to sink slightly into the wax. This will slightly displace the wax, so be careful not to push too hard or your candle surface will not be smooth. Repeat this process with the remaining embeds.
Step 2: Trim wick and ENJOY
Allow the candles to cool overnight or for at least 8 hours. Trim the wick to ¼”-½” (6-13 mm) and add a warning label to the bottom.

Show off your take on these succulent embed candles and all your handmade creations, with the CandleScience community by tagging us @CandleScience and using the #CandleScientist hashtag on Facebook, Twitter, and Instagram. We may feature you in our Stories or on our website!