How to make marble candles
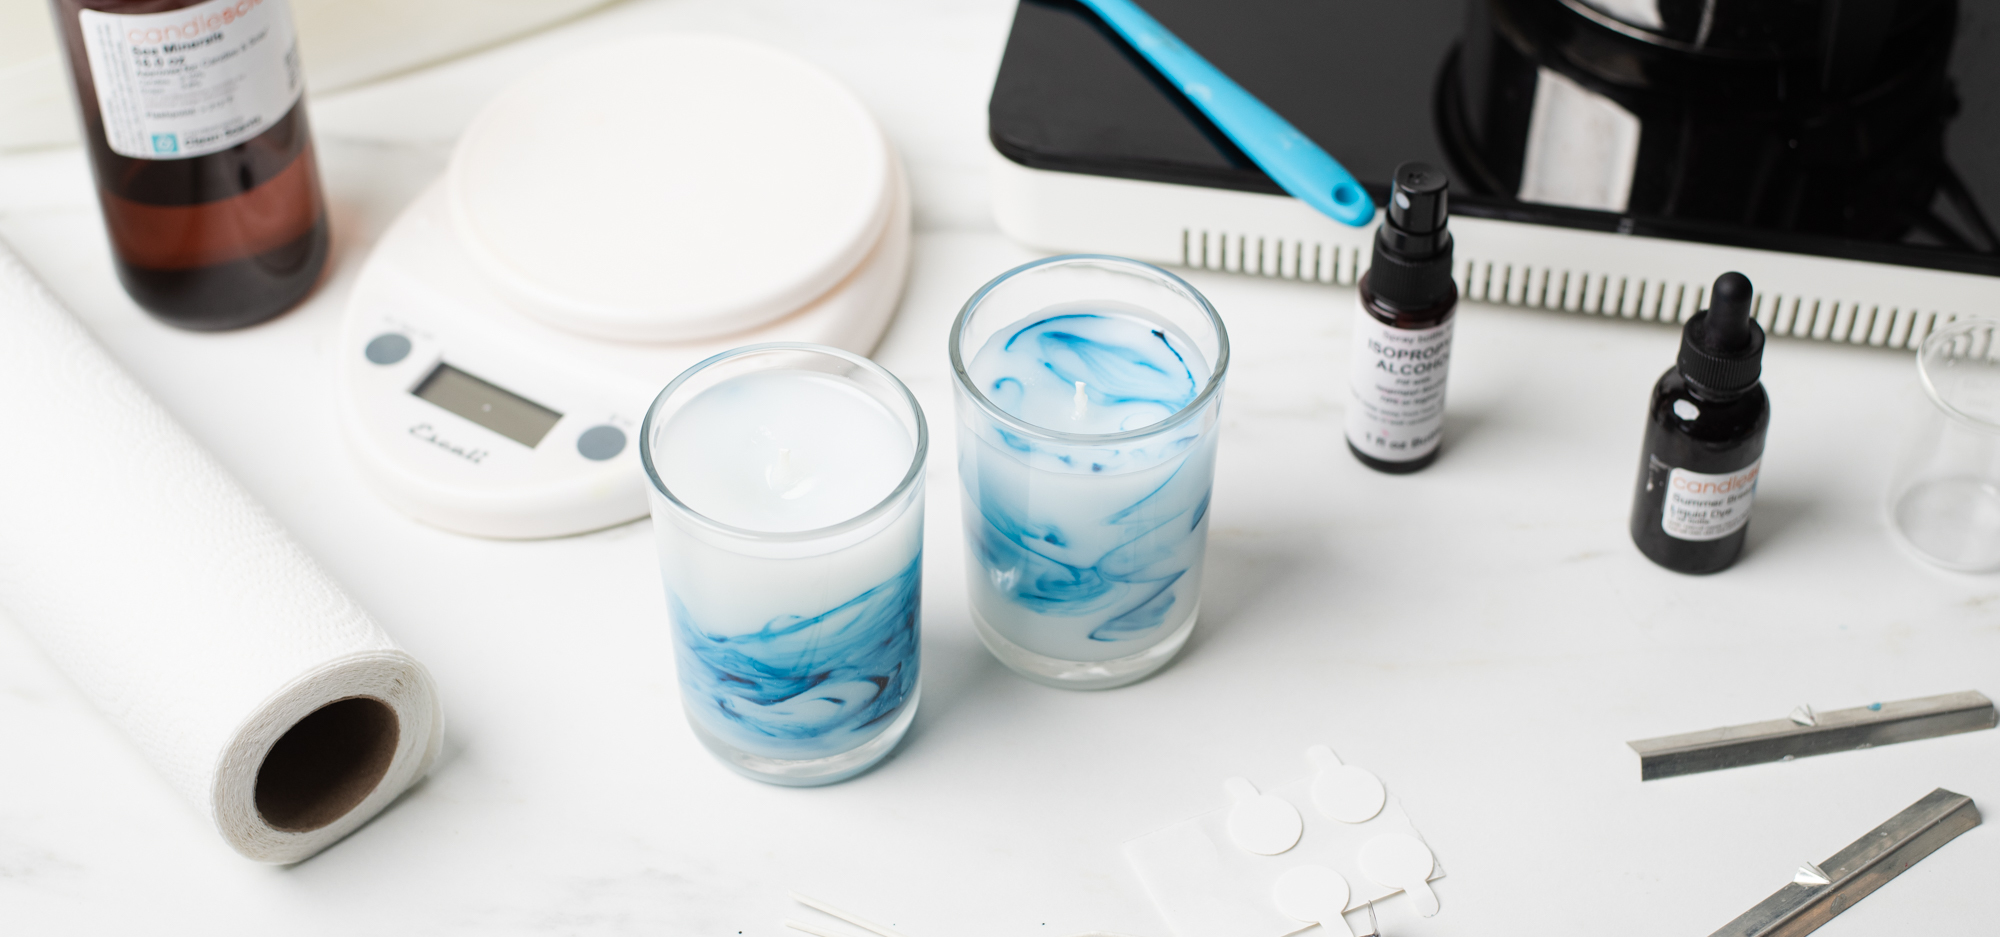
Whether you call it marble, tie-dye, swirl, or galaxy, this effect is a fun way to add an artsy touch to your candles—without relying on your containers to do the talking. The marbling technique adds swirls and streaks of color directly to the candle wax.
Marble candles can feature high contrast, brush-like lines of color, or a more subtle, smoked-out effect. No two marble candles look the same, which is ultra appealing to shoppers who prefer artisan and hand-made crafts. Read on for a how-to guide on creating beautiful marble candles with unique designs and patterns.
There are endless ways to customize marble candles, including using different colors and patterns, using multiple colors, placing the marble effect in different areas of the container, and using various techniques.
This step-by-step guide on making marble candles walks you through two different marbling techniques: the swirling method and the painting method. If you've attempted marbling candles before, then you know it can be a bit of a trial-and-error process. Our tutorial speeds up that process by showing you the techniques we've tested and found to be the most successful.
Ready to make your own DIY marble candles? Gather the items needed, and let the steps below inspire your creativity. If you're using fragrance oil to enhance your marble candles, consider pairing a thematic scent with your color selection.
Additional items needed:
- Paper towels
- Isopropyl rubbing alcohol
- Stirring spatula
- Scissors or wick trimmer
- Wooden skewers
Directions:
Prepare your candle jars
We will use a total of four candle jars to show both techniques.
Wipe out four Puebla Tumbler Jars with a small amount of isopropyl alcohol and a clean paper towel. Using a wick sticker, center one LX 18 Wick in each jar.
Technique 1: Swirling method
This technique is done by adding dye to a small amount of wax at the bottom of your jar and then slowly rolling it around the sides, allowing you to capture vibrant, organic swirls.
How much wax and dye you begin with will affect the finished look of the candle so feel free to experiment with different amounts and colors.
It can be a little difficult to control the pattern of the dye with this technique, but that adds to the fun and each candle will be unique!
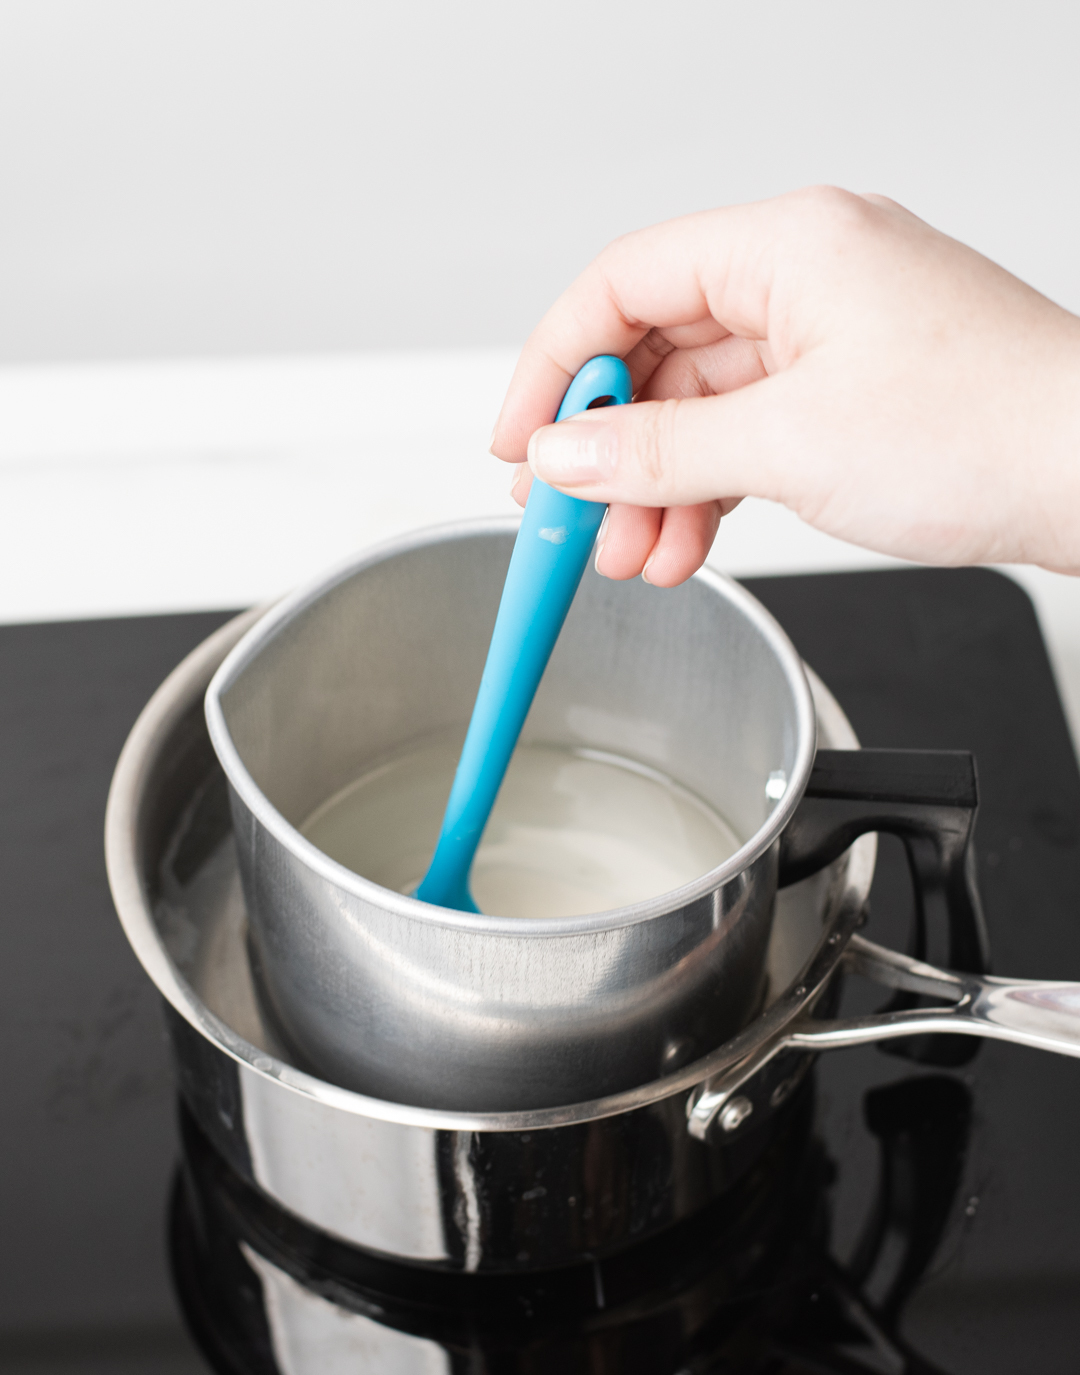
Step 1: Weigh and melt wax
Note: We melted the total wax amount we calculated for our jar since the small amount needed for the marble effect would have been difficult to measure.
Place the pouring pitcher on your digital scale and tare the weight. Weigh 14 oz (396.8 g) of the IGI 4627 Comfort Blend Wax in the pouring pitcher.
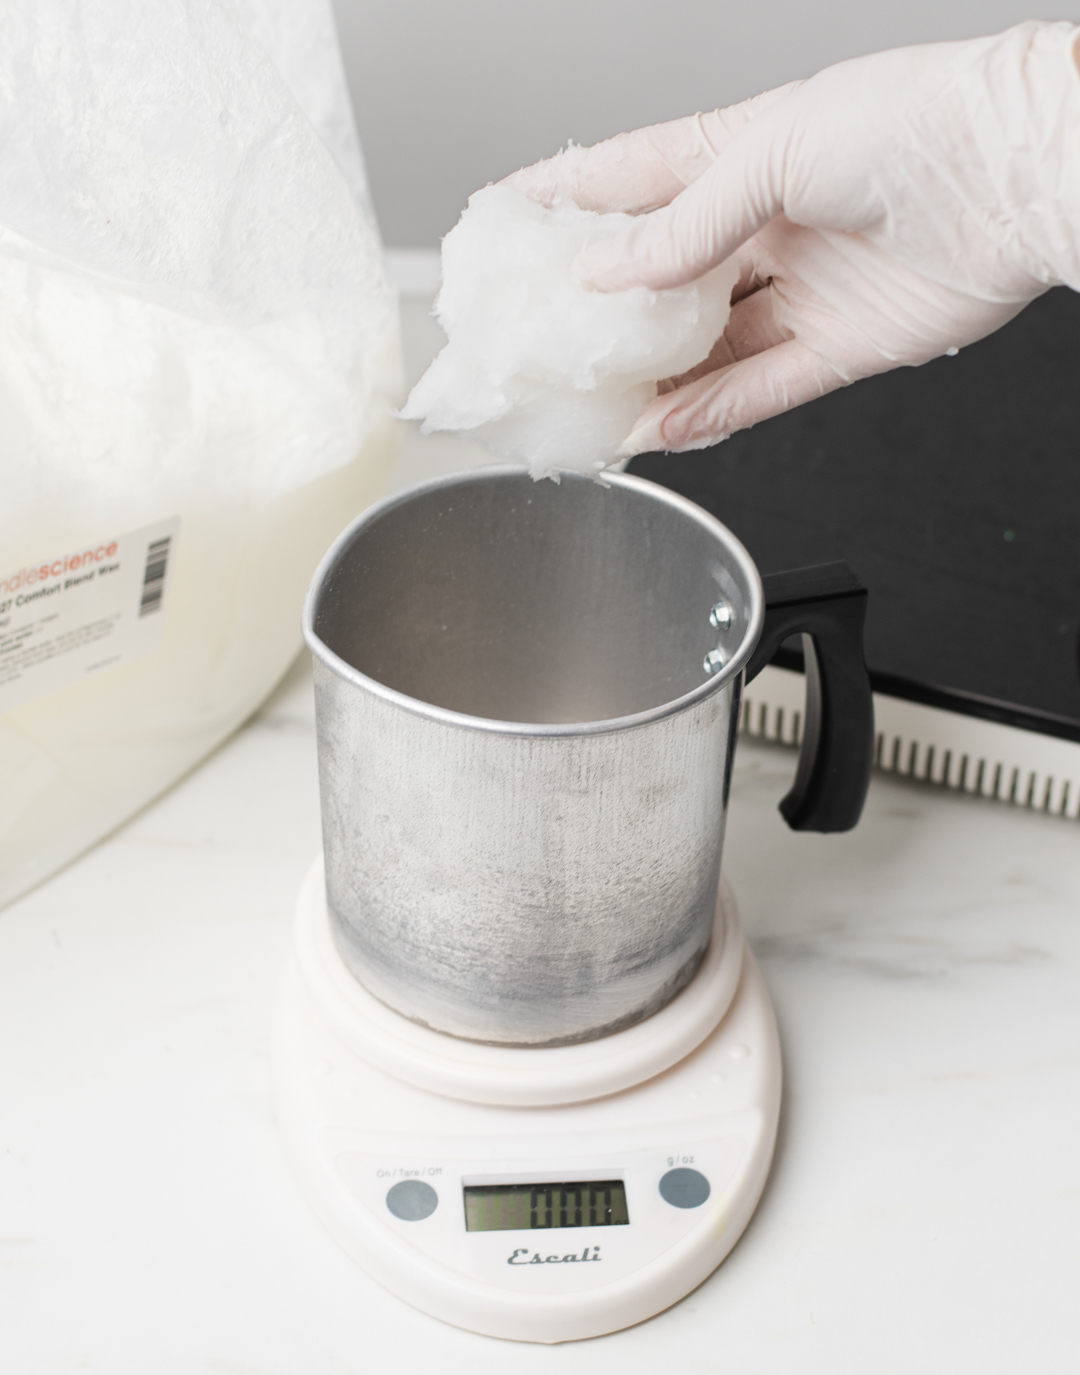
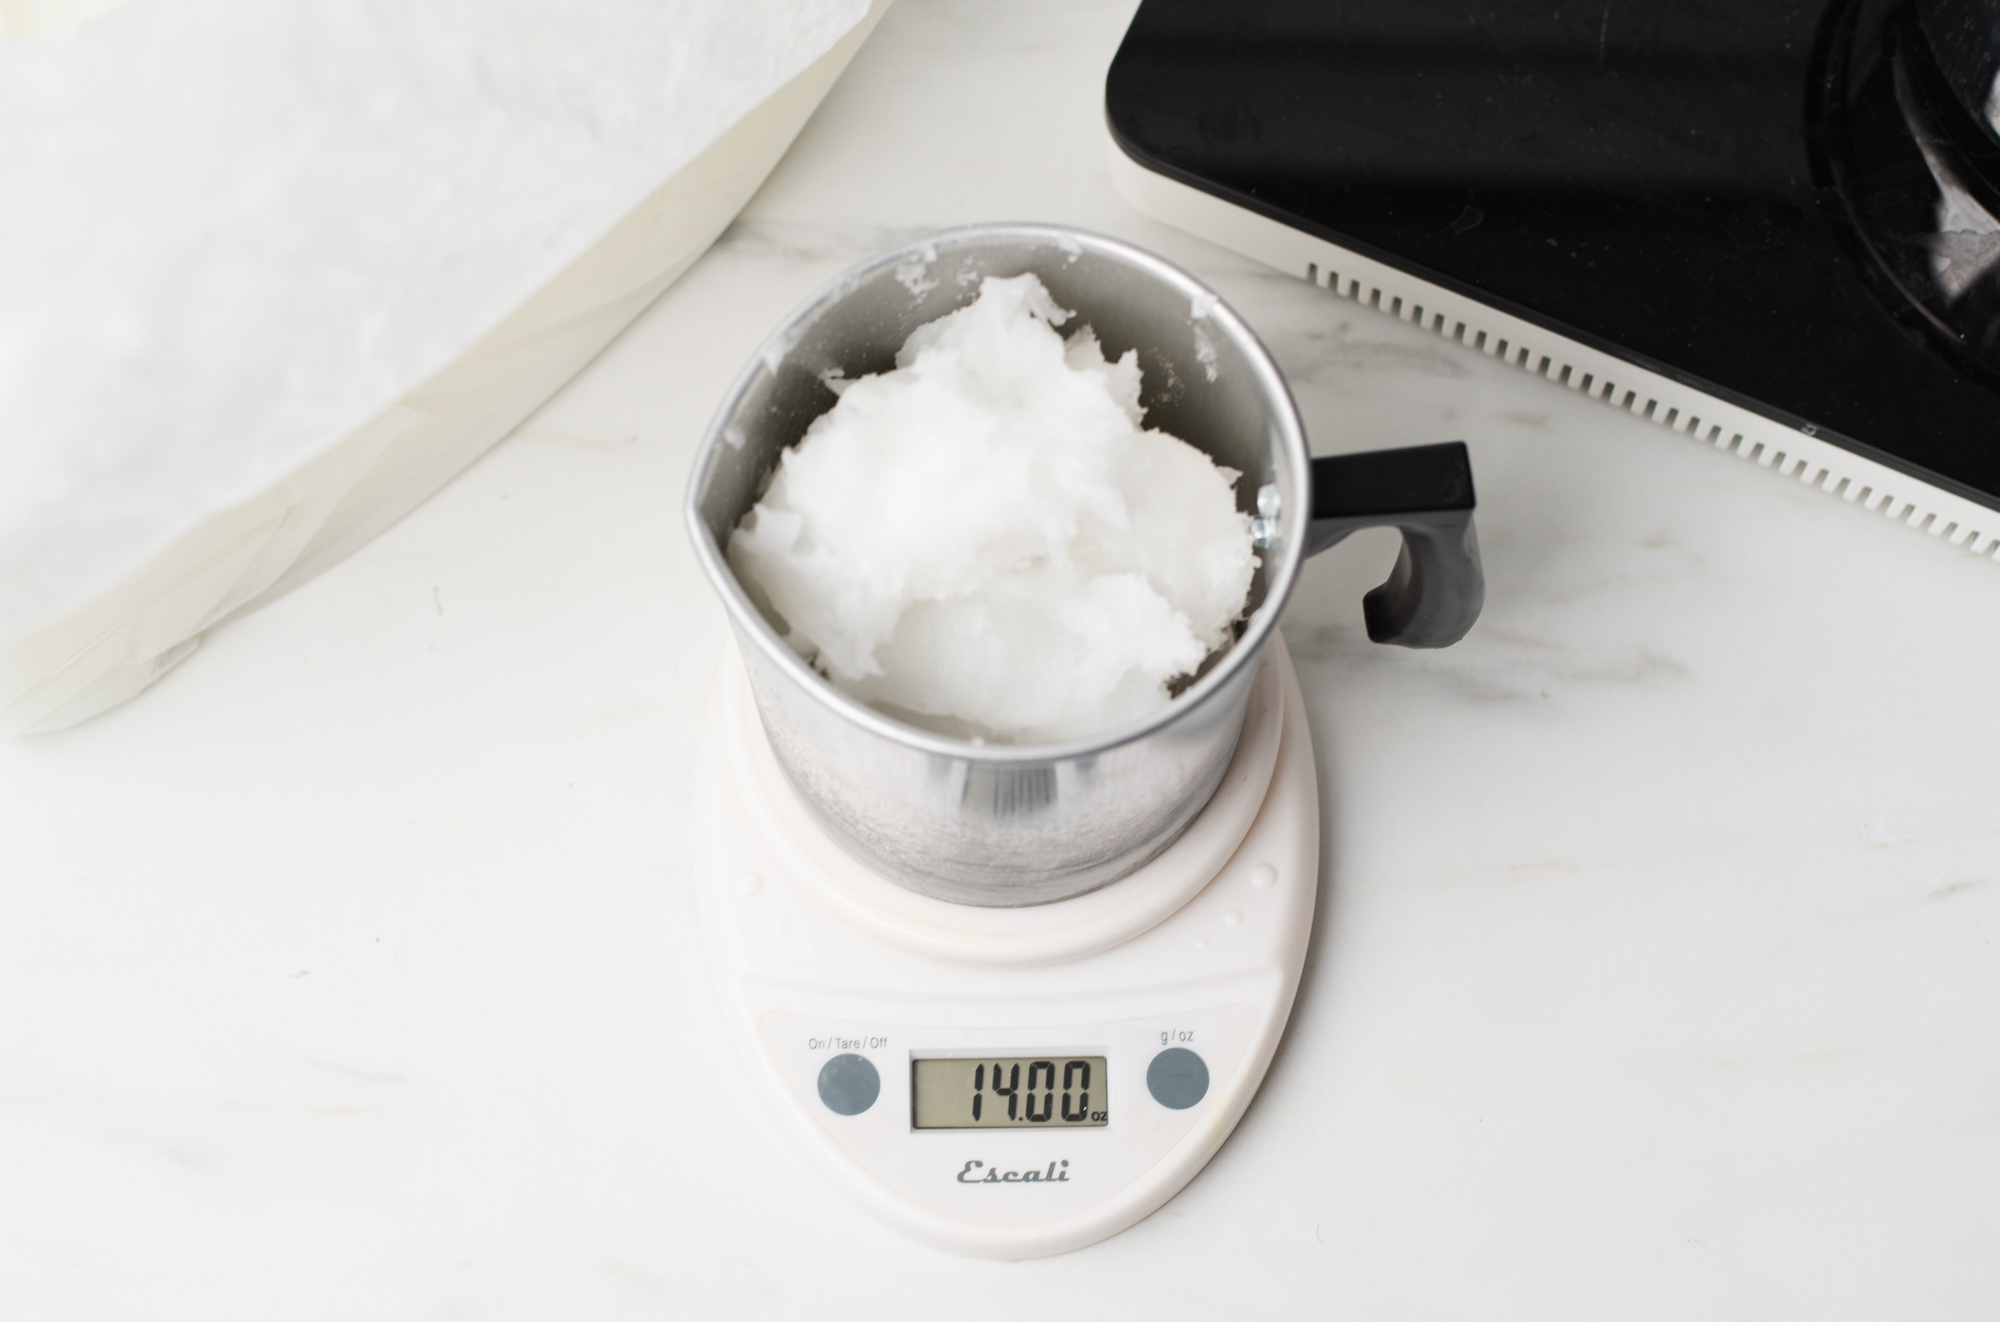
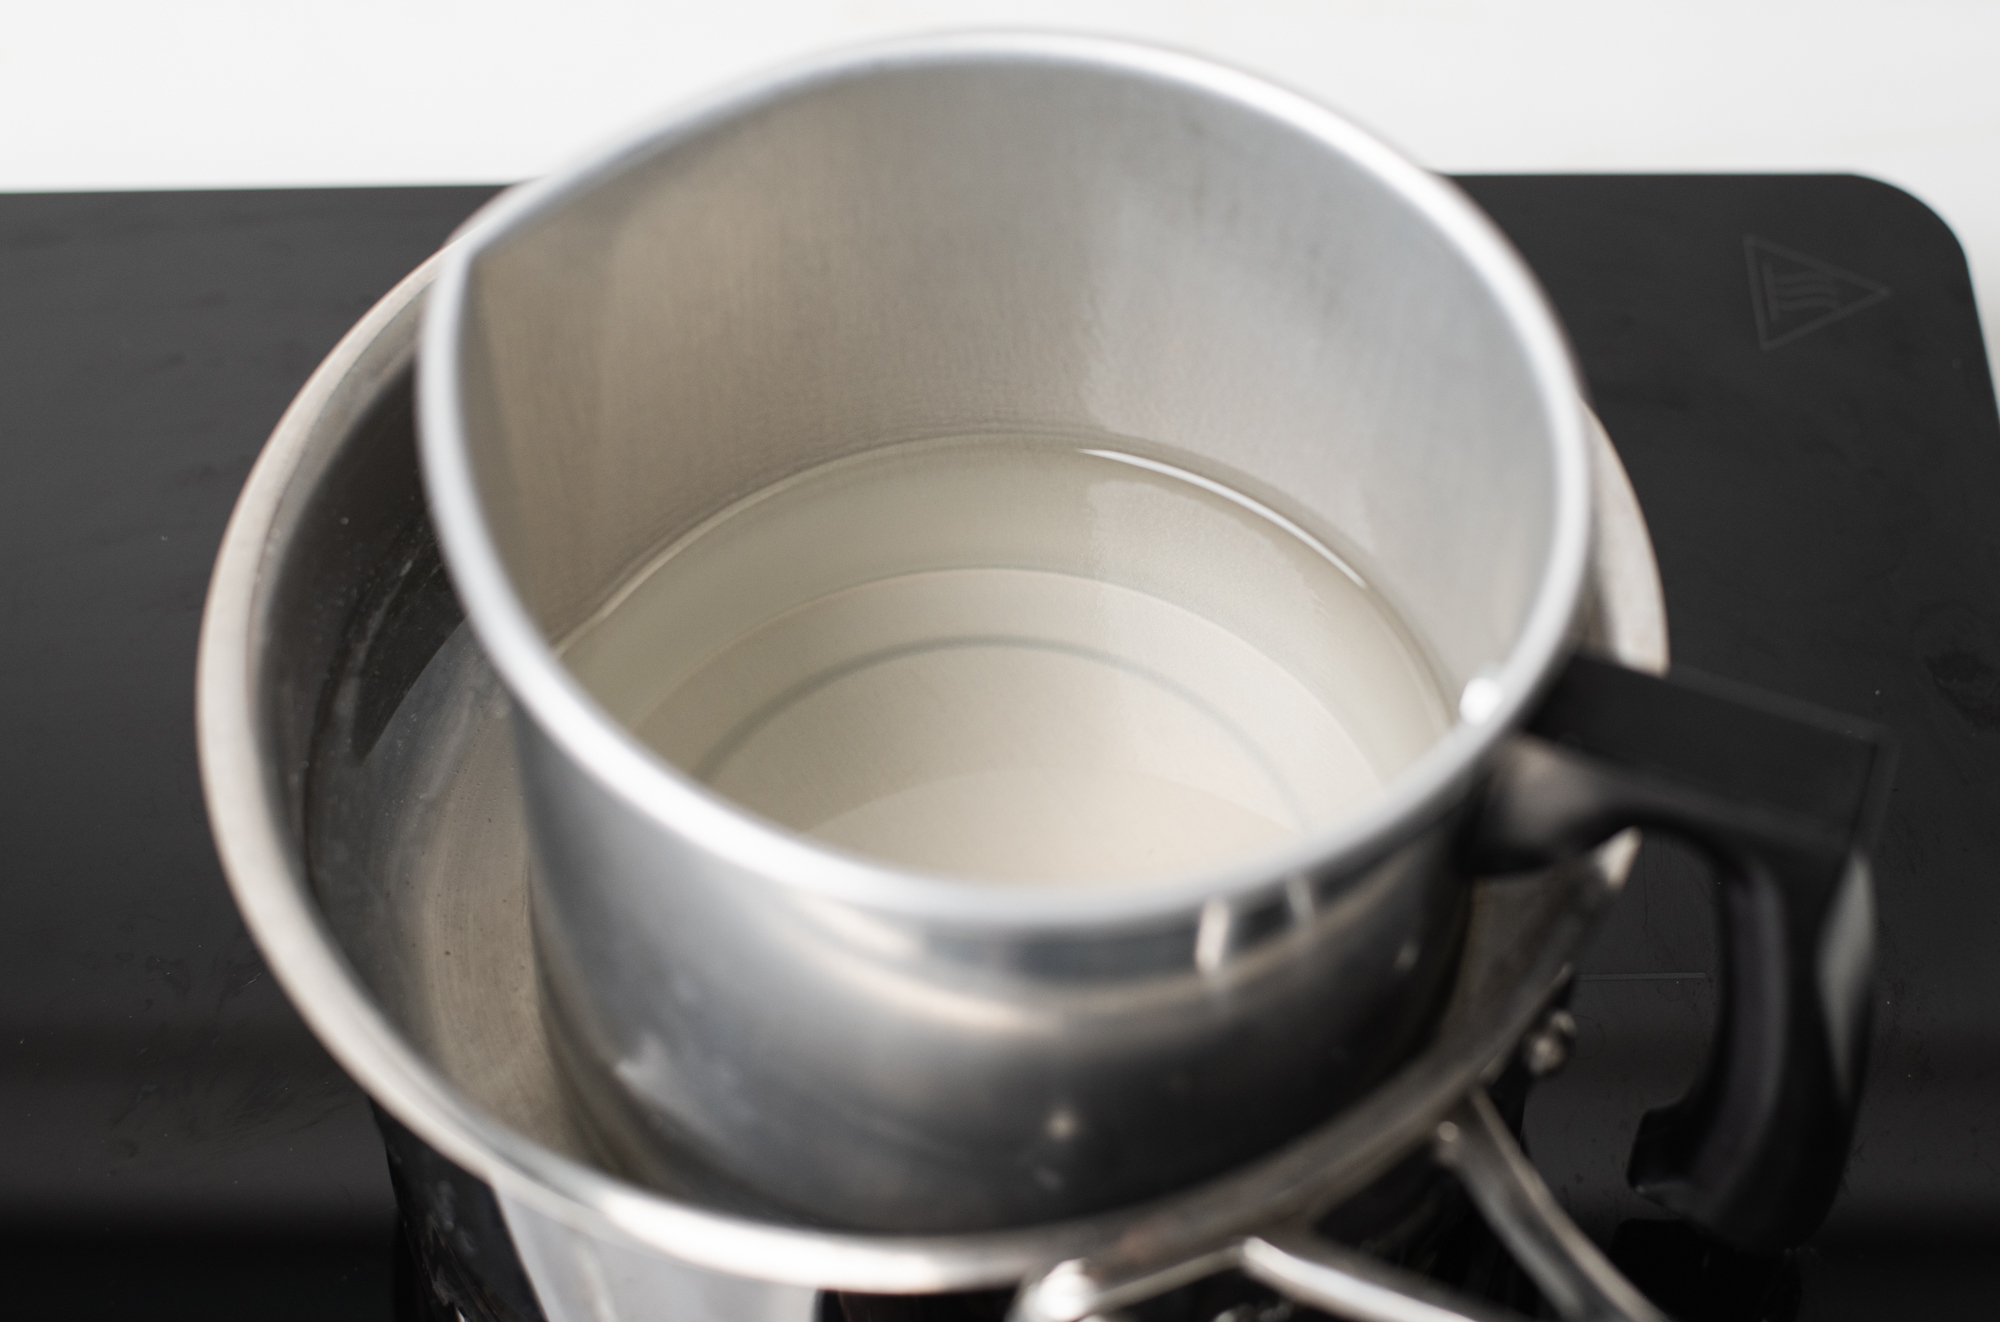
Melt the wax with a double boiler or on a hot plate.
Once your wax has reached 180°F (82.2°C), the recommended pour temperature for IGI 4627, pour a small amount wax into the bottom of the candle container.
You can experiment with how much wax to start with, but you’ll want just enough to coat the inside of your container without too much overlapping.

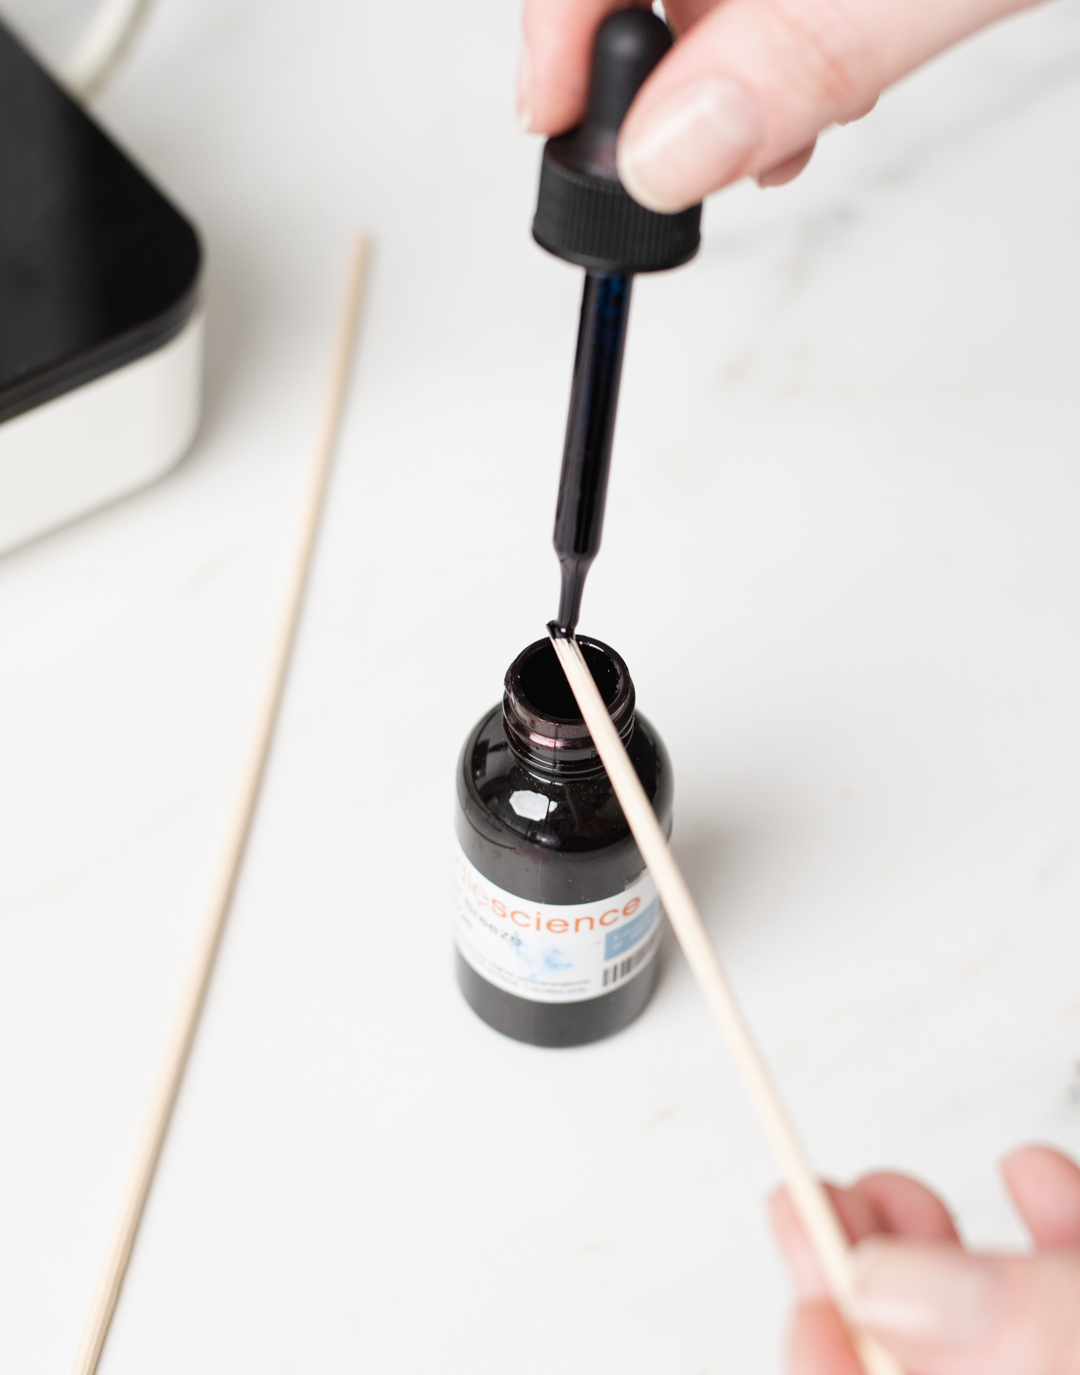
Step 2: Add the dye
The wax will begin to cool very quickly. Once it starts to appear slightly cloudy, use a skewer to add the Summer Breeze Liquid Candle Dye. Be careful not to over mix it.

.jpg)
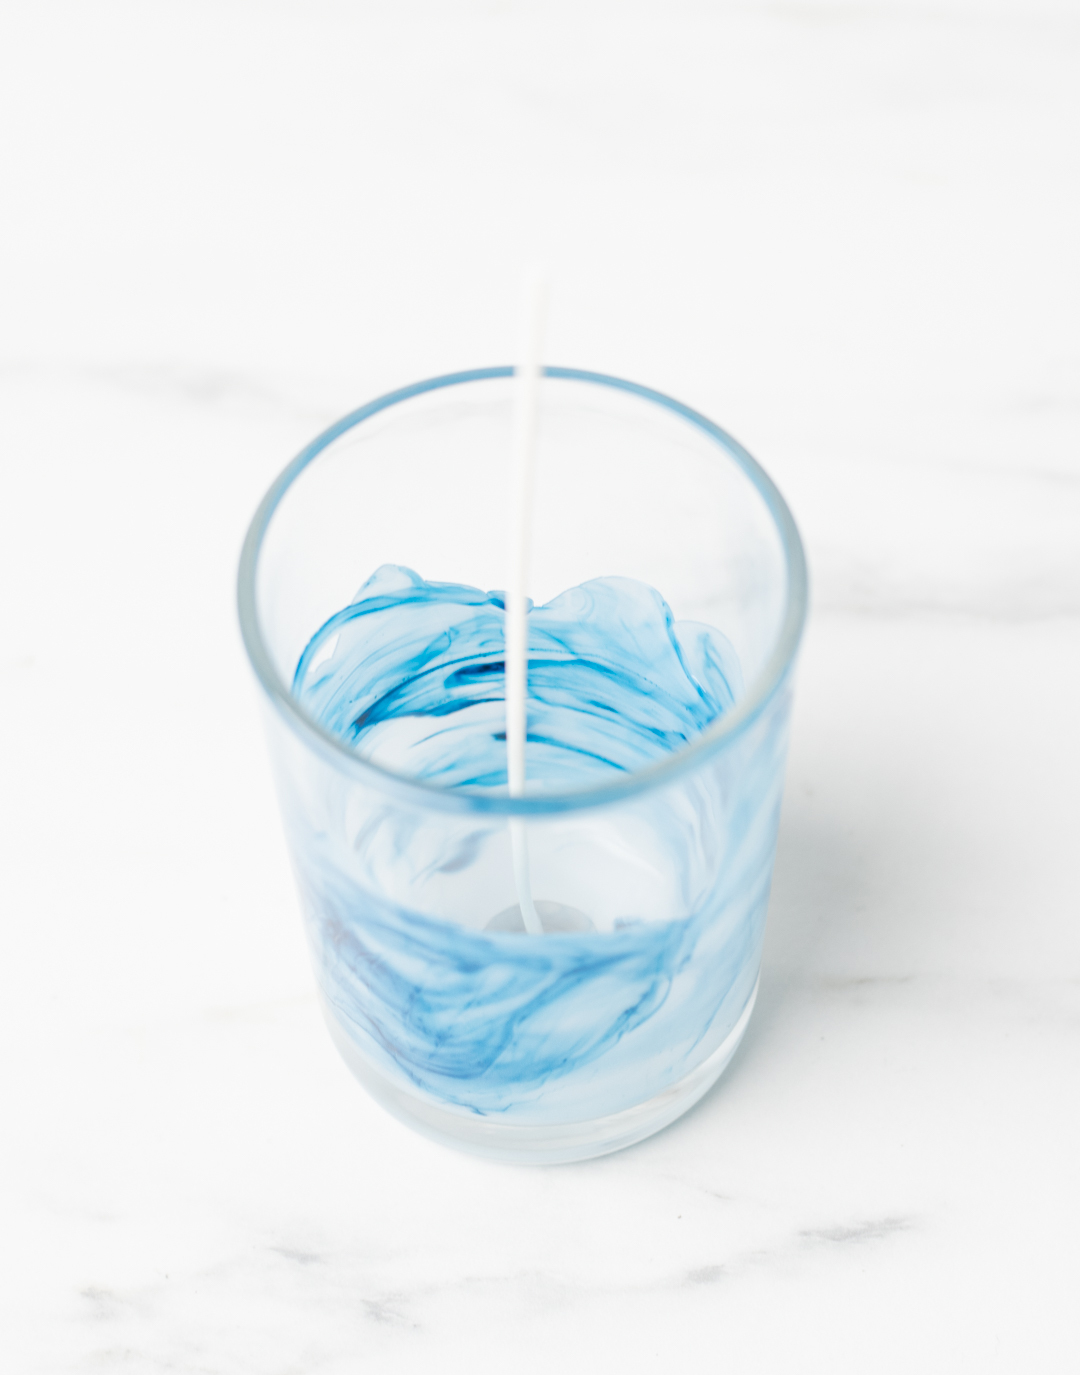
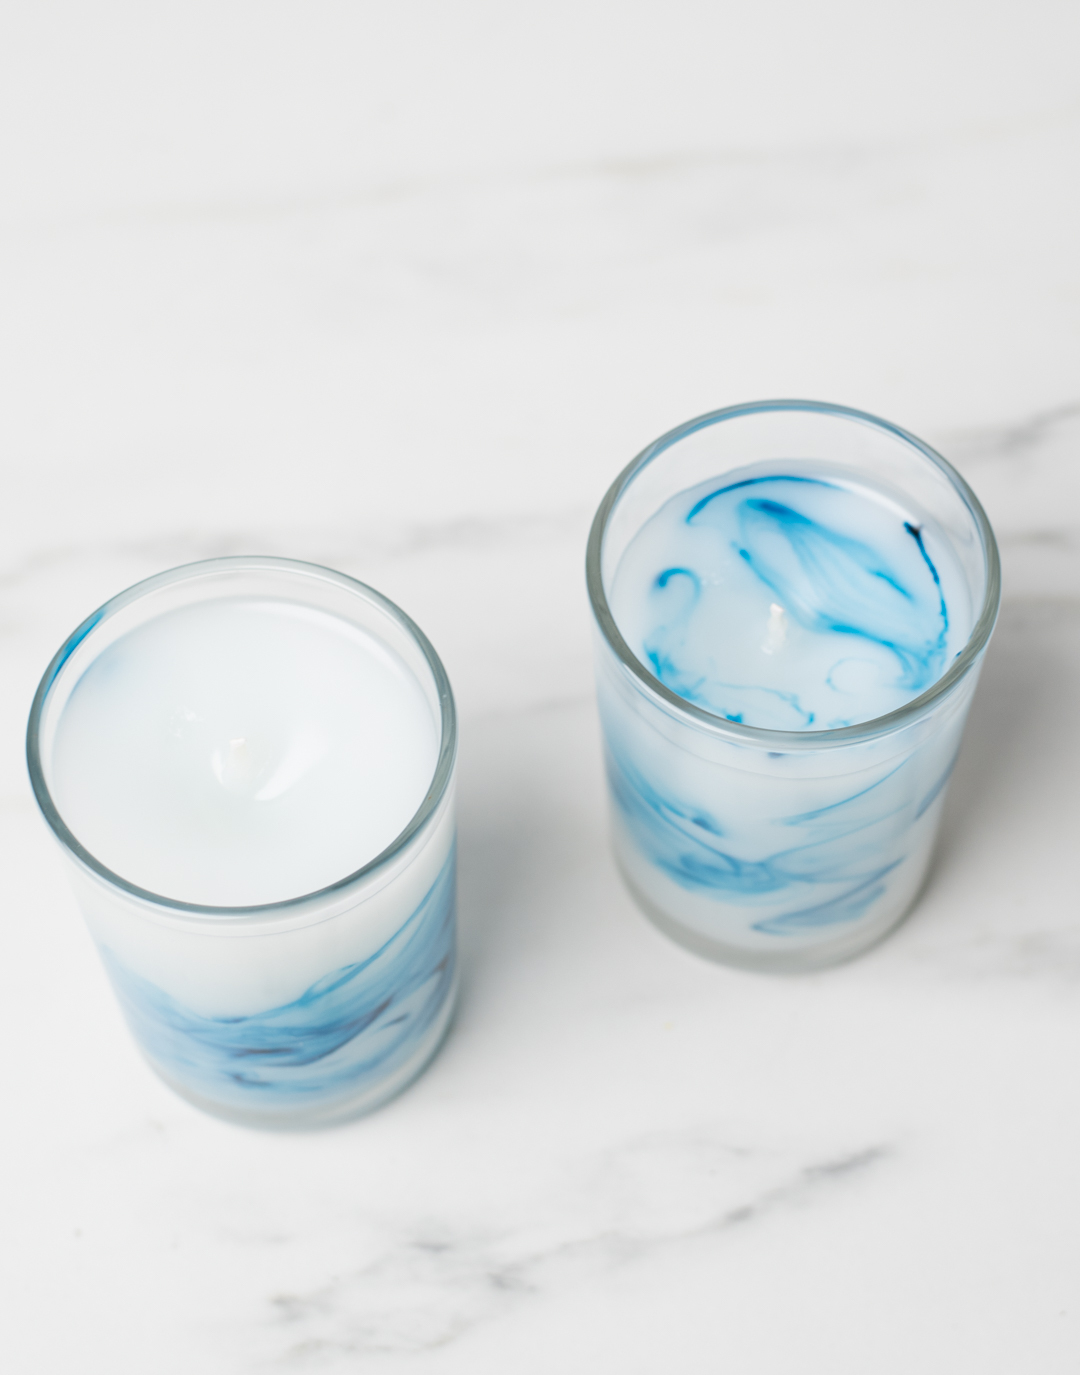
Step 3: Create the marble effect
Rotate the jar slowly to coat the sides with the wax and dye. The dye should begin to leave distinct patterns on the glass. Allow the wax to cool completely.
Note: If the wax fully changes to the color of the dye, the dye was likely added while the wax was too hot.

Step 4: Weigh and add fragrance oil
In a glass container, weigh 1.12 oz (31.8 g) of the Sel de Mer fragrance oil, which is about an 8% fragrance load.
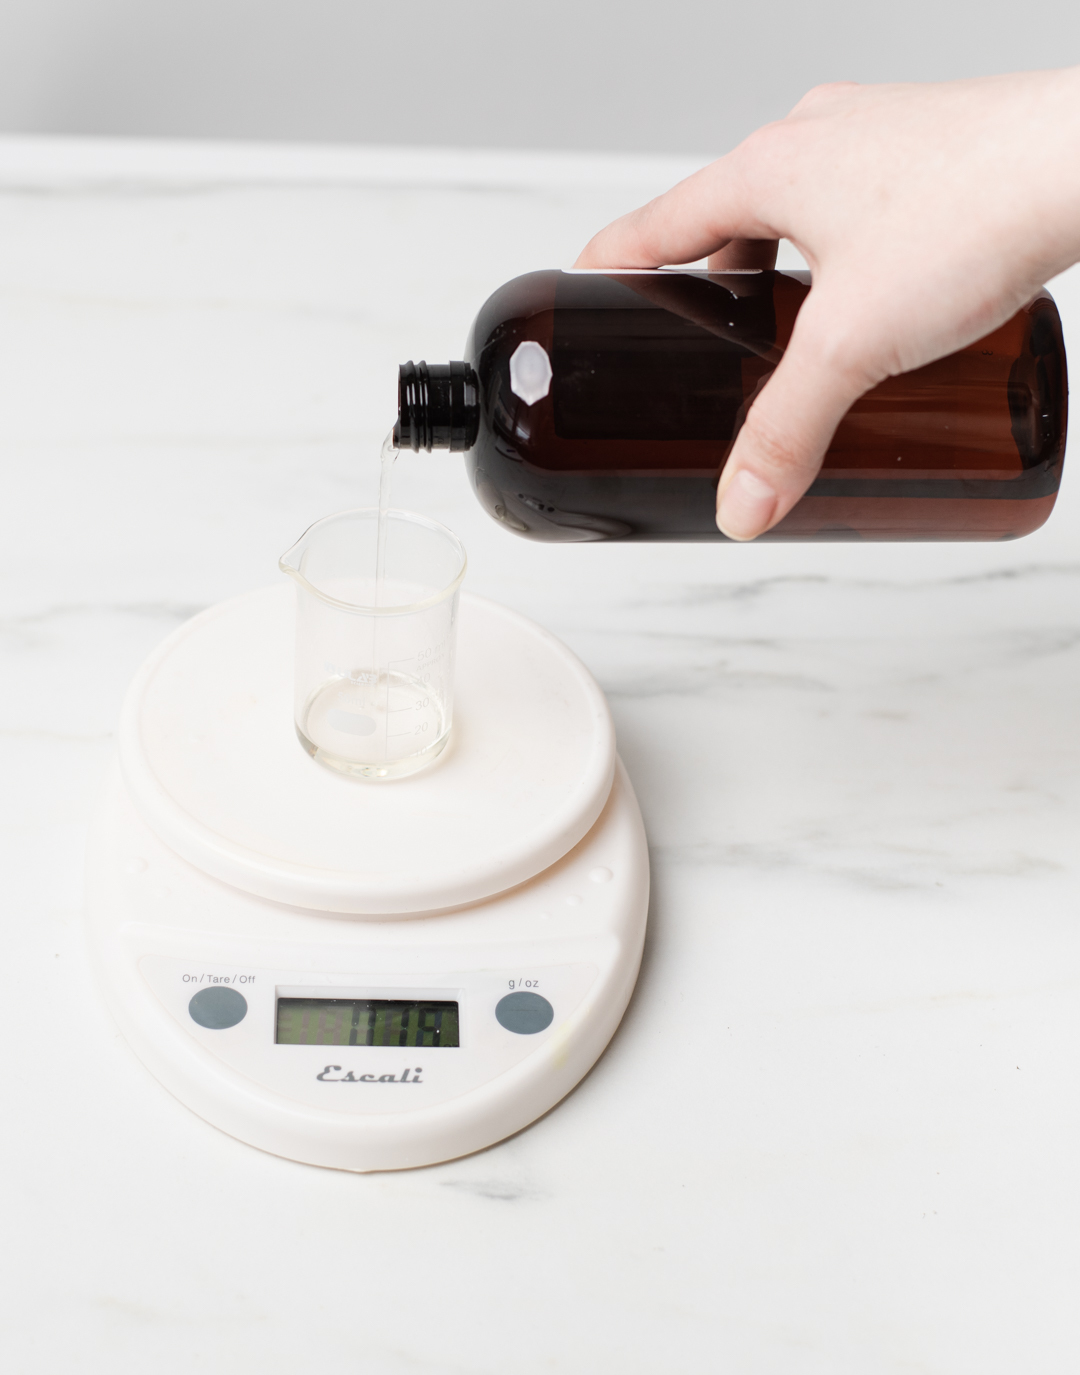
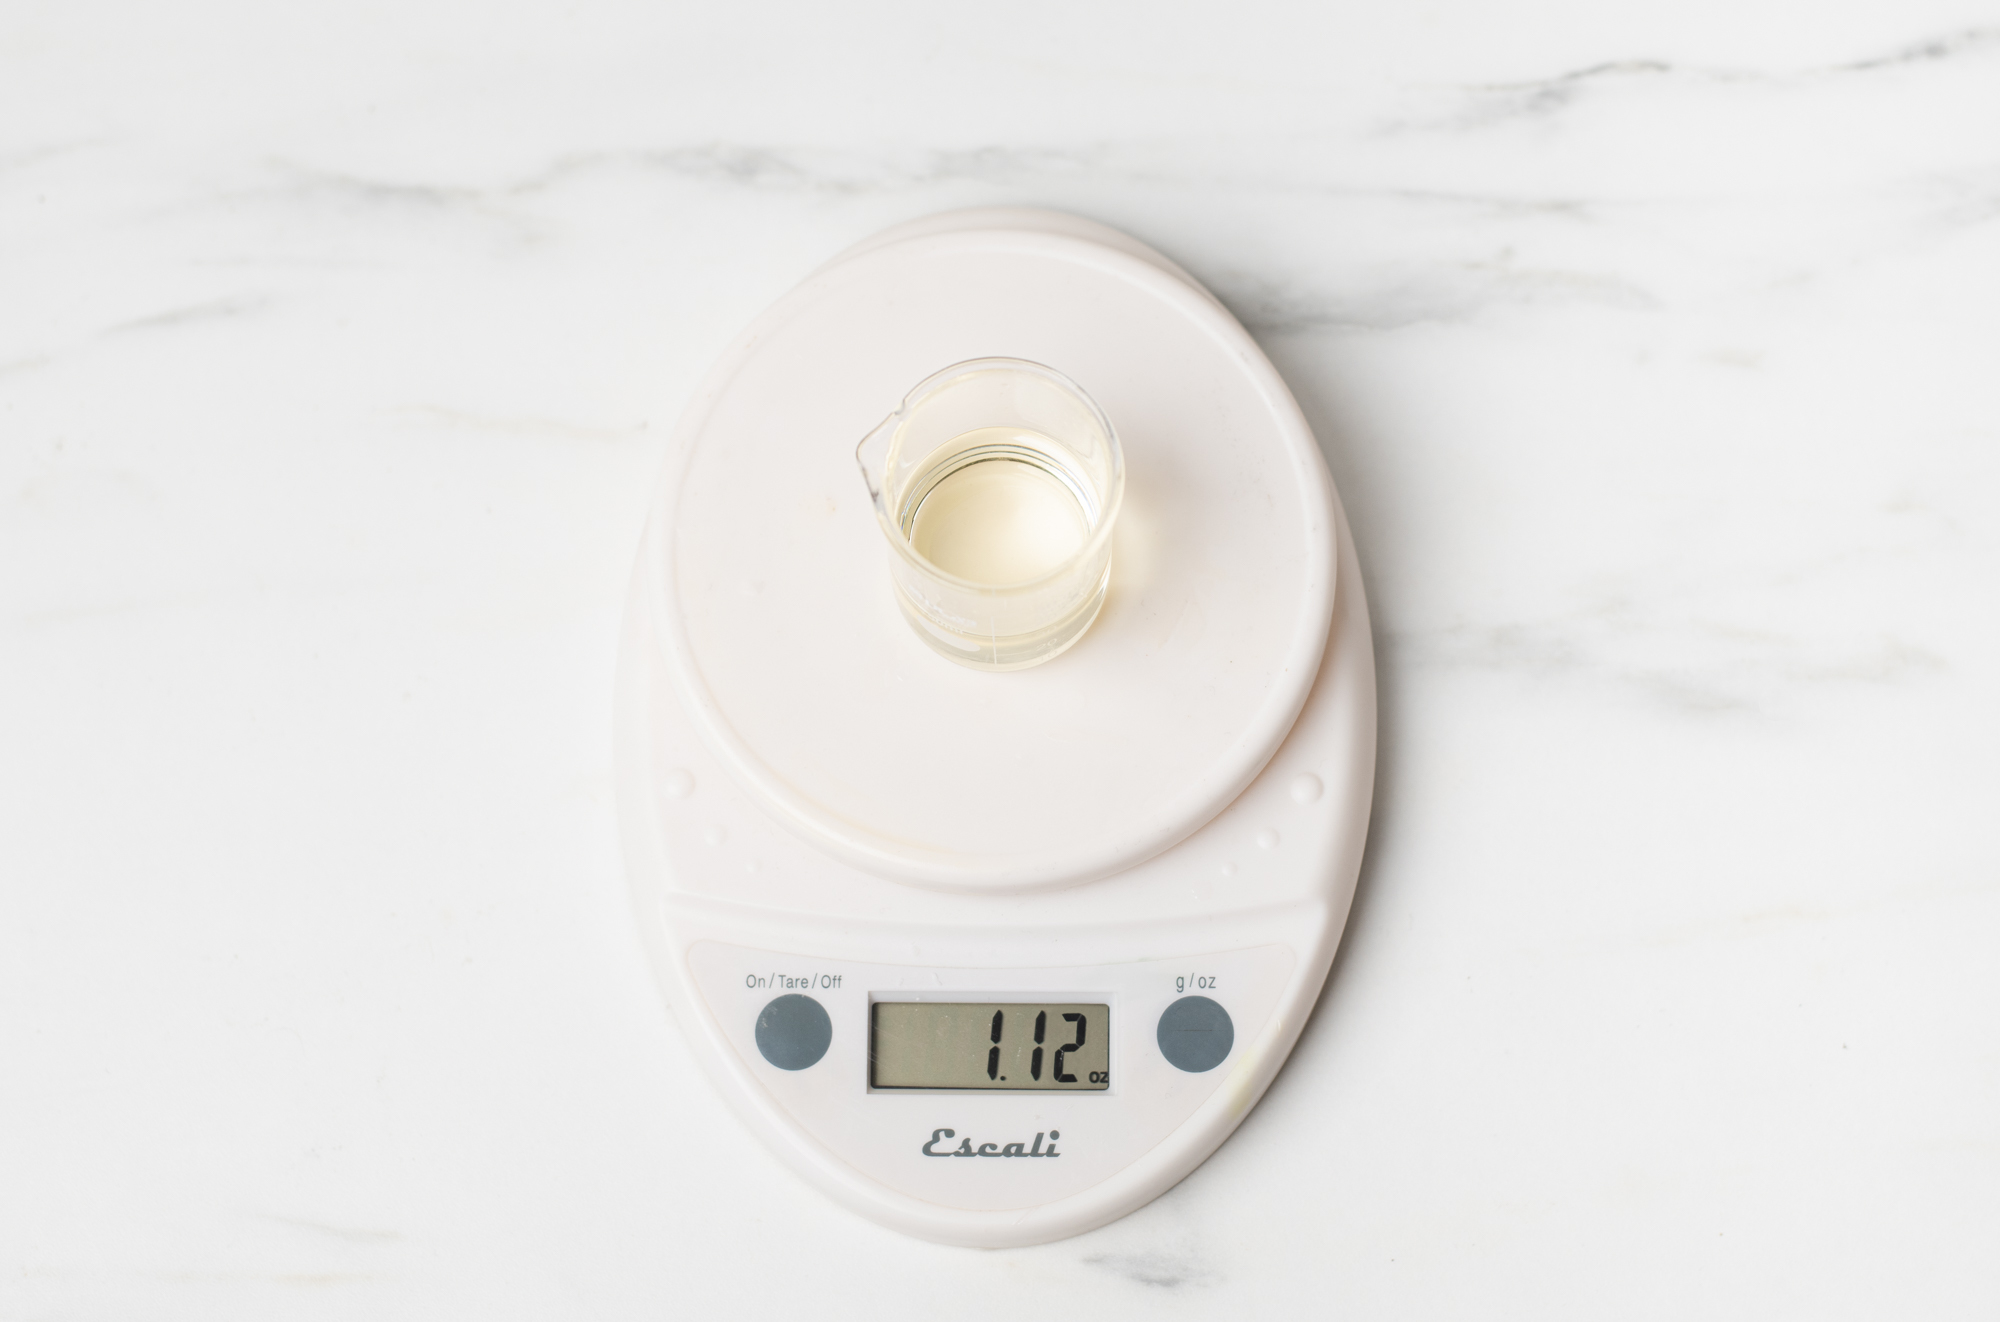
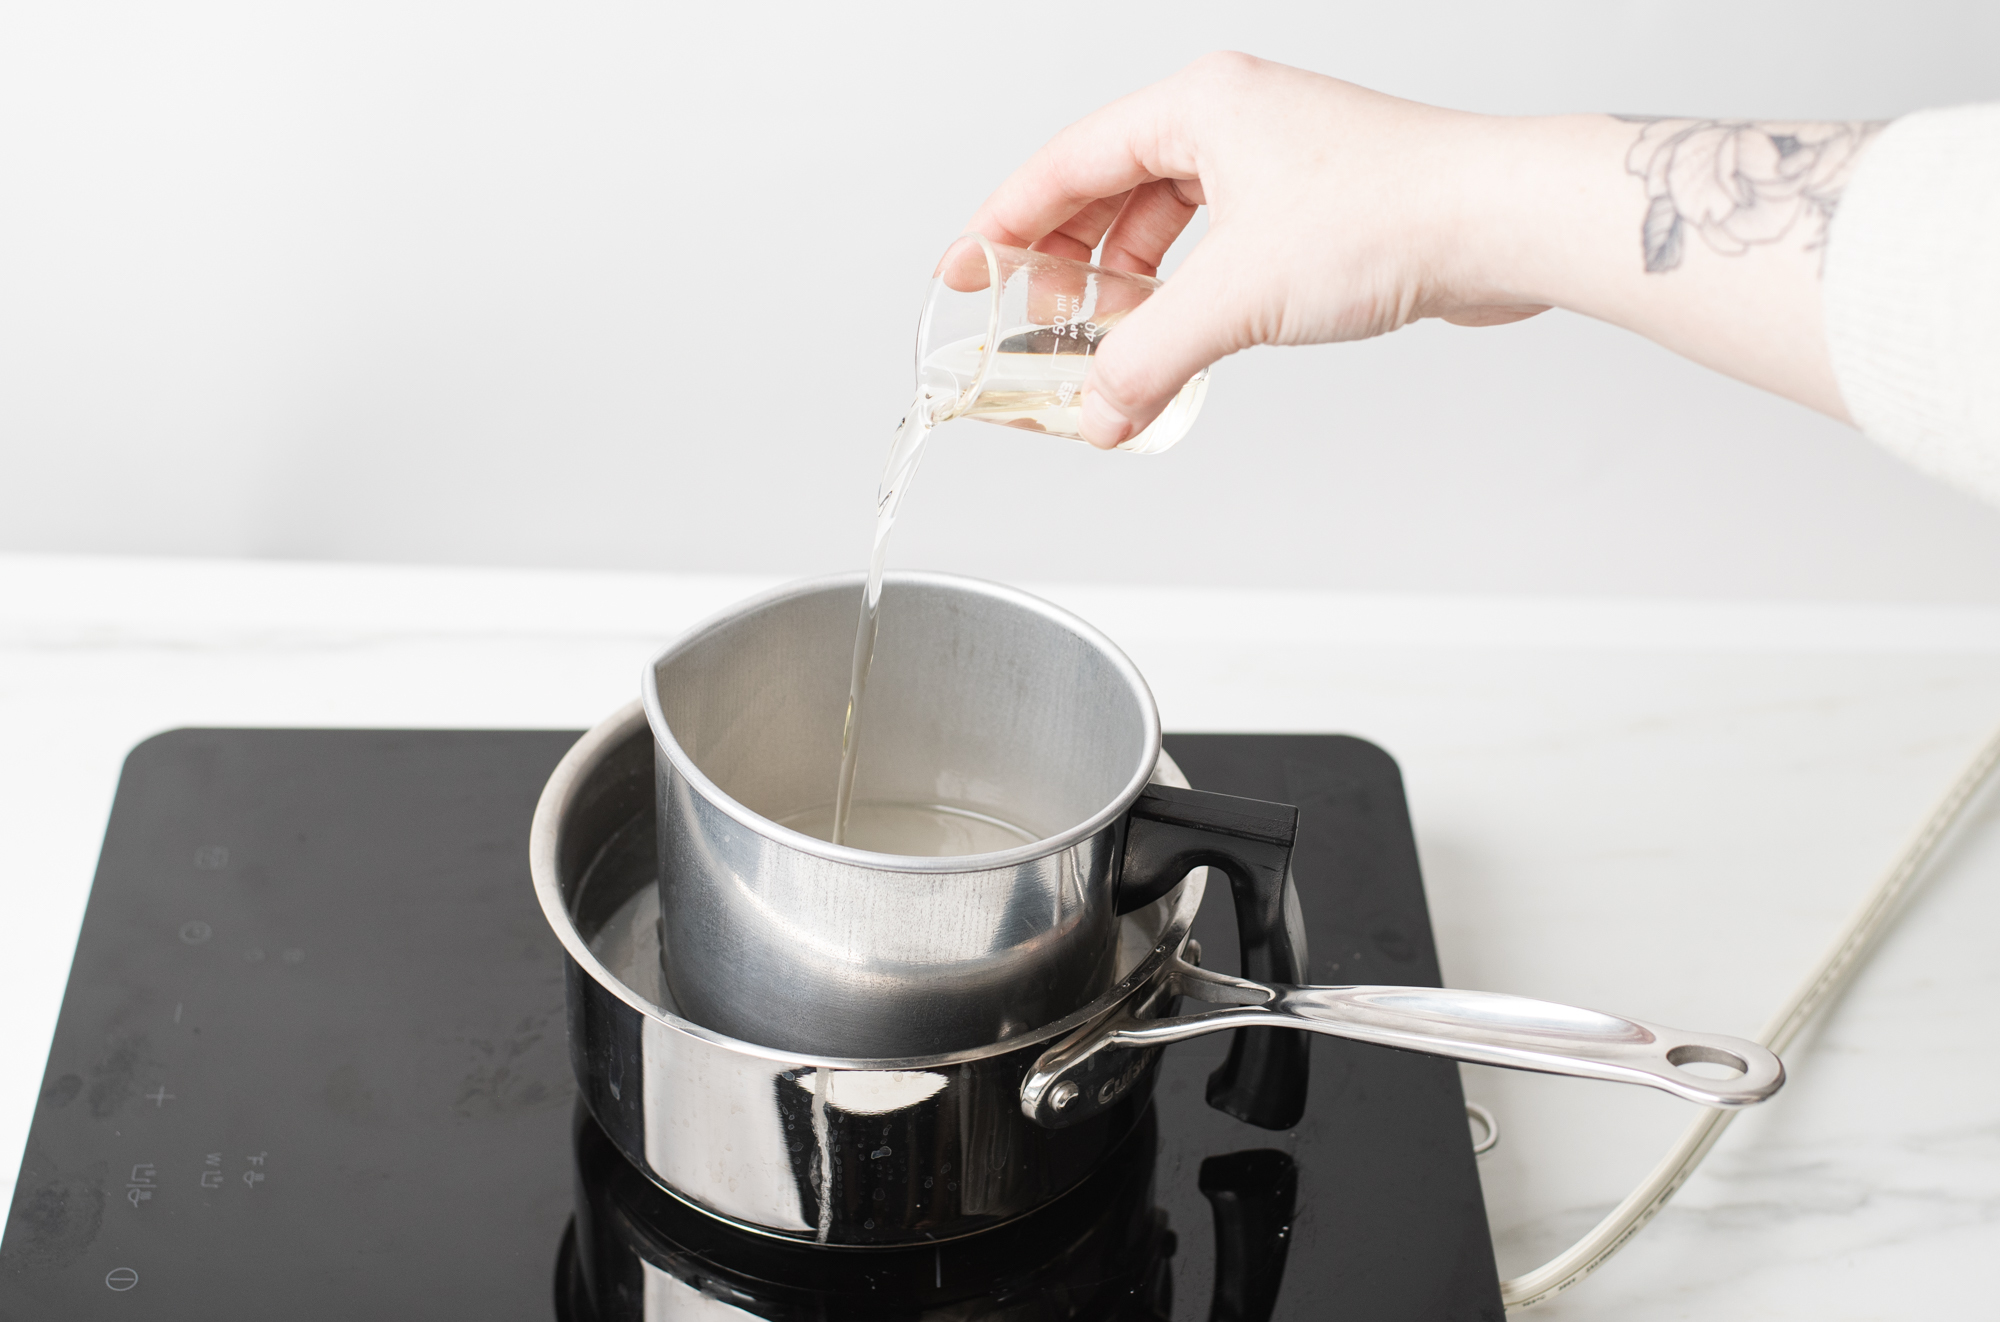
Place your pouring pitcher back into the double boiler and heat until the wax has reached 185°F (85°C), add the fragrance oil. Stir gently for 2 minutes to ensure that the oil is able to bind with the wax.
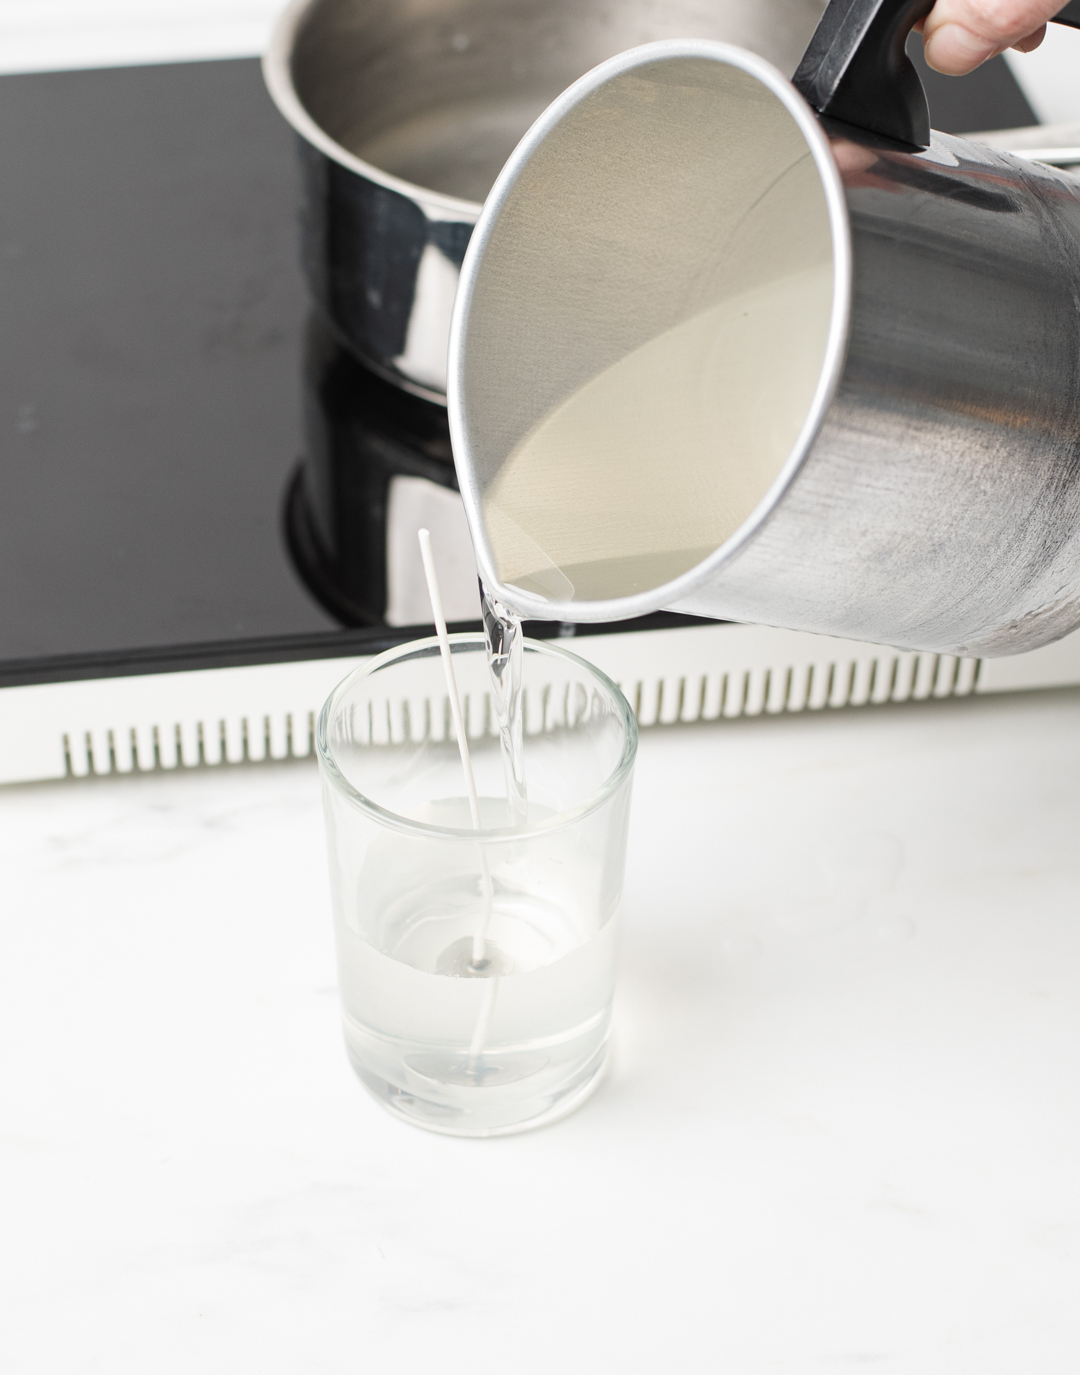
Step 5: Pour the wax
Allow the wax to cool a bit below the recommended pouring temperature to be sure not to reactivate the dye. We poured ours at 160°F (71°C). Carefully pour the wax into the container making sure not to pour it directly on the sides where your marbled wax has cooled.
Note: If the poured wax picks up the dye color, your wax was too hot. Pouring at a cooler temp will help keep the dye from bleeding.
Add a wick bar and allow your candles to cool completely.

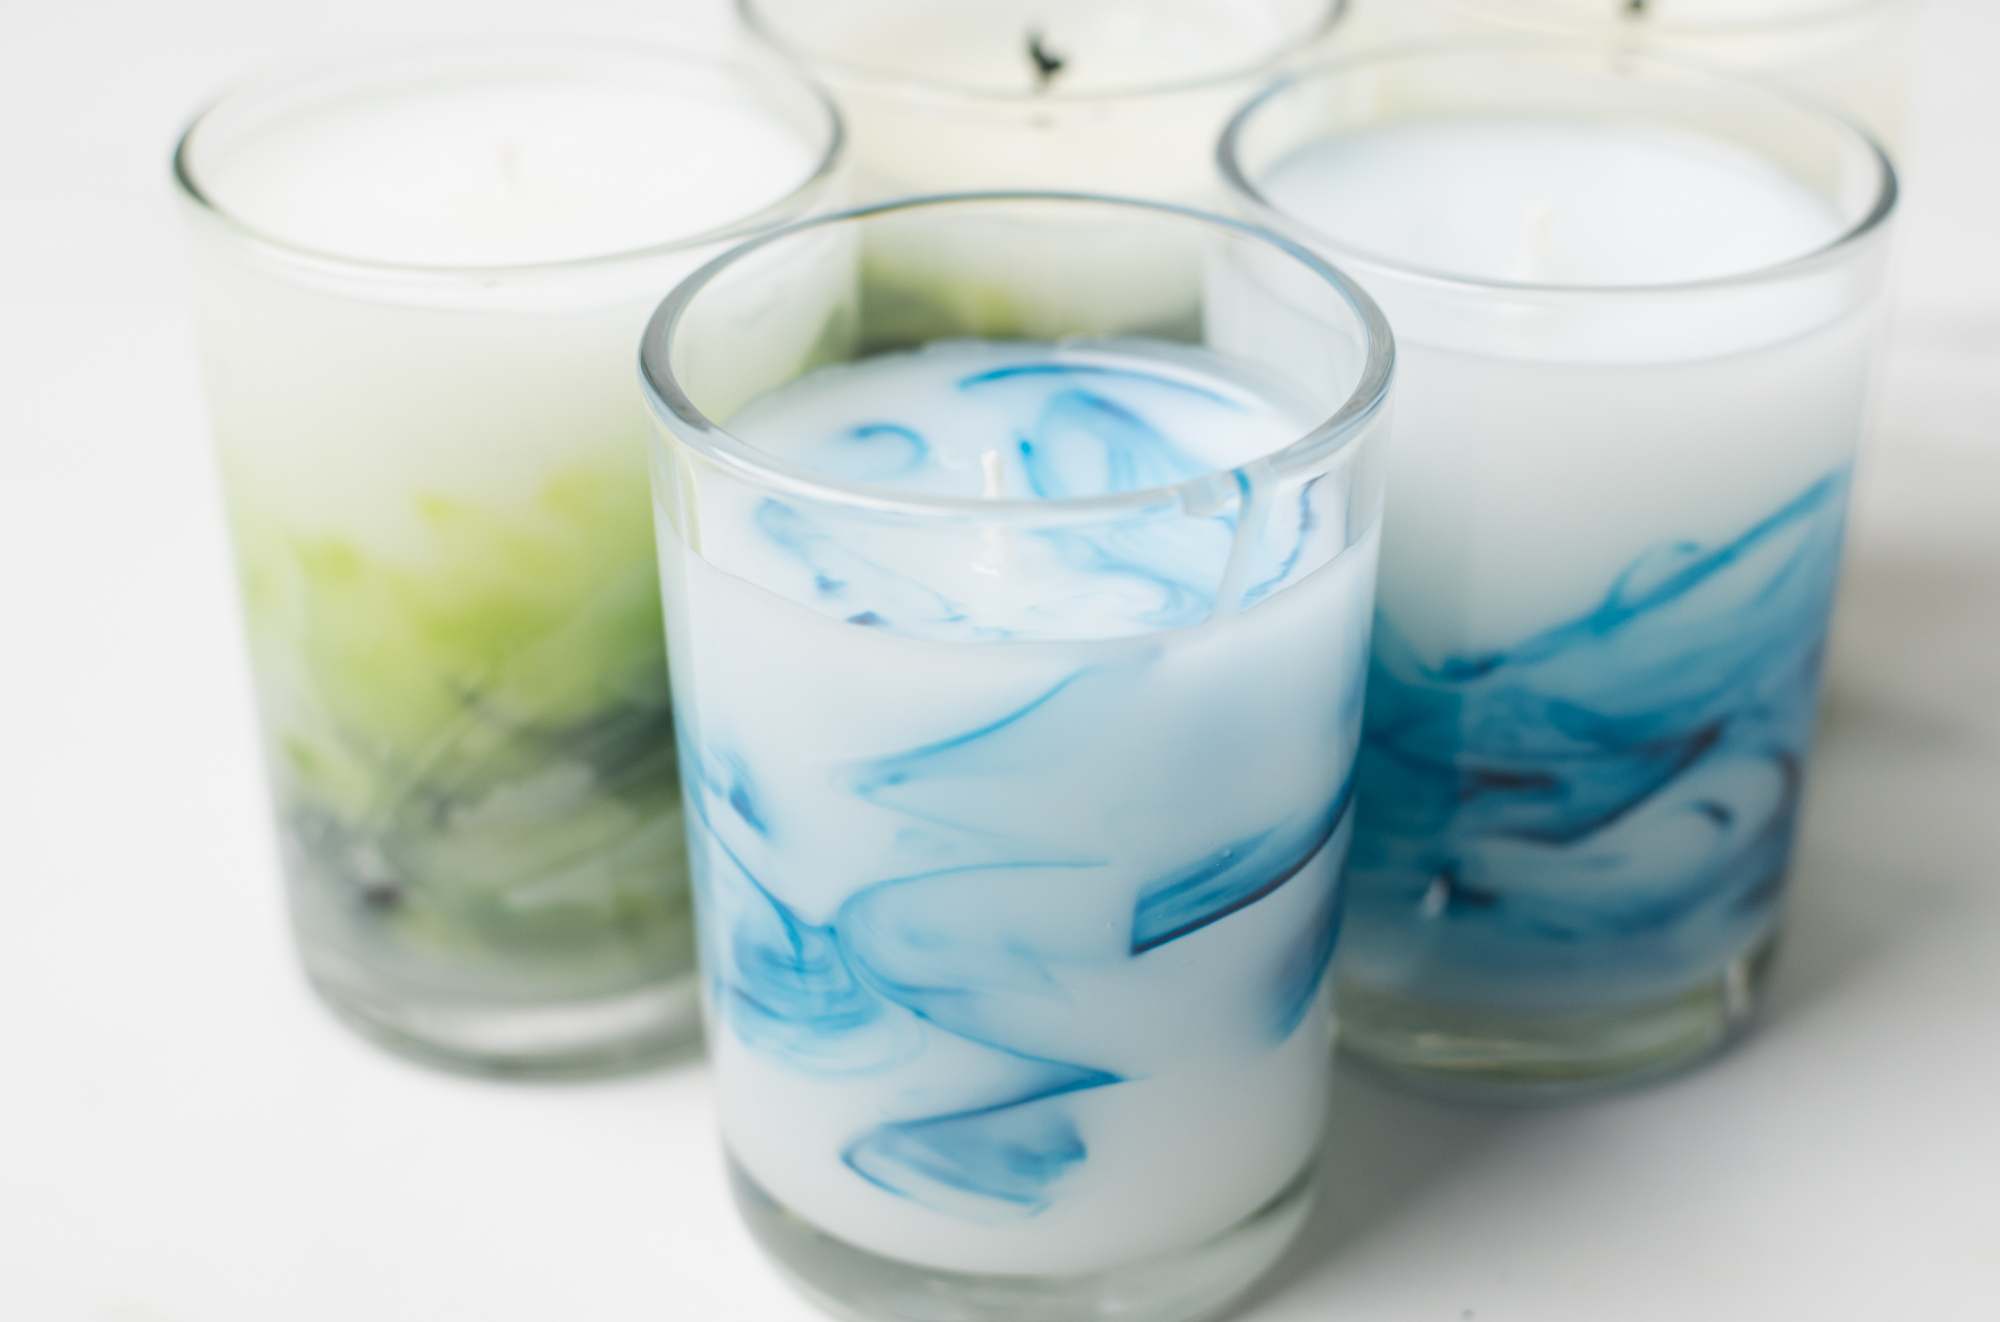
Technique 2: Painting method
This method involves “painting” the dye on the inside of the jars after the candle has been poured but before it has completely cooled. This technique allows you to have a bit more control over where the dye is placed and how the finished pattern will look.
Timing and temperature are key here! If you put the dye in too early when the wax is too hot, it will likely bleed and color the entire candle. Wait too long and the wax may be too cool and you will not be able to push the skewers into the candle.
Step 1: Weigh and melt wax
Place the pouring pitcher on your digital scale and tare the weight. Weigh 14 oz (396.8 g) of the IGI 4627 Comfort Blend Wax in the pouring pitcher.
Melt the wax with a double boiler or on a hot plate.
Step 2: Weigh and add fragrance oil
In a glass container, weigh 1.12 oz (31.8 g) of the Sel de Mer fragrance oil, which is about an 8% fragrance load.
When your wax has reached 185°F (85°C), add the fragrance oil. Remove from heat and stir gently for 2 minutes to ensure that the oil is able to bind with the wax.
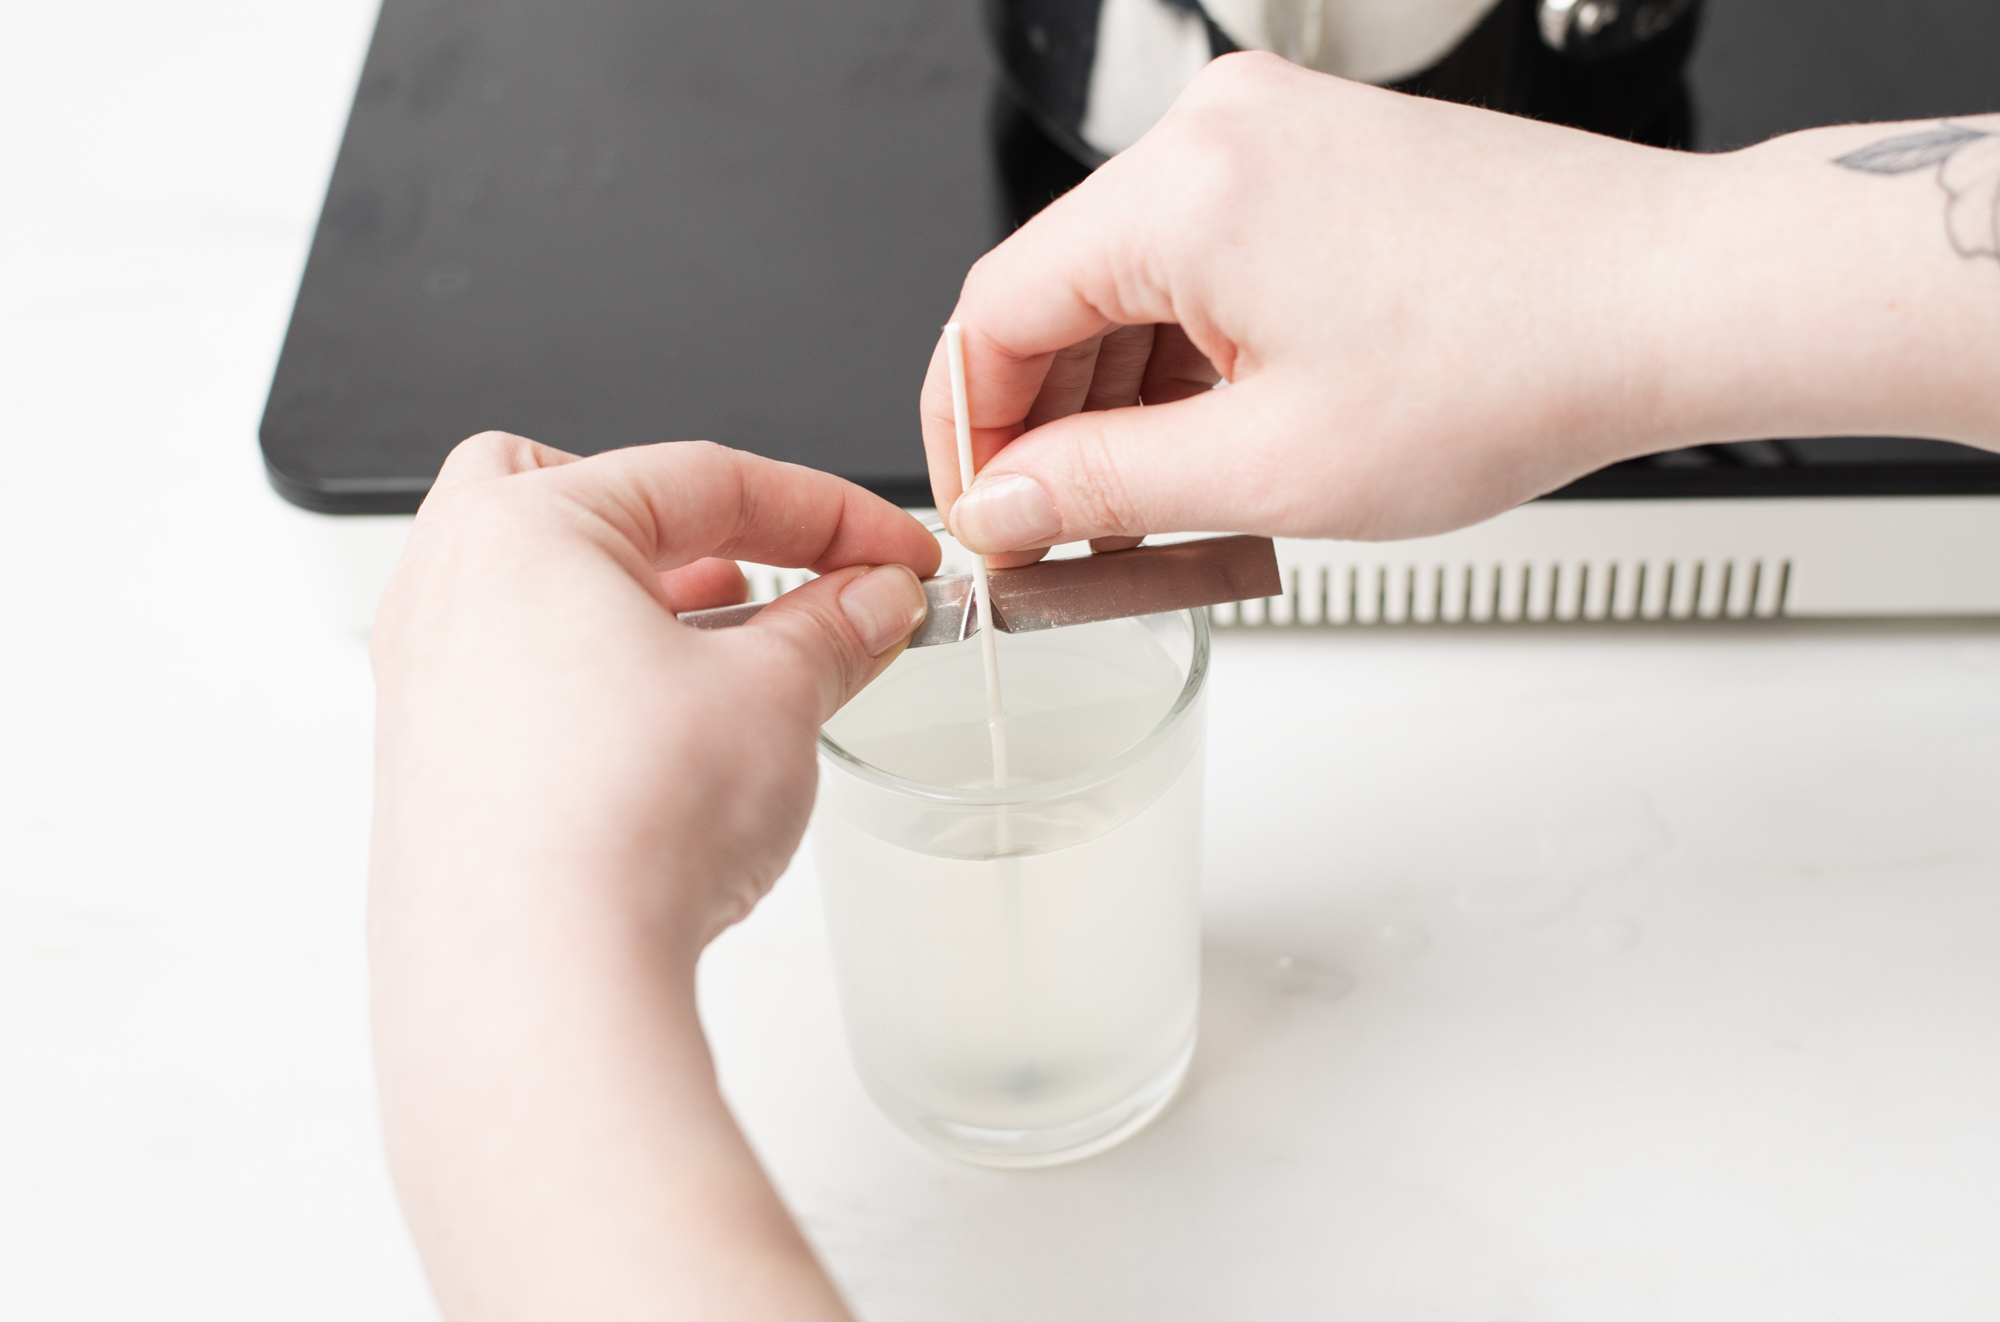
Step 3: Pour wax into container
Once your wax has cooled to 180°F (82.2°C), pour the wax into the jars. Secure the wick with a wick bar.
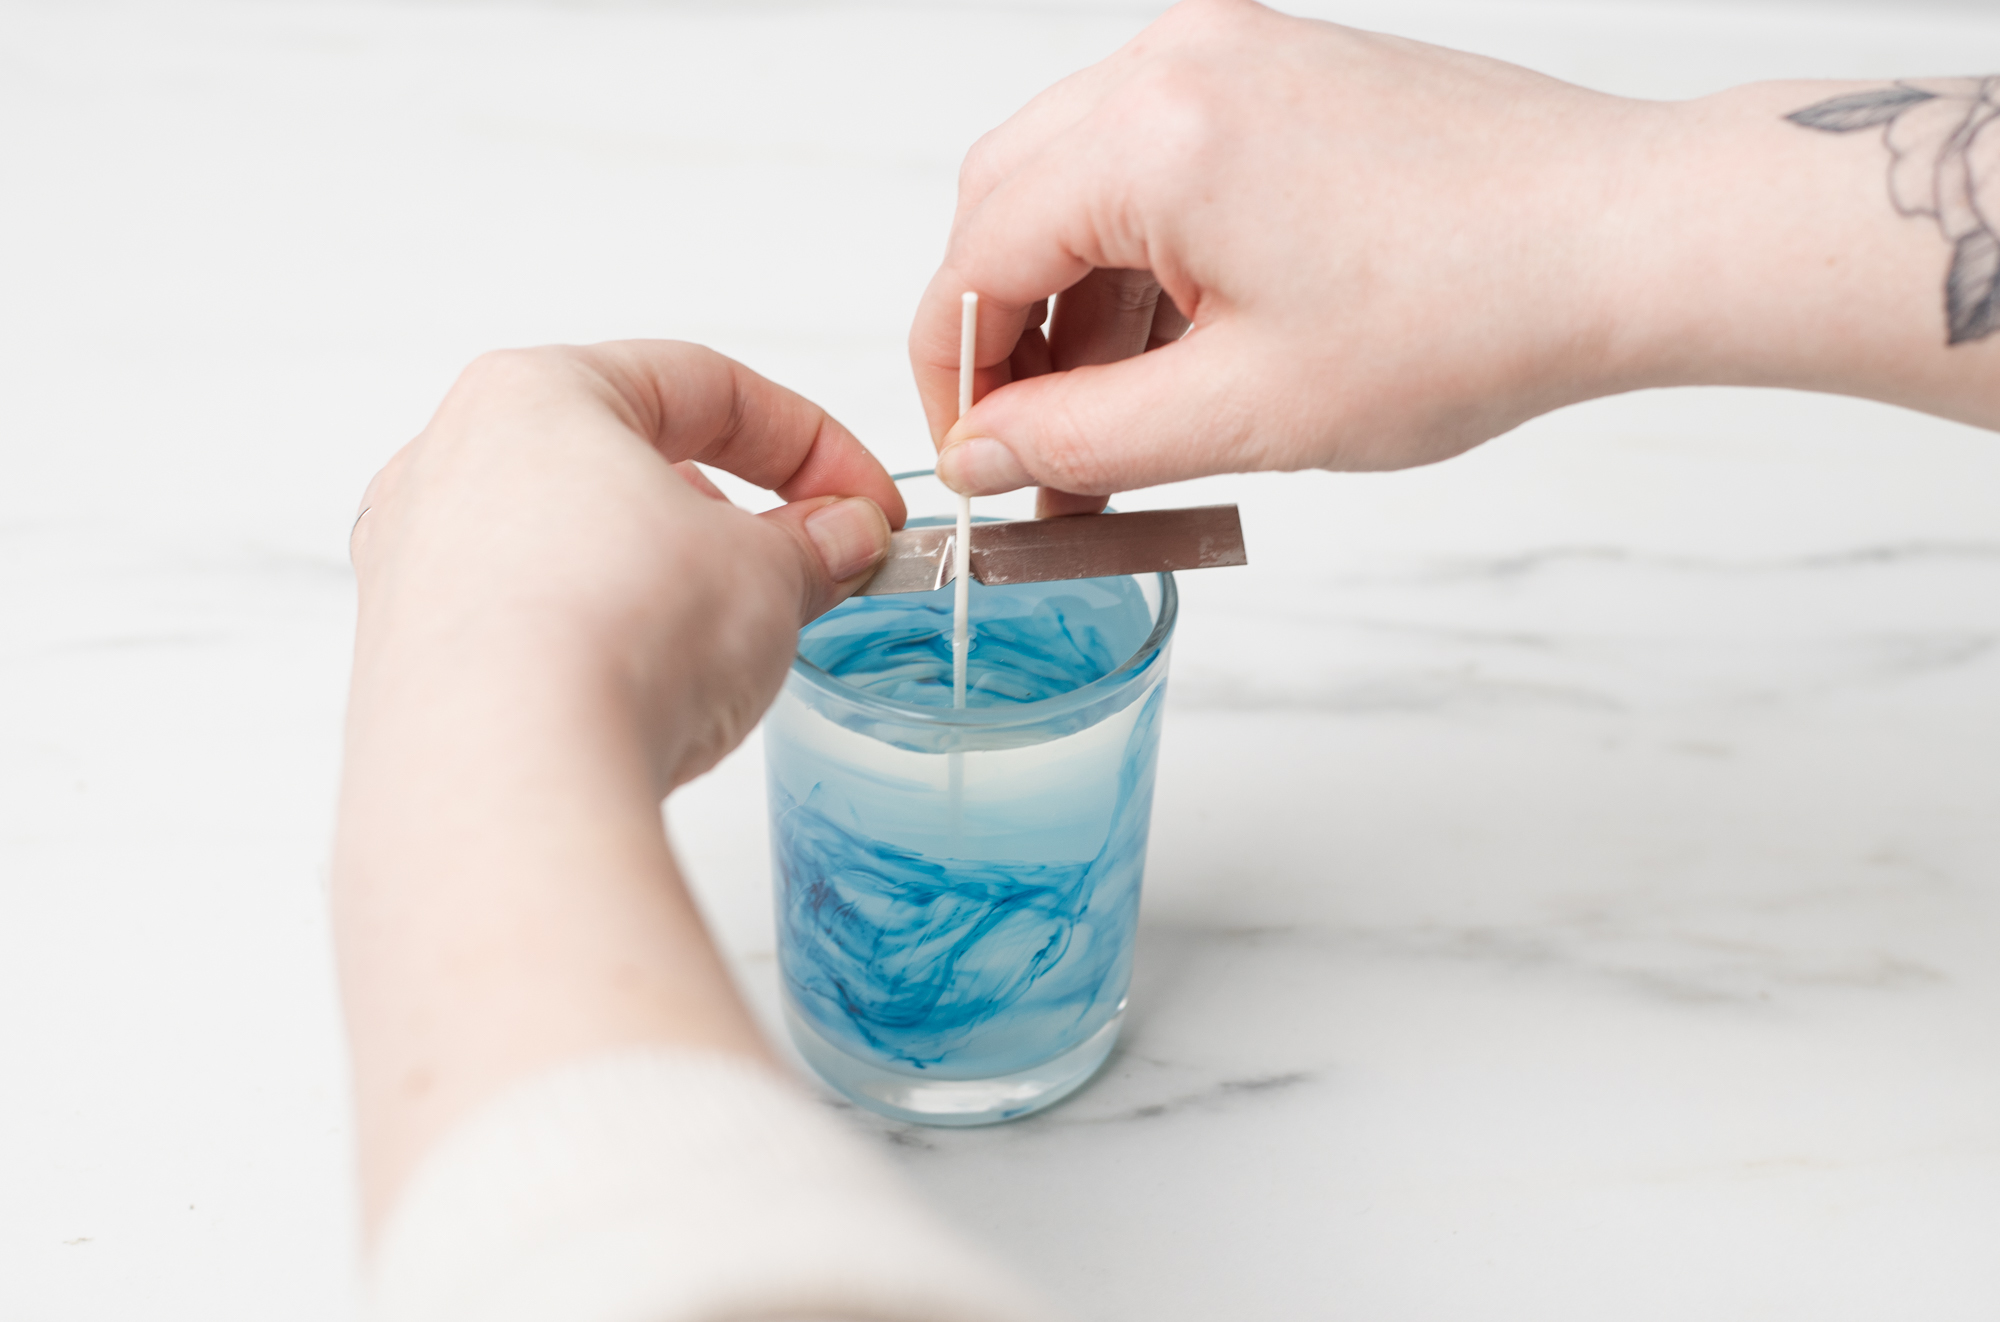
Step 2: Add the dye and marble
Once the wax has begun to set but has not completely cooled, it’s time to add the dye. The wax should still be liquid, but it will appear to be more opaque.
Note: If the wax is too cool you will not be able to move the dye around, if it is still too hot, the dye will bleed and color the whole candle. This may take some trial and error. The temperature can vary, but we added our dye around 130°F for the best results.
Add some dye to your skewer and push into the wax along the side of your jar creating a swirl pattern. Once you’re happy with the design, allow the candle to cool completely.

If you’ll be using two different colors of dye, choose some that will blend nicely together as they will combine as the candle melts.
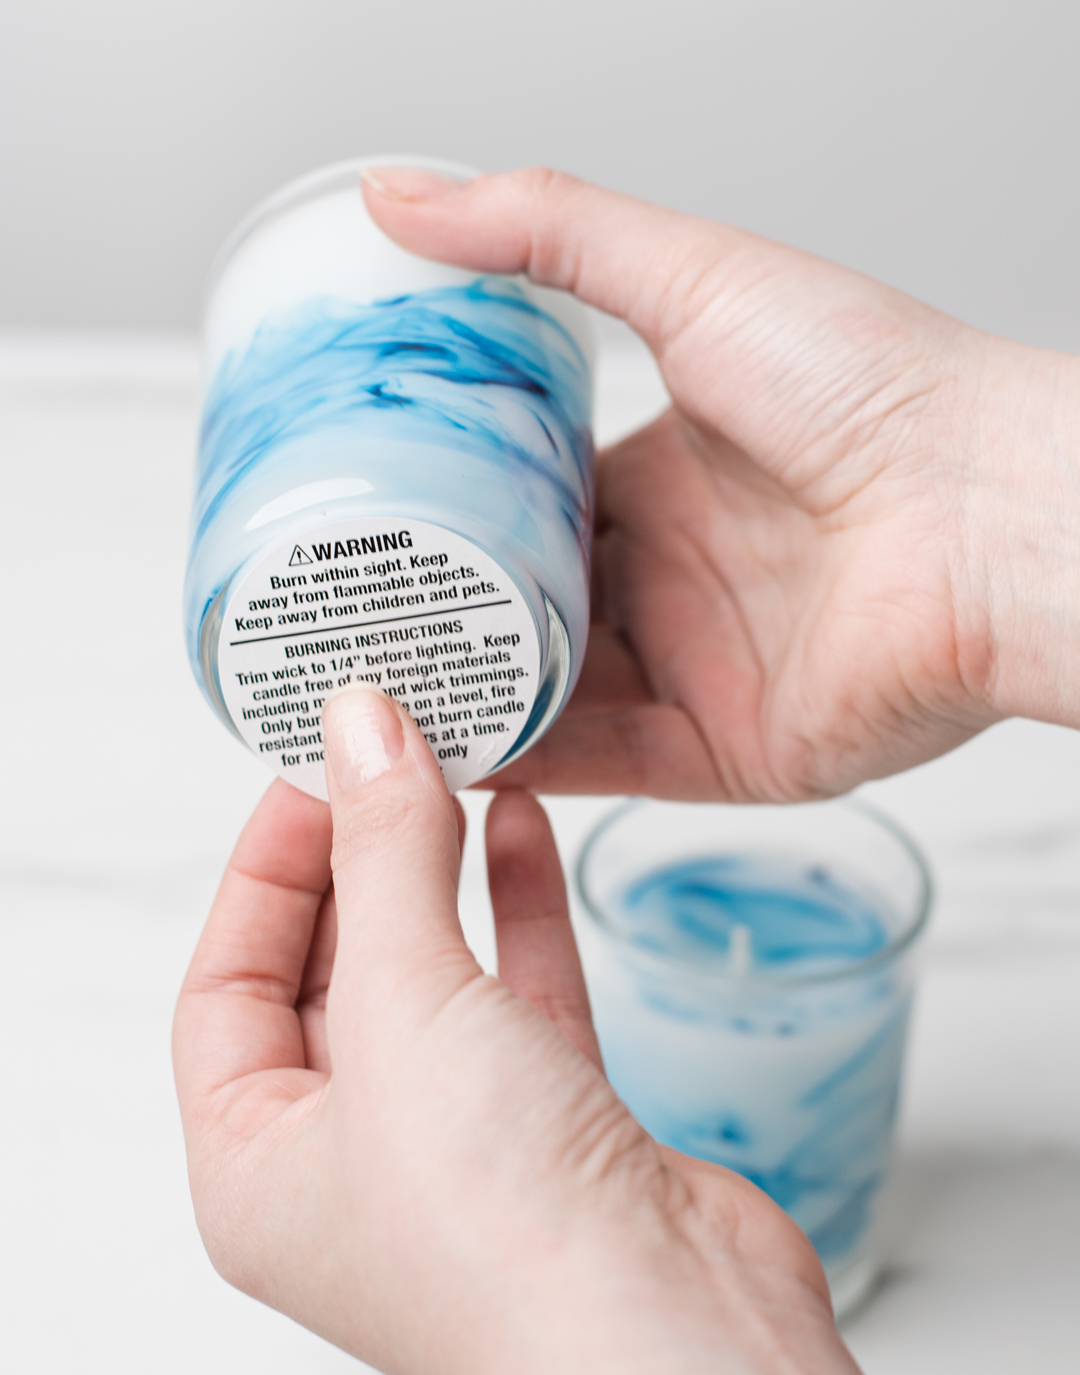
Trim wicks
Once all of your marble candles have cooled completely, remove the wick bars and trim the wicks to 1/4 in (.635 cm). Place a warning label on the bottom of each candle.
.jpg)
Which method do you like more?
Show off your marble candles and all your handmade creations, with the CandleScience community by tagging us @CandleScience and using the #CandleScientist hashtag on Facebook, Twitter, and Instagram. We may feature you in our Stories or on our website!